Nederlands
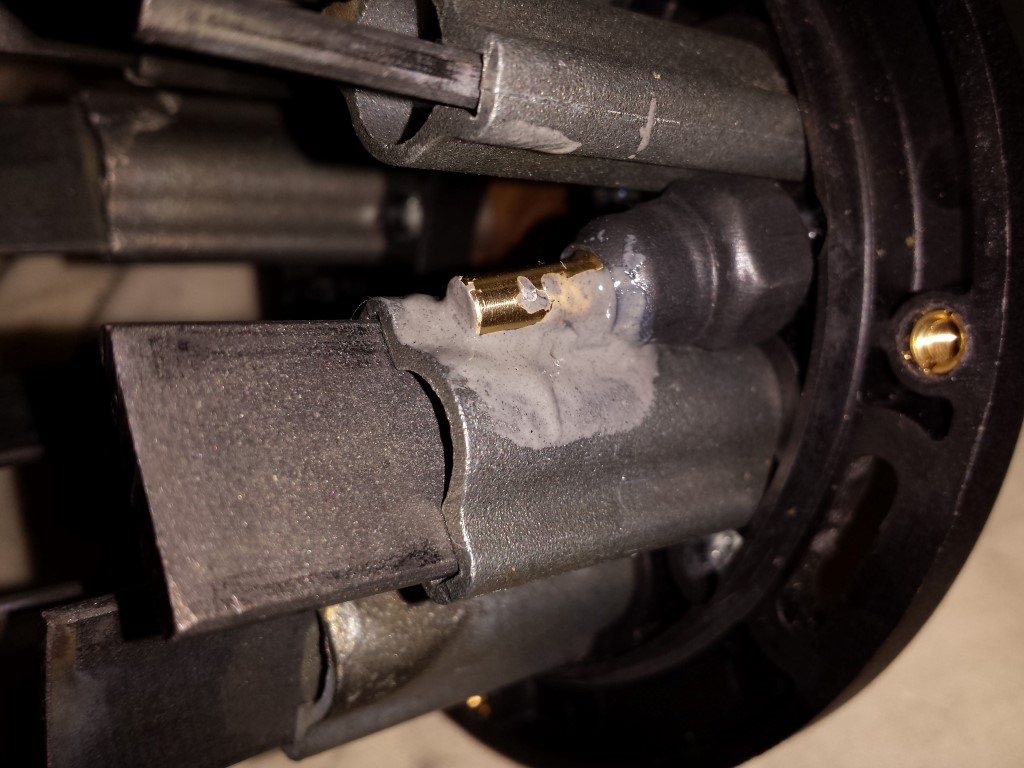
Blog / Electric motor

Posted on 28 February 2015 at 01:33 am (CET)
Posted on 28 February 2015 at 01:33 am (CET)
I continued again solving the problems that I still had.
I was able to place the temperature sensor of Trailtech in the motor, attached it with JB Weld, will be stuck on there forever. Also tested it already and it seems to work well. Will find out on the next test ride if it really works properly.
I tightened all of the nuts in the motor again and added Loctite inbetween. Then I placed another nut on all of the nuts that are holding the connection points of the motor and the carbon brushes, again with Loctite. I don't really expect this to come loose again. Also lengthened the wires for the temperature sensor.

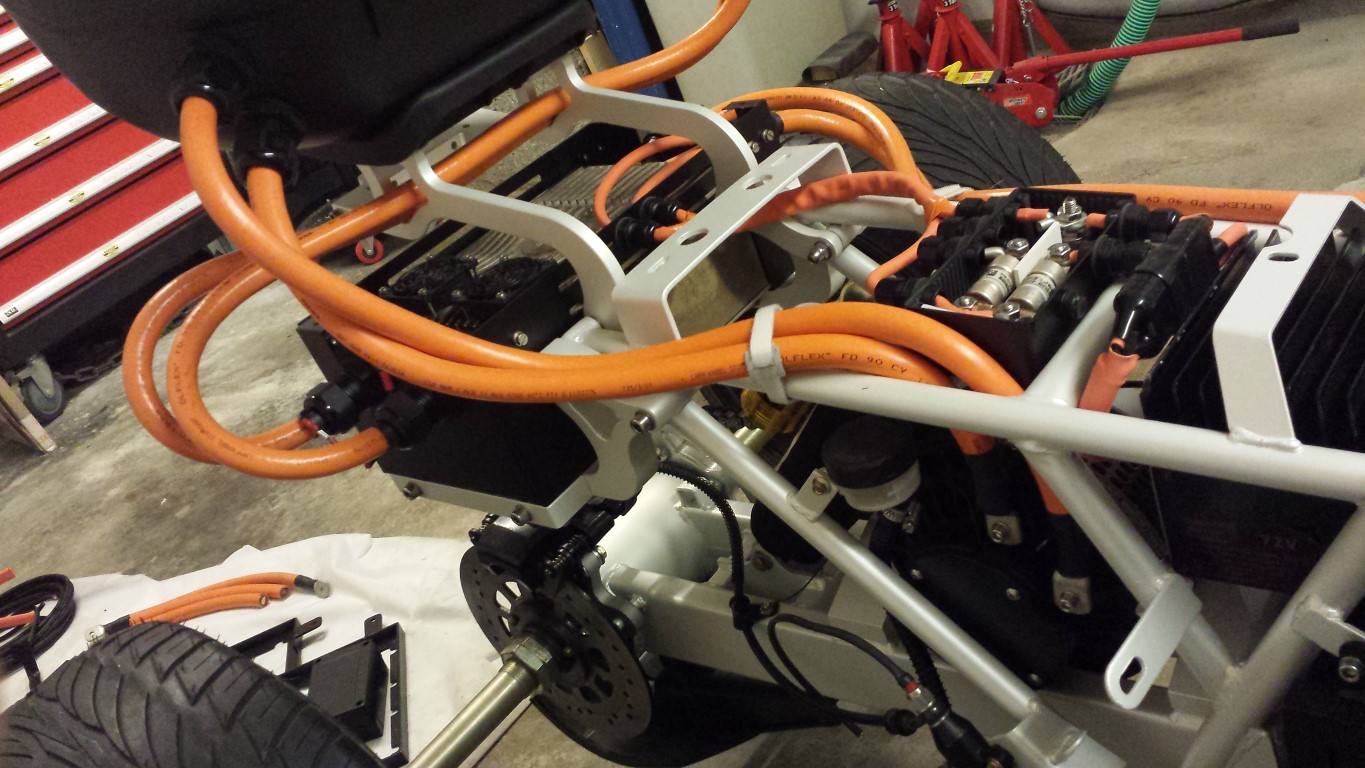
After that I placed the motor back on the quad bike again and connected the orange wires in a better way. They have a lot more play now with suspension travel of the rear swingarm, should be almost no pressure anymore on the connection points of the motor.

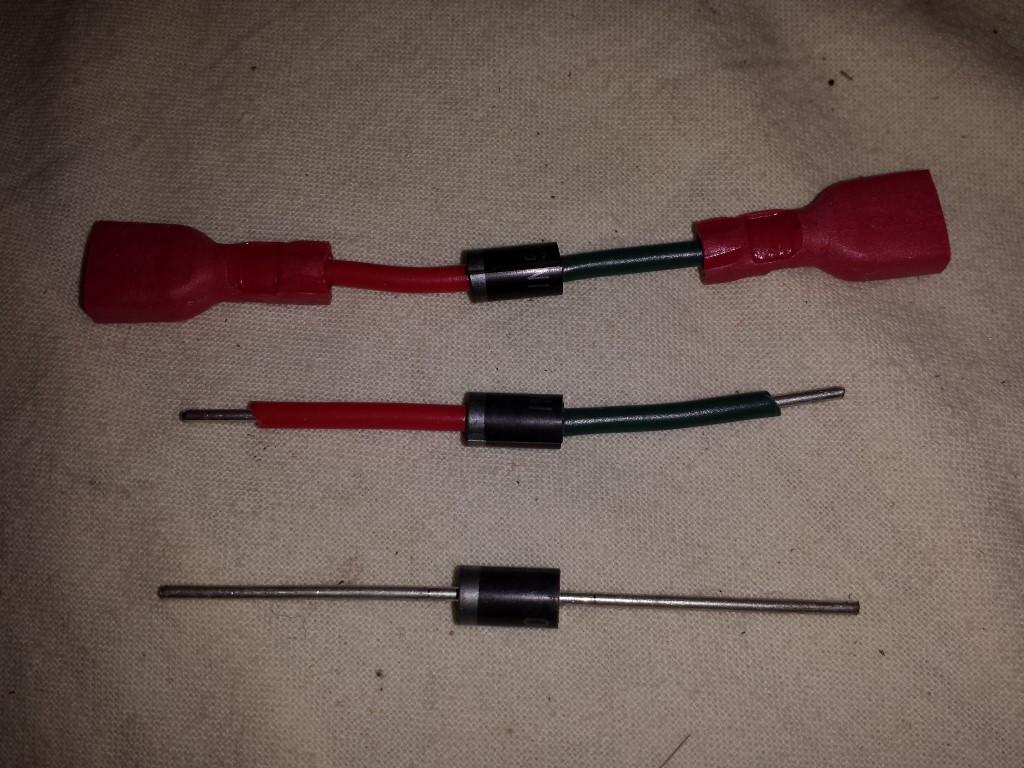
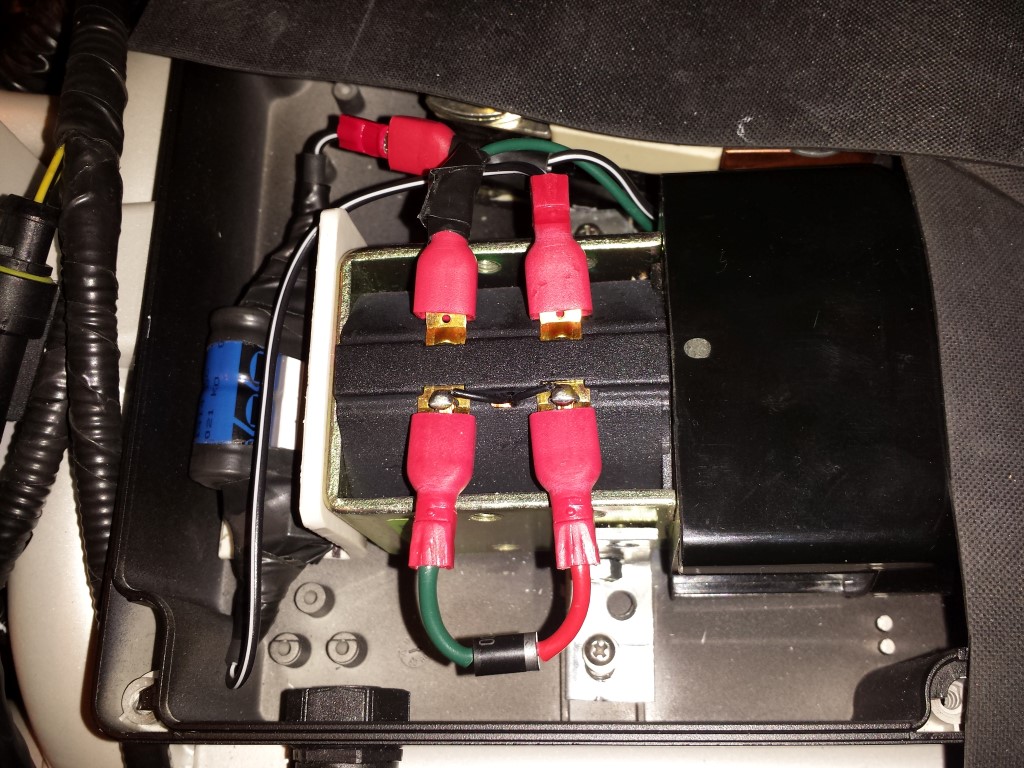
I noticed that there were big sparks between the contacts of the small 12 V relays when disengaging the contactors. I used some diodes for this, the contactors open a bit slower now but at least there are no more sparks anymore in the relays. Don't want to keep replacing the relays when they break.
Also added a capacitor and resistor so the contactor between the battery packs uses less power, now it doesn't get so warm anymore.

On the contactors for forward and reverse I only used the diodes since these won't be engaged for such a long time, heat won't be an issue here.
I've now fixed all of the problems that I ran into. Hopefully there won't be more coming soon since I really want to go the RDW this coming month for the road approval test. But before I go there I want to test at least once more. Tomorrow the weather would be nice and the quad bike is rideable again so I already charged the batteries a bit. ;)

Posted on 26 February 2015 at 12:42 am (CET)
Posted on 26 February 2015 at 12:42 am (CET)
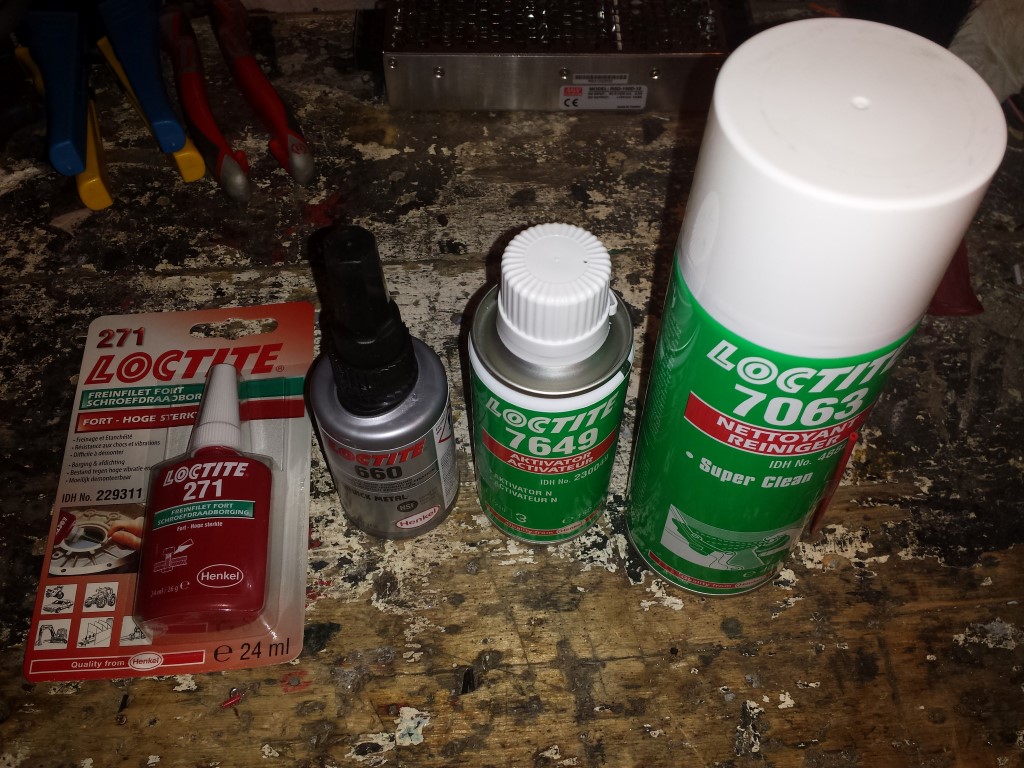
Apparently I hadn't found all problems yet that arised after the test ride. I'm glad I found them now though or the next test ride probably wouldn't have gone so well. For pretty much all of the problems I had to buy these few things.
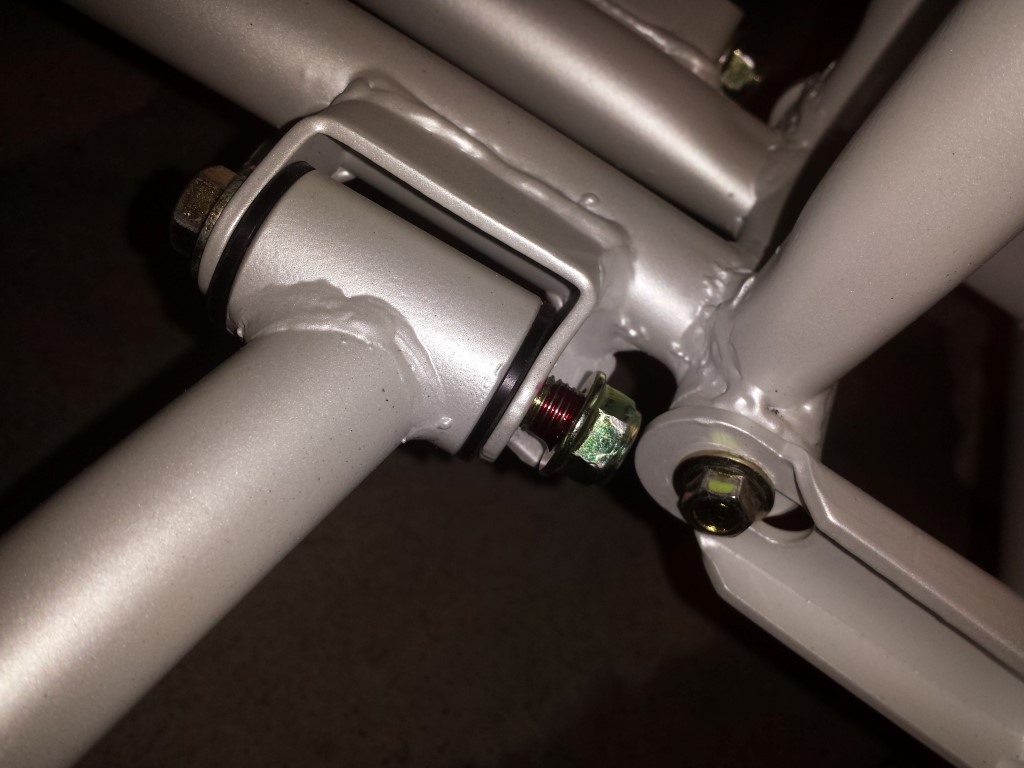
A few bolts of the front swingarms had come loose. I didn't put any Loctite on them just yet since I wasn't sure how tight they should be. I suddenly saw that there was some space inbetween, that's never good. So I loosened them all, put some Loctite inbetween and tightened them again. Should not come loose anymore now unless I really want to myself.
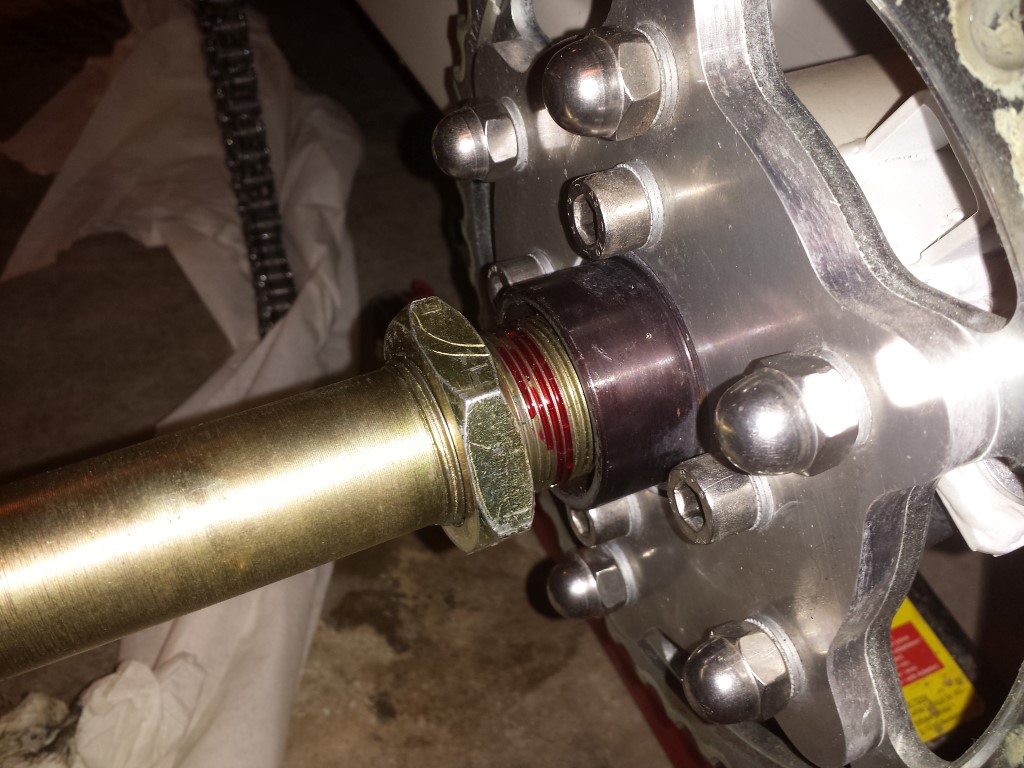
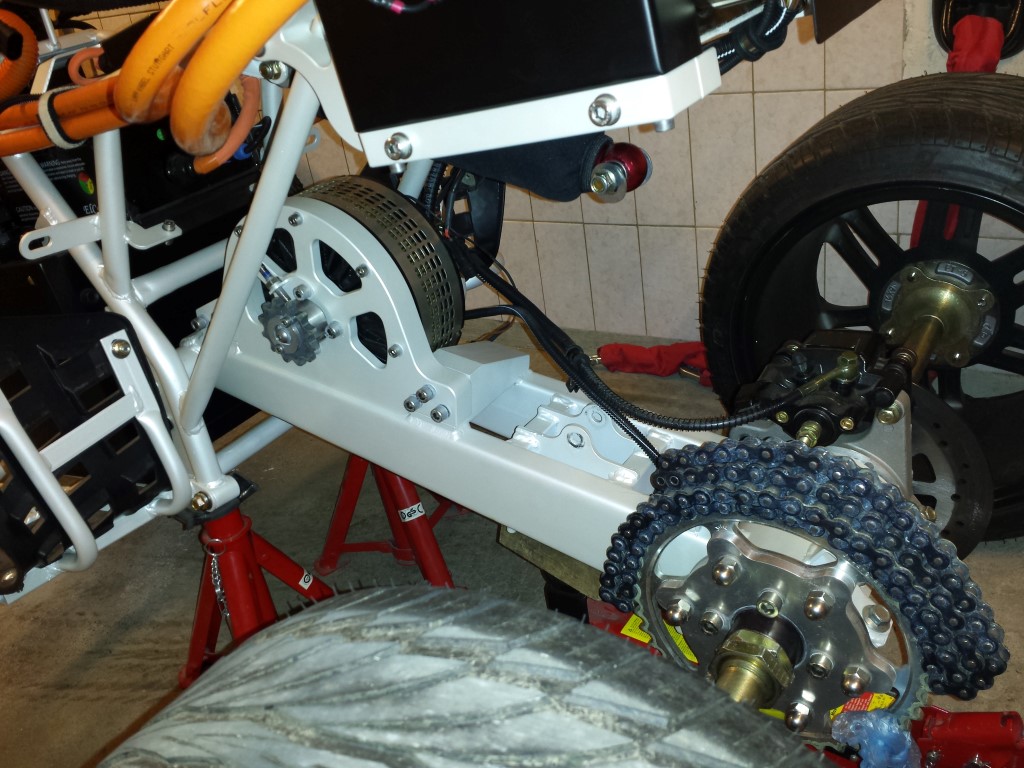
On the rear something also came loose, the 2 big nuts that keep the sprocket adapter stuck to the rear axle. Because of this the sprocket adapter was ale to move freely on the axle. I did already tighten this with blue Loctite inbetween but apparently that was not strong enough for the forces it has to endure. Also noticed that there was some play between the sprocket adapter and the axle. So I first used Loctite Quick Metal to fill up the space. Then I used red Loctite again to tighten the nuts. This should also not come loose anymore.
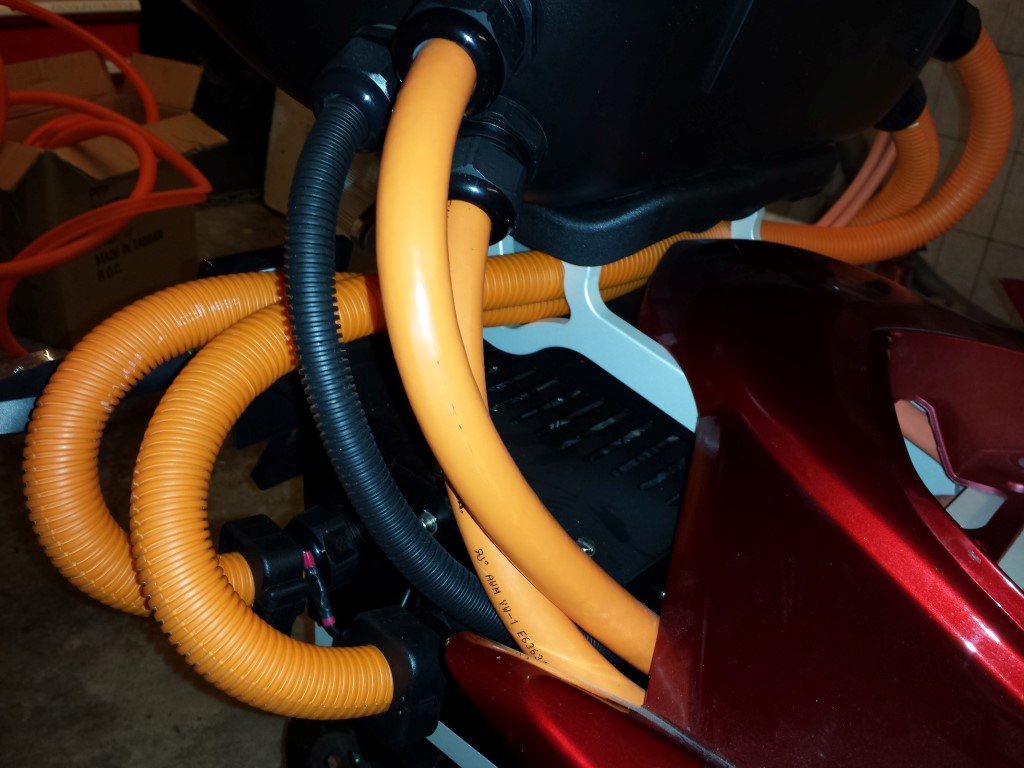
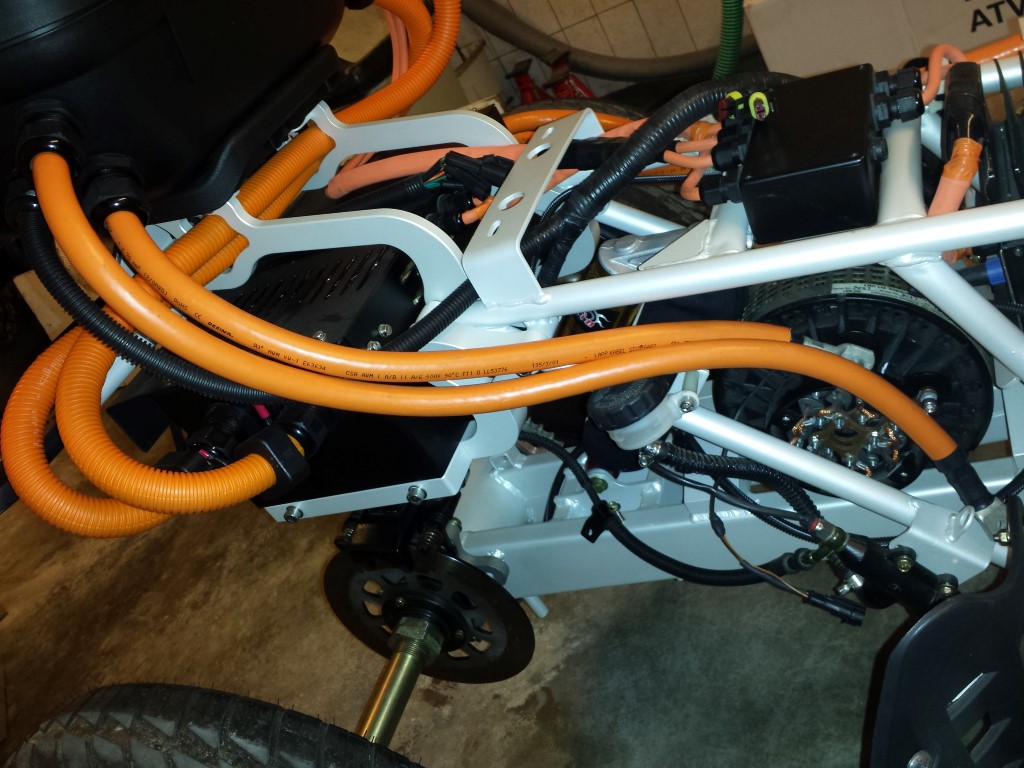
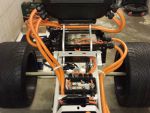
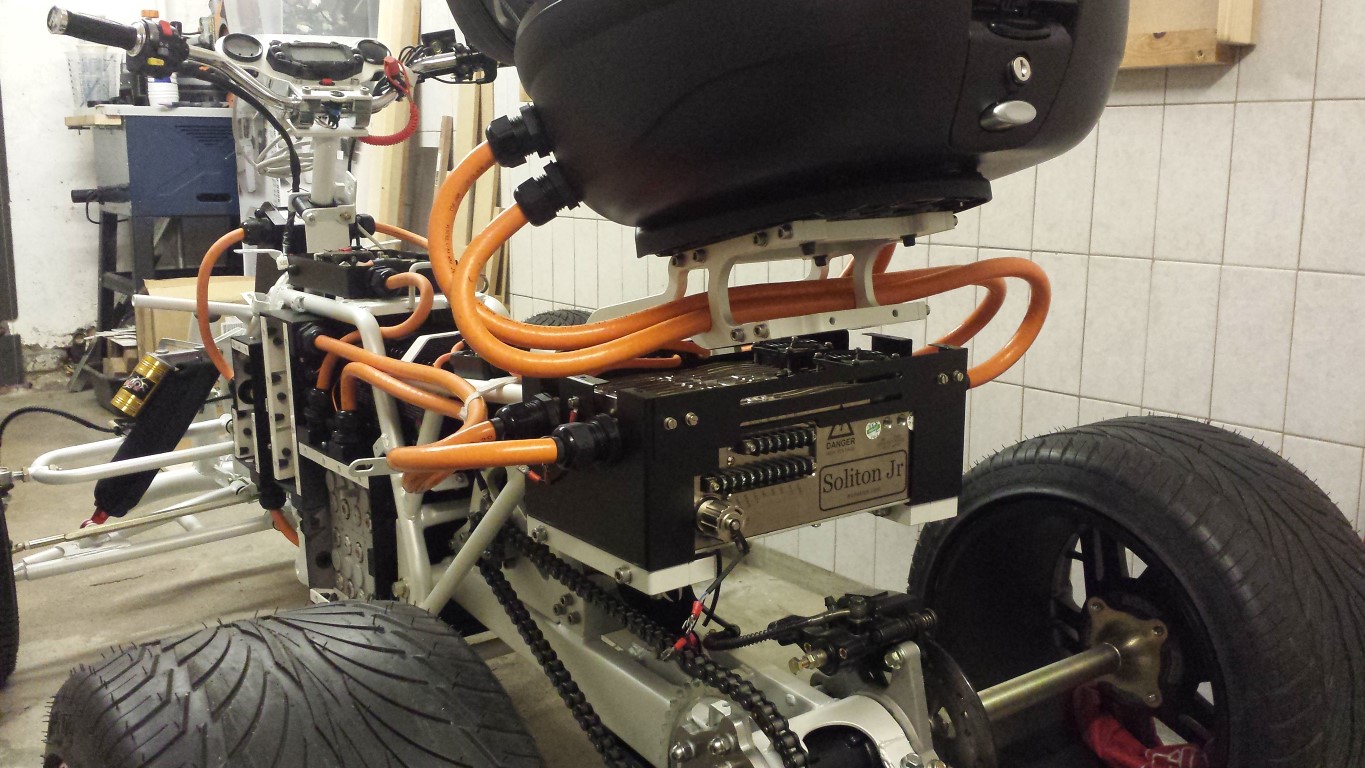
After that I continued again with the orange wire hoses. It's pretty hard with these thicker wires, especially the bends. It also still barely fits between the mounts.
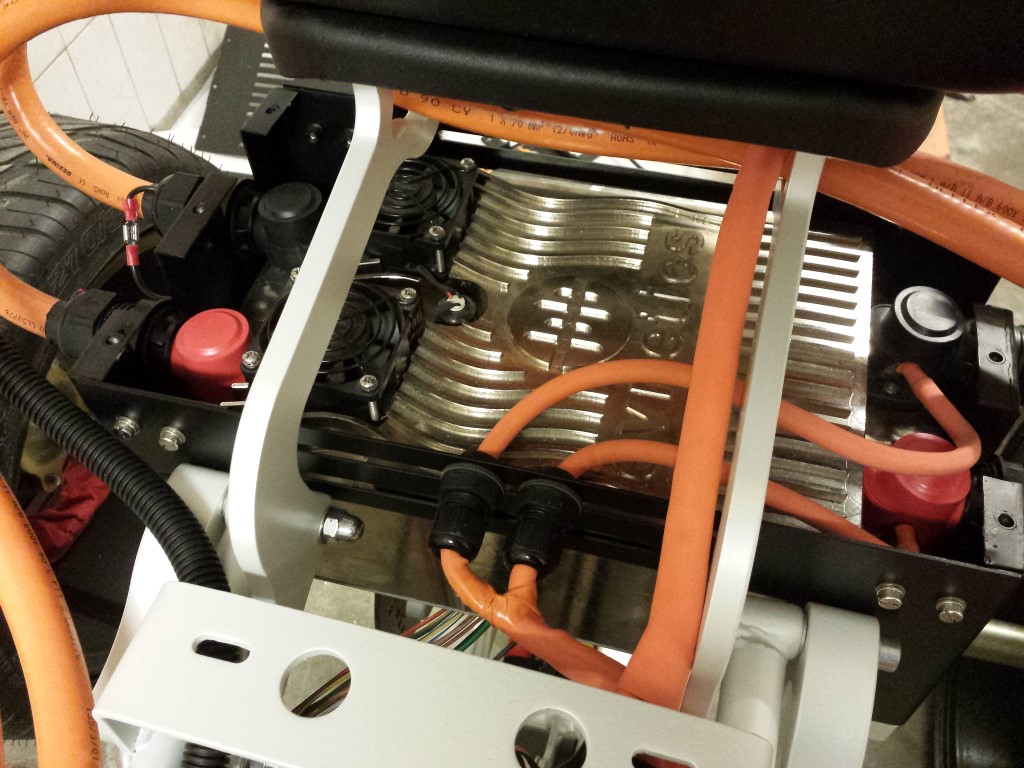
On the side of the controller I already placed the RFI filters to reduce noise, also neccessary again for the road approval test at the RDW.
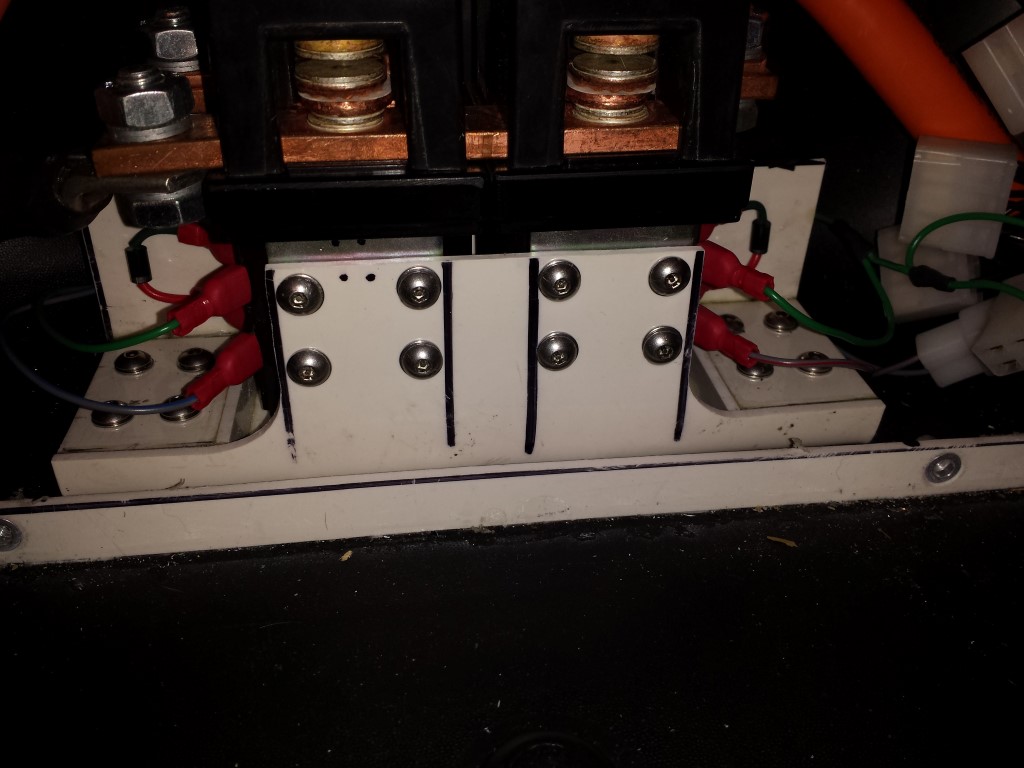
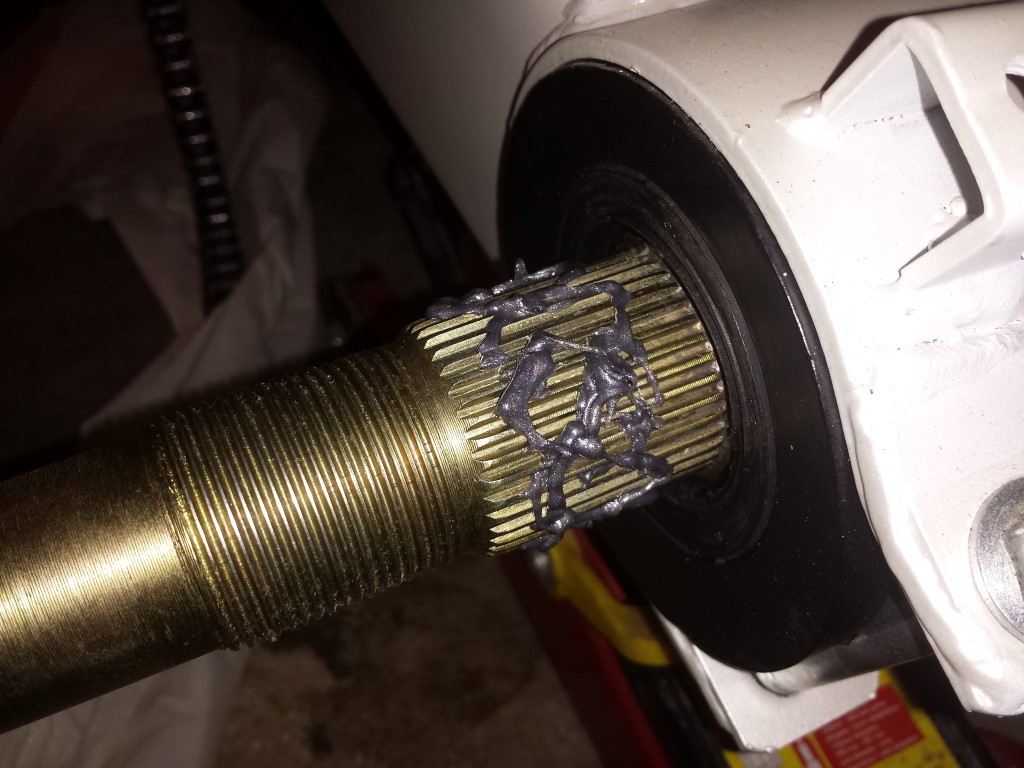
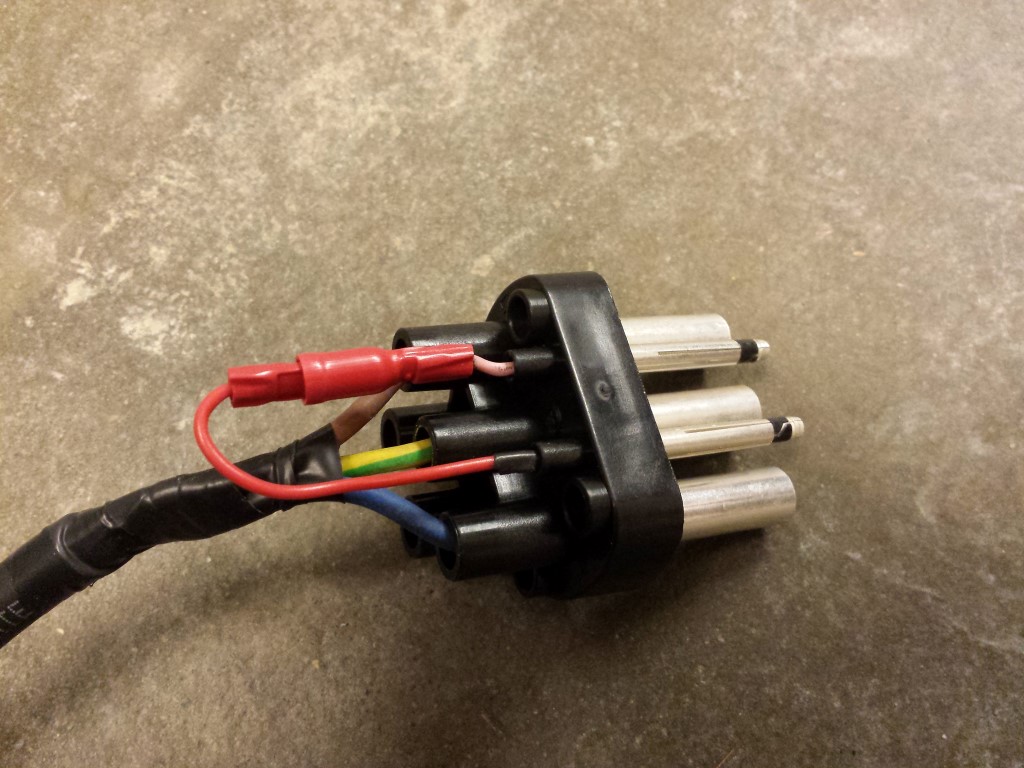
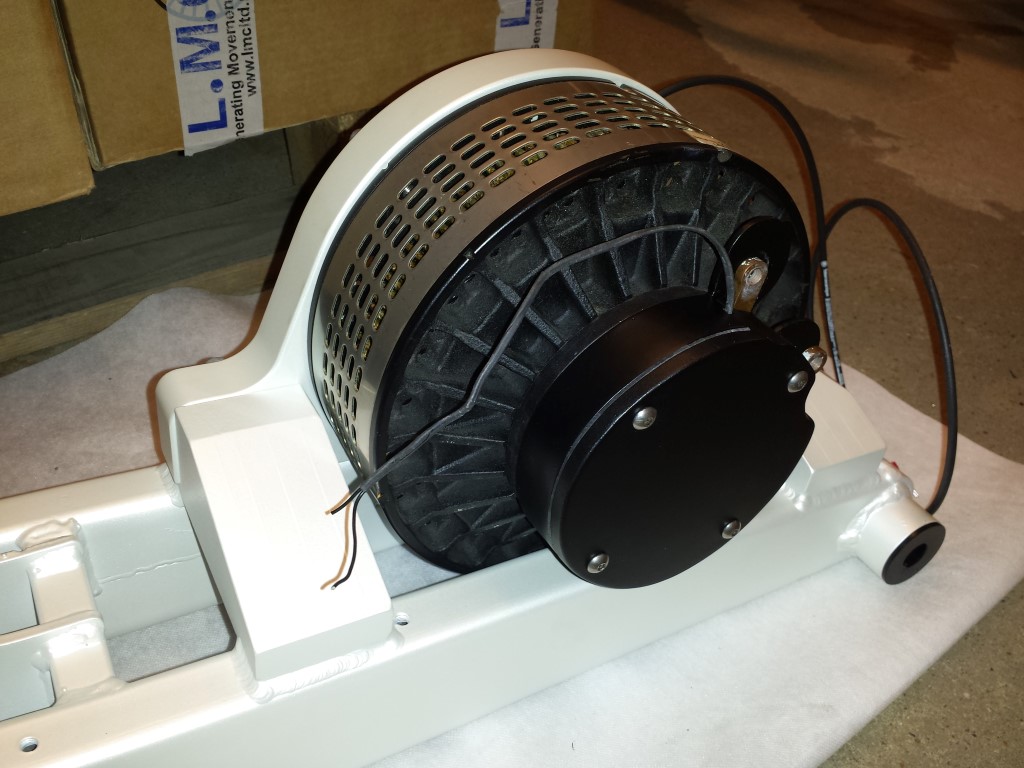
While I was busy with the wire hoses on the wires that go to the motor I suddenly discovered a very big problem. I noticed that there was some play on the connection points of the motor. I immediately took off the protective cover to see what was going on. To my surprise I saw that literally all of the nuts inside were loose. So the connections to the carbon brushes were also all loose. This is something that should never happen, If I would've pushed full power through the motor something would've certainly gone wrong. You can't really see it on the picture but really all of these nuts were loose.
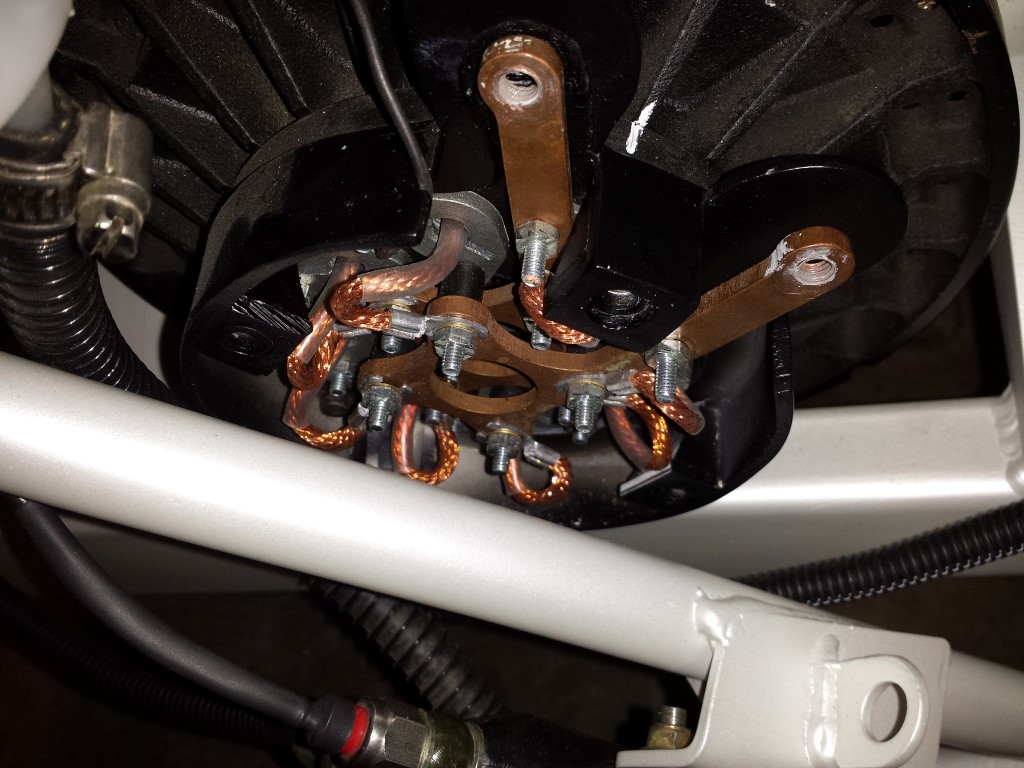
The cause of this is very simple, it's because of the stiff orange wires that didn't have enough space during suspension travel of the rear swingarm. Will have to completely change this because like this there will be too much pressure on the connection points of the motor. I'm first trying to place the wires in a straighter line to the connection points and not all the way through the frame anymore. I will also tighten all of the nuts with Loctite so these hopefully never come loose again.
But ofcourse I couldn't easily reach it anymore so unfortunately I had to take the motor off the quad bike once again. Thankfully this is still pretty easy to do, I really only have to jack it up and remove the suspension. Can just take out the motor together with the motor plate after that.
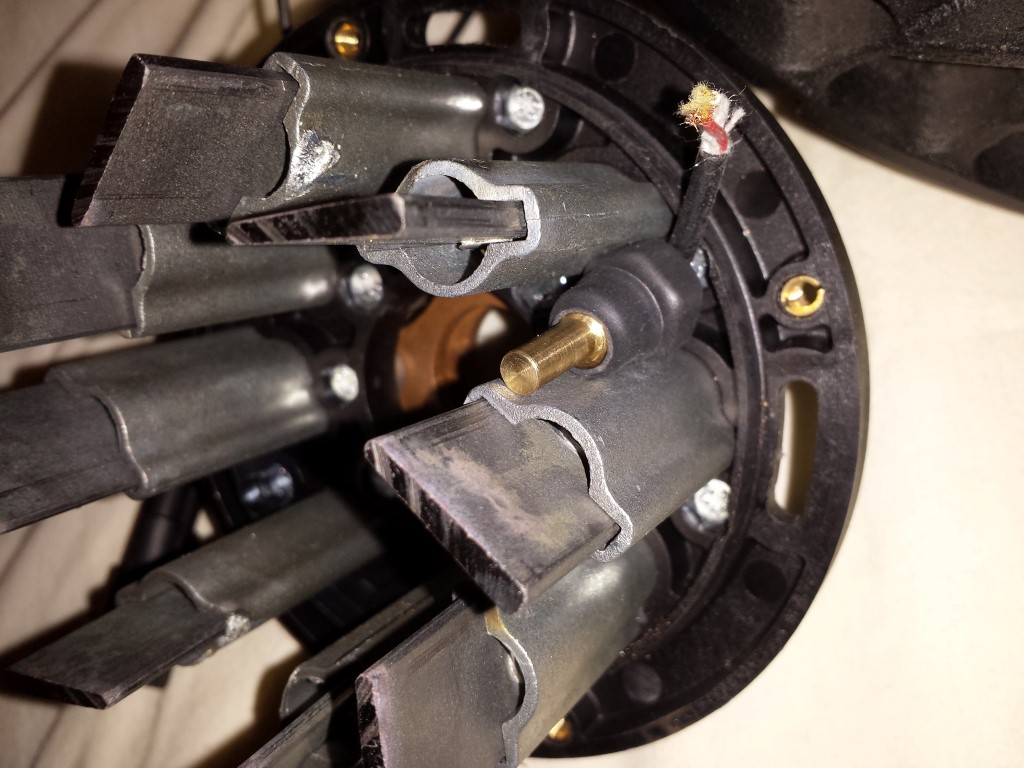
Since I have the motor out now anyway I also checked if I could replace the temperature sensor with the one from Trailtech. That way I can be sure that I get to see the right temperature on my display. I'm just not really sure yet how I'm going to attach it and if I can even use this sensor this way. Will have to contact the supplier of the motor again for this.
I hope that these were the last few problems for now. It's not really fun to discover these things knowing that the quad bike is almost all finished. But on the other hand it's definately better to see it now than when it's too late.

Posted on 16 January 2015 at 11:37 pm (CET)
Posted on 16 January 2015 at 11:37 pm (CET)
I have all of the connections on the controller and motor covered up now. should be safe enough like this.
Also placed the last part of the enclosure on the controller. Doesn't look very pretty but for now it'll have to do. It's important for the road approval test at the RDW.
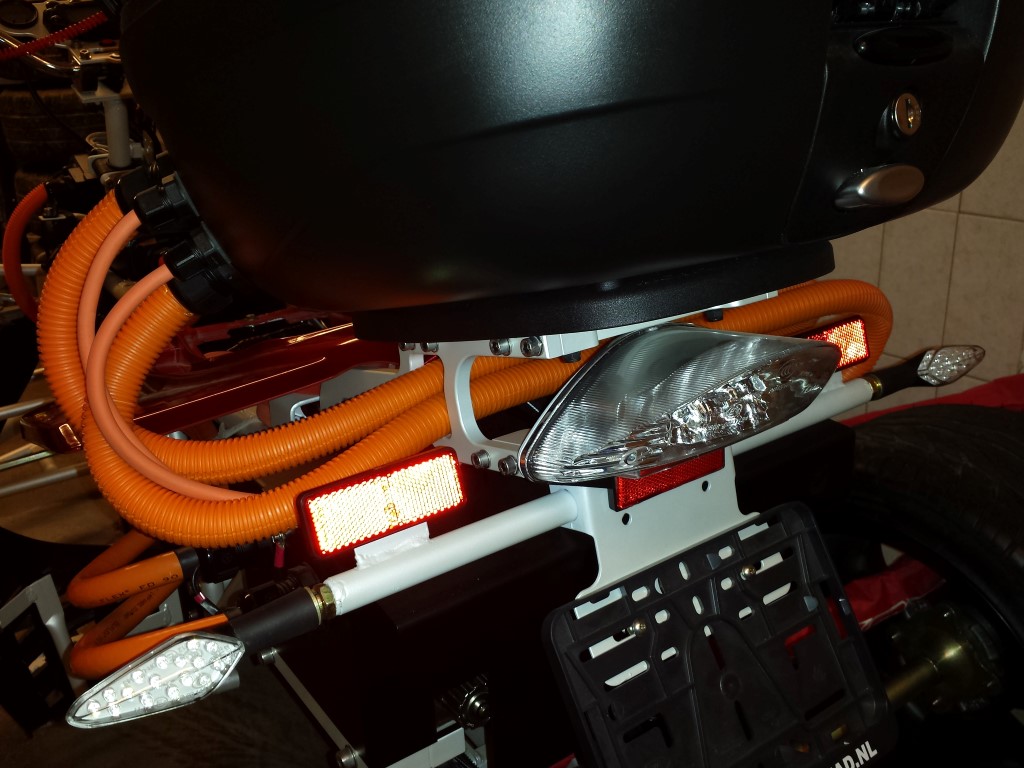
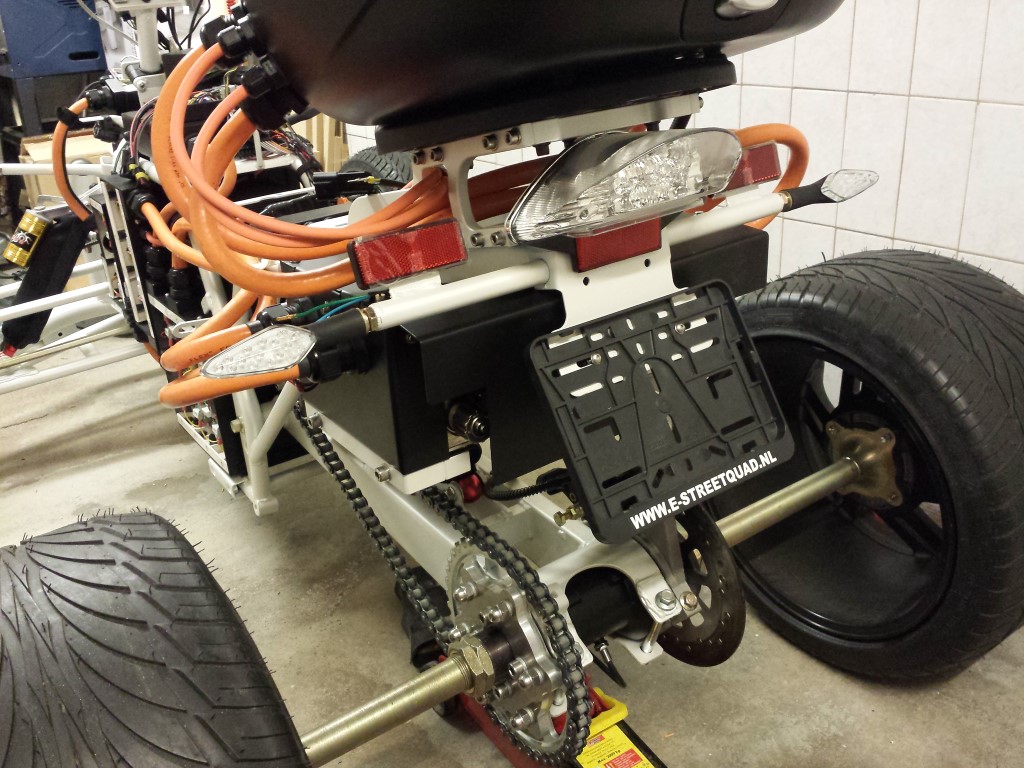
After that I already attached the rear lights and license plate holder. It all barely fits between the controller's enclosure and top case.
A long while ago I already made the charge cable but I had to get a different plug for this back then. I still hadn't put that one on yet so I've done that as well now. It's not suitable for charge stations, I won't make use of them anyway. Will just be charged from an outlet at home.

And then some more good news, charging the battery pack for the first time went perfectly as well. The battery cells were all still close to full so it didn't need much time. The BMS disables the charger when it has to so no problems there either. Only thing not working is a button I want to use to enable and disable the charge process. Just still have to add an extra relay to it so that's an easy fix.
Posted on 2 November 2014 at 01:00 am (CET)
Category: Electric motor, Wiring (HV)
Posted on 2 November 2014 at 01:00 am (CET)
Category: Electric motor, Wiring (HV)
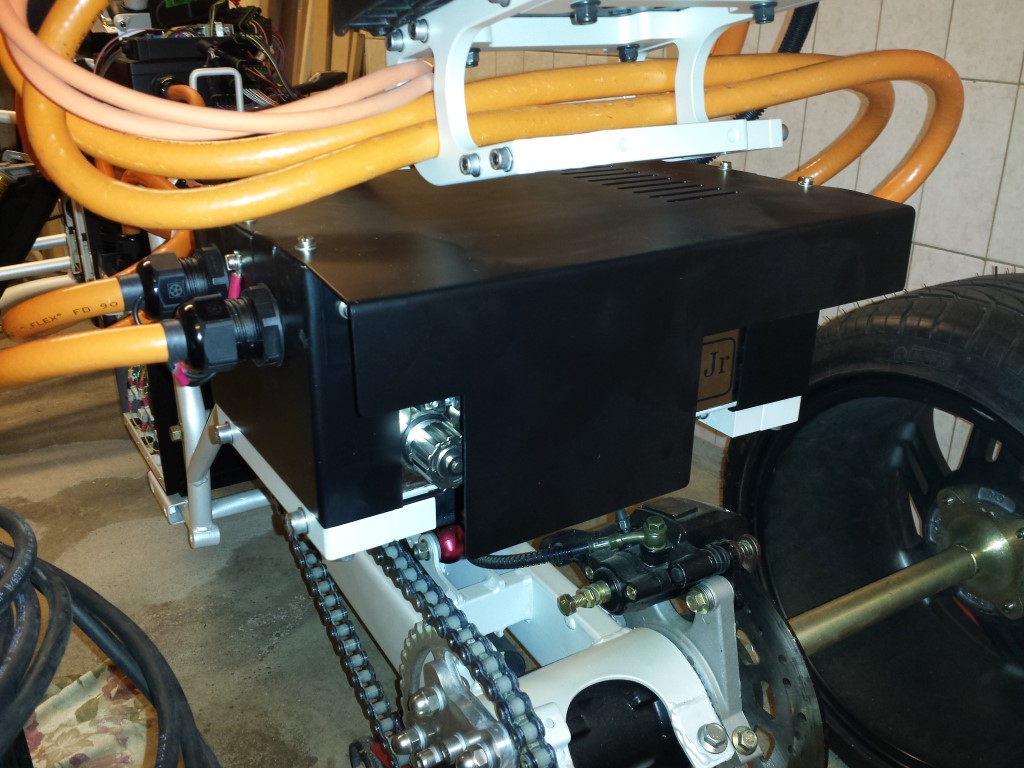
The past week I've done a lot of work again. First thing I wanted attached in the top case are the contactors for being able to drive in reverse. This all went well, I just hope that it's strong enough.
I made a whole construction out of plastic where the contactors fit in nicely.
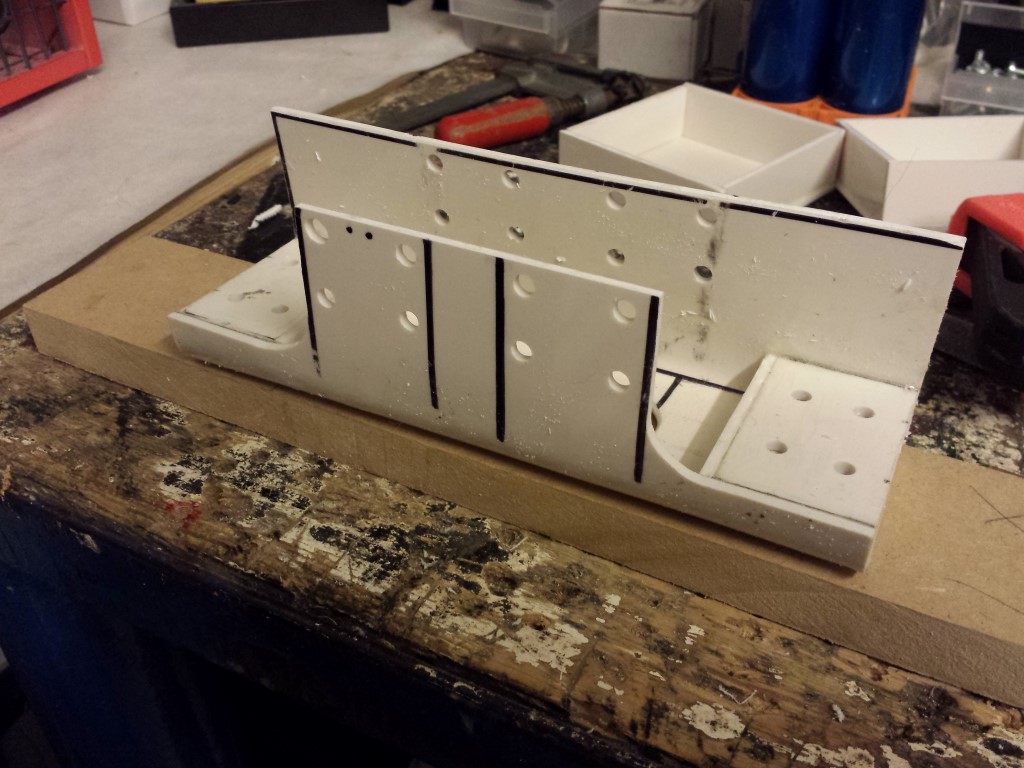
Also made mounting points that I glued into the top case with special glue. With this I have to wait and see if it's strong enough.
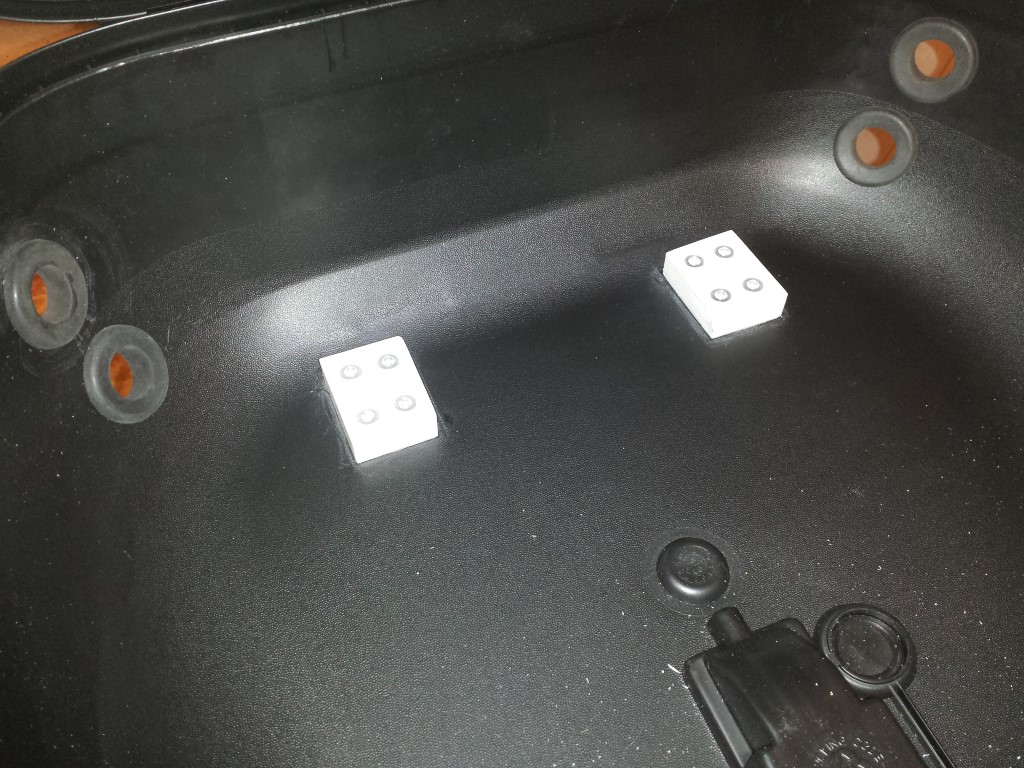
The contactors I can easily attach or remove this way. Meanwhile I've also connected the last few wires for the propulsion. The smaller black wires are just for earthing of the shielding in the orange wires, just still have to isolate these so they can't come in touch with the contactors.
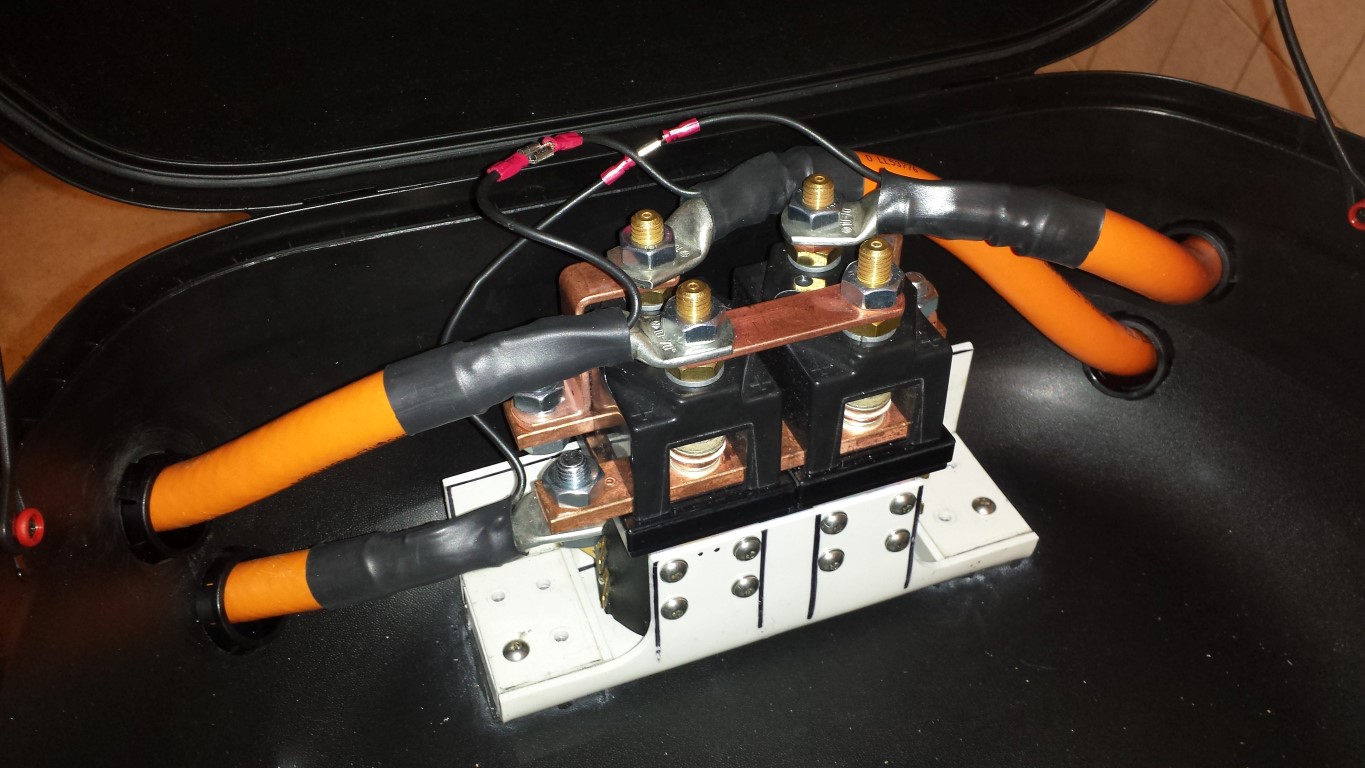
I was worried that it wouldn't look so good on the outside of the top case but it doesn't look too bad. As you can see I ended up using cable glands again instead of those rubbers. The wires stay in place much better like this and the top case is still waterproof.
I've also tried with the rear fender on it already and you don't notice the wires as much then. I just forgot to take a picture of this and the fender is also off again. So I'll show that later.
The plan now is to make some shielding in the top case so the contactors won't be visible anymore and untouchable. But that will take a while again to finish.

Posted on 29 September 2014 at 12:09 am (CET)
Category: Electric motor, General
Posted on 29 September 2014 at 12:09 am (CET)
Category: Electric motor, General
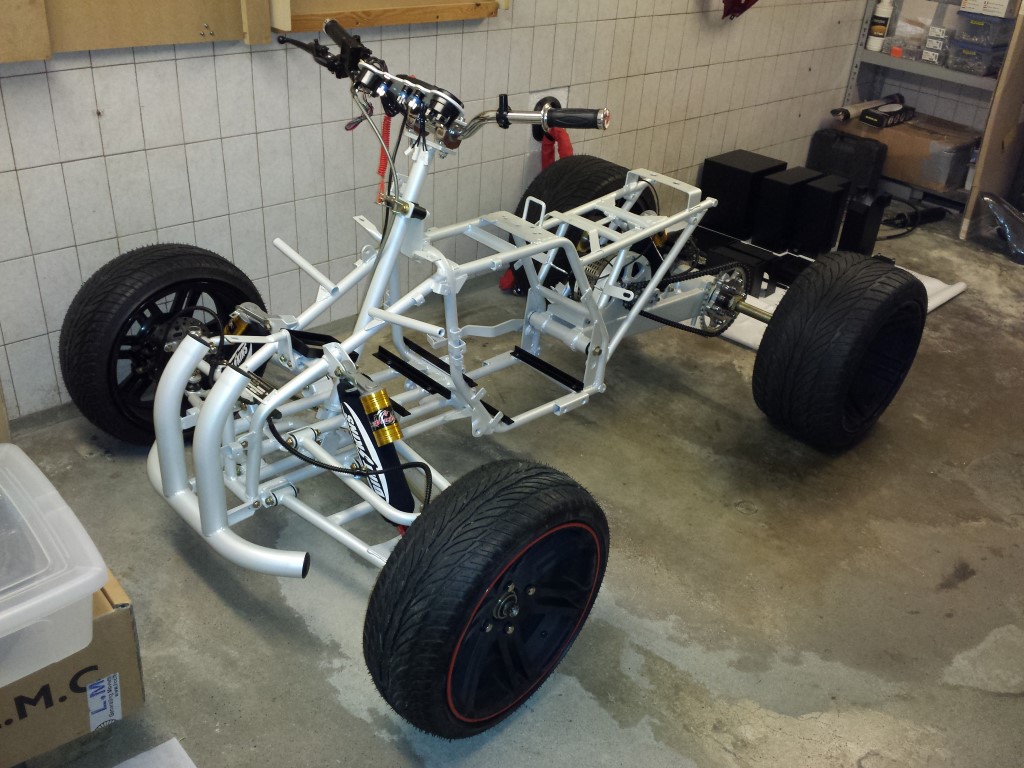
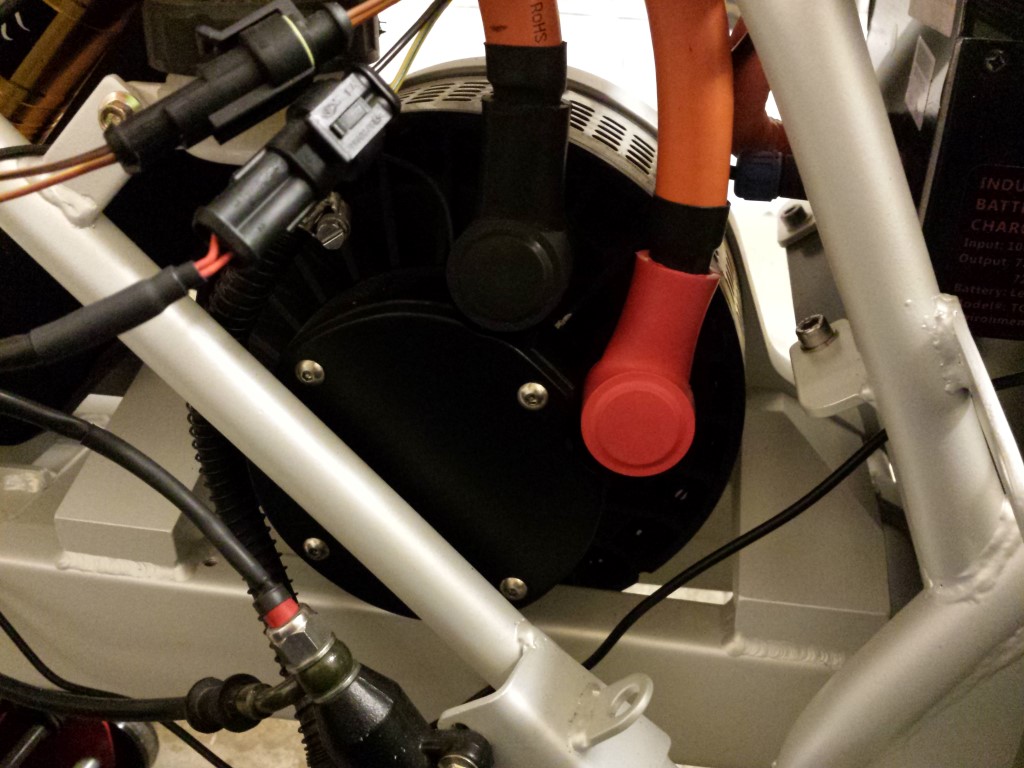
Today was a very productive day. The quad bike is nicely standing on 4 wheels again. This morning I started with attaching the motor to the rear swingarm. I just needed a rubber hammer to get it on there because of the thick layer of paint on the blocks and plate but at least it's firmly on there now.
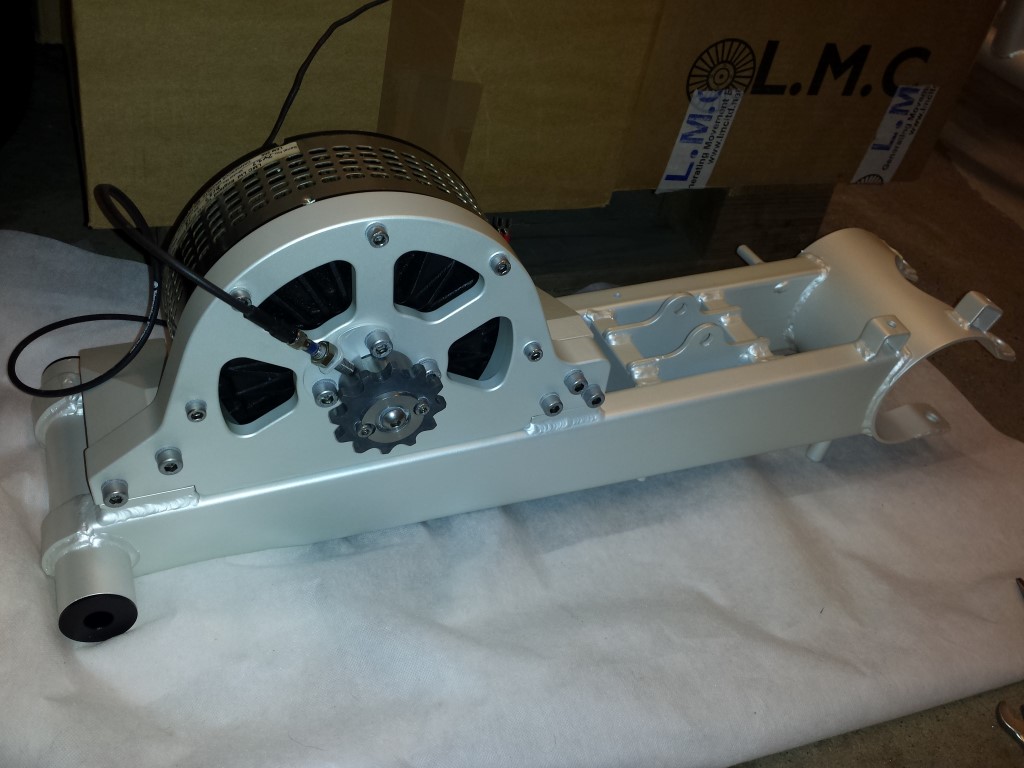
I also placed the new protective cover on it. Definately looks much better than the original.
Then I wanted to place the rear swingarm onto the frame. Wasn't really easy since it weighs about 15 kg in total with the motor on it. With the POM bushings in it it's also just a bit wider so I had to push the mounting points on the frame outward a bit. After that I was able to get it in pretty good with some help of the rubber hammer again and a few extra hands.
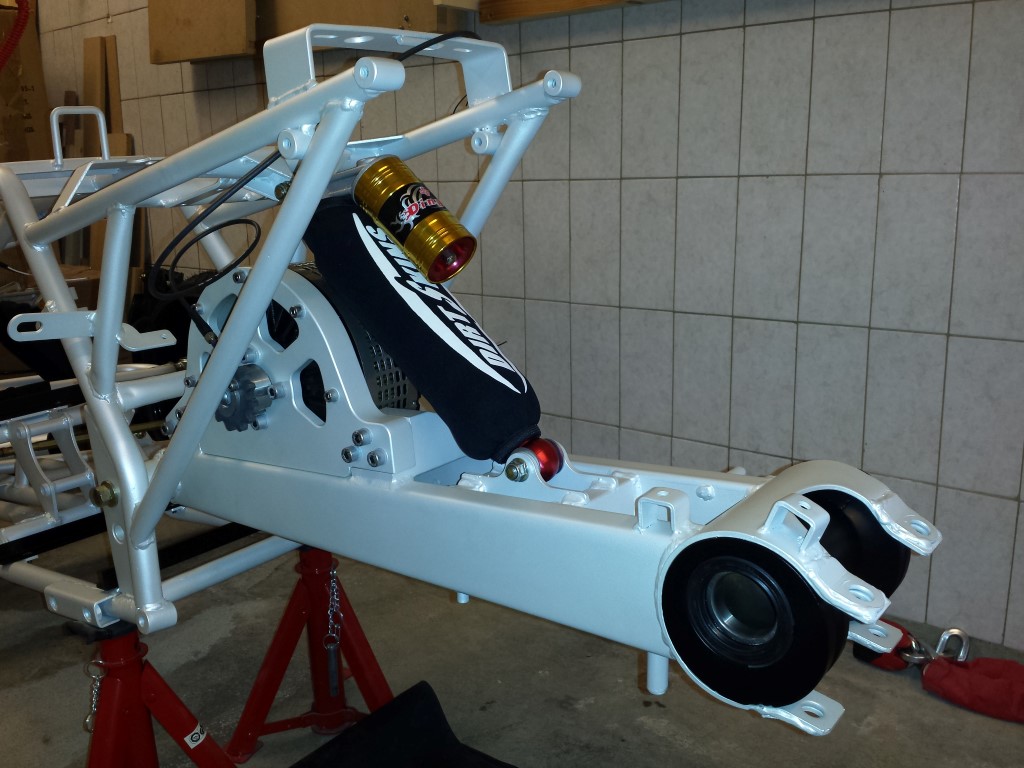
Shock with shock cover attached and the bearing house in the rear swingarm.
Then I placed the rear axle and added the rear sprocket and brake disc to it. Also placed the chain and tensioned it already.
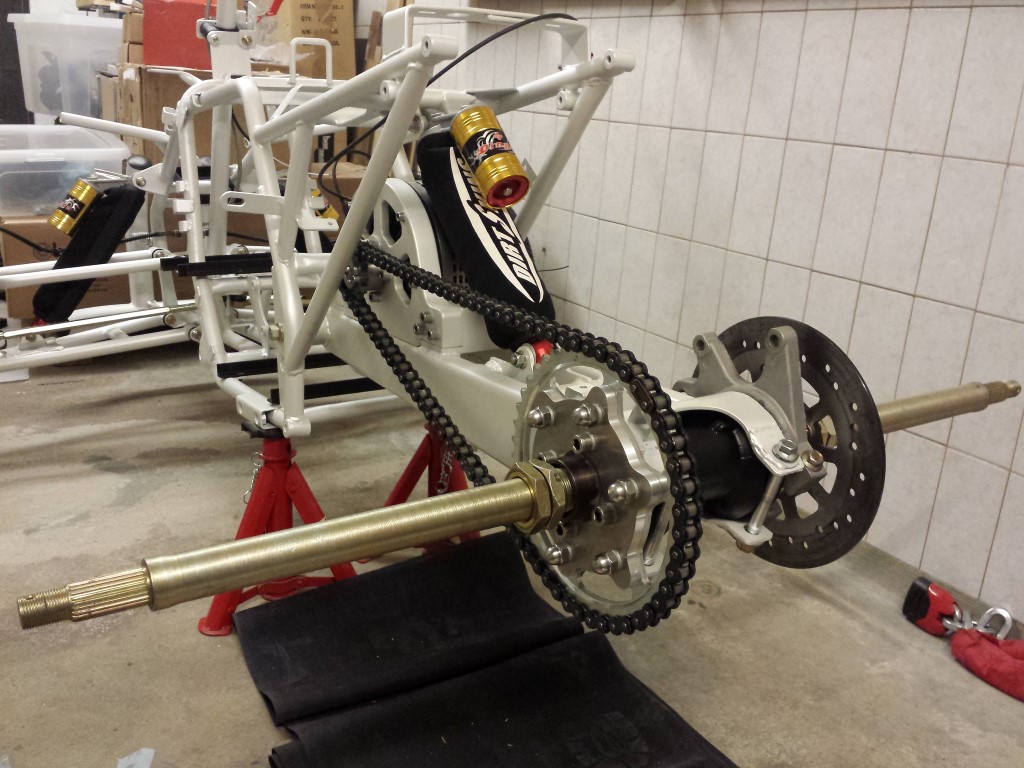
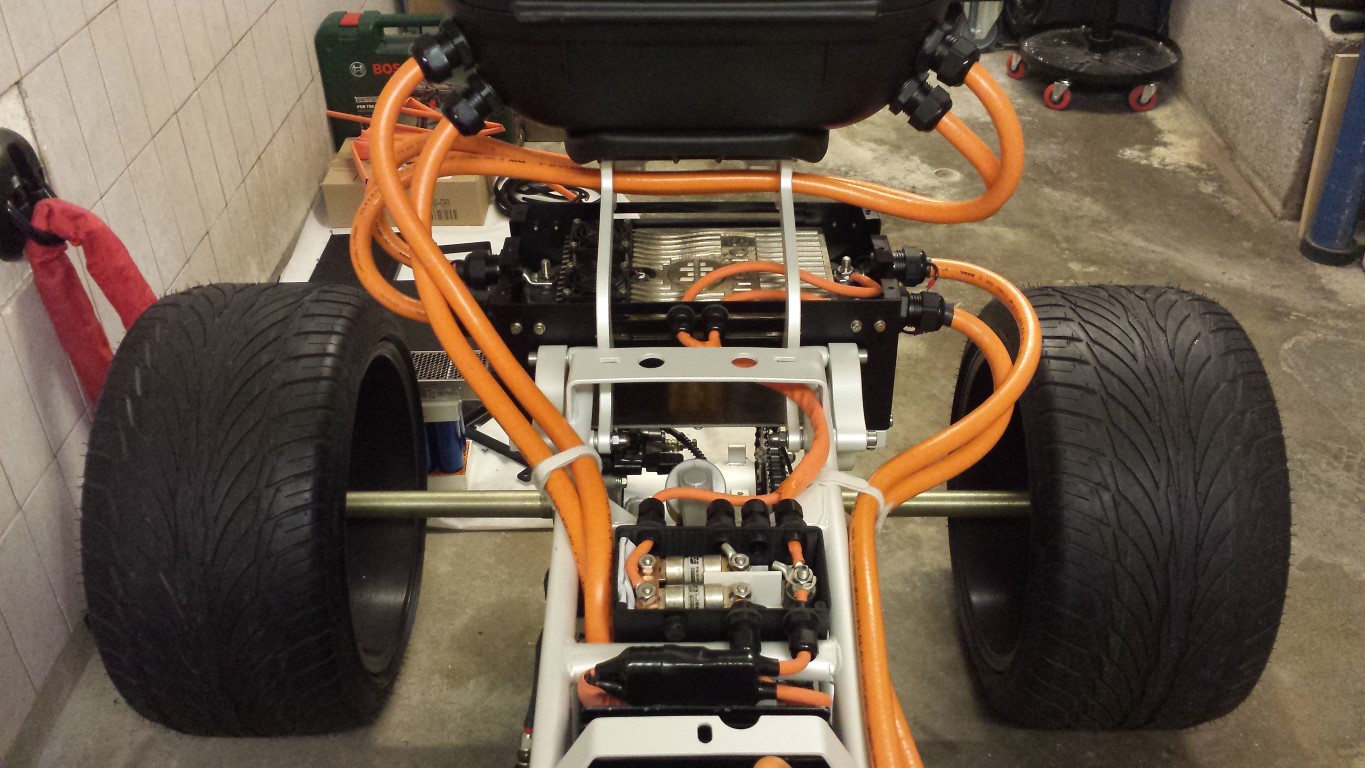
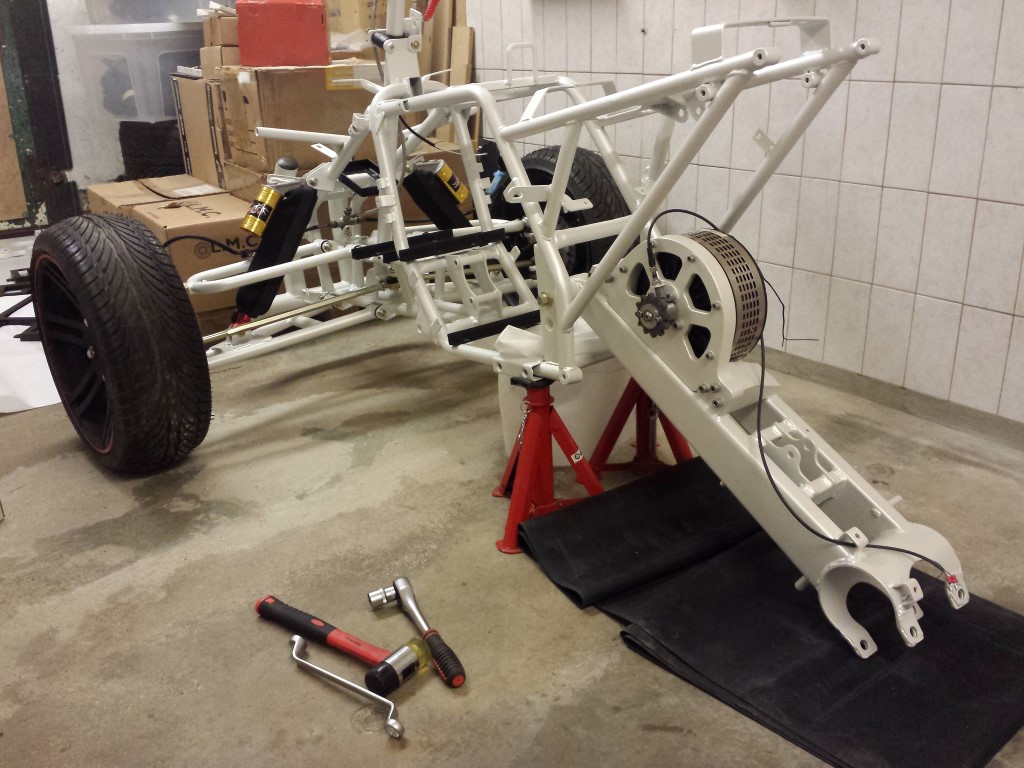
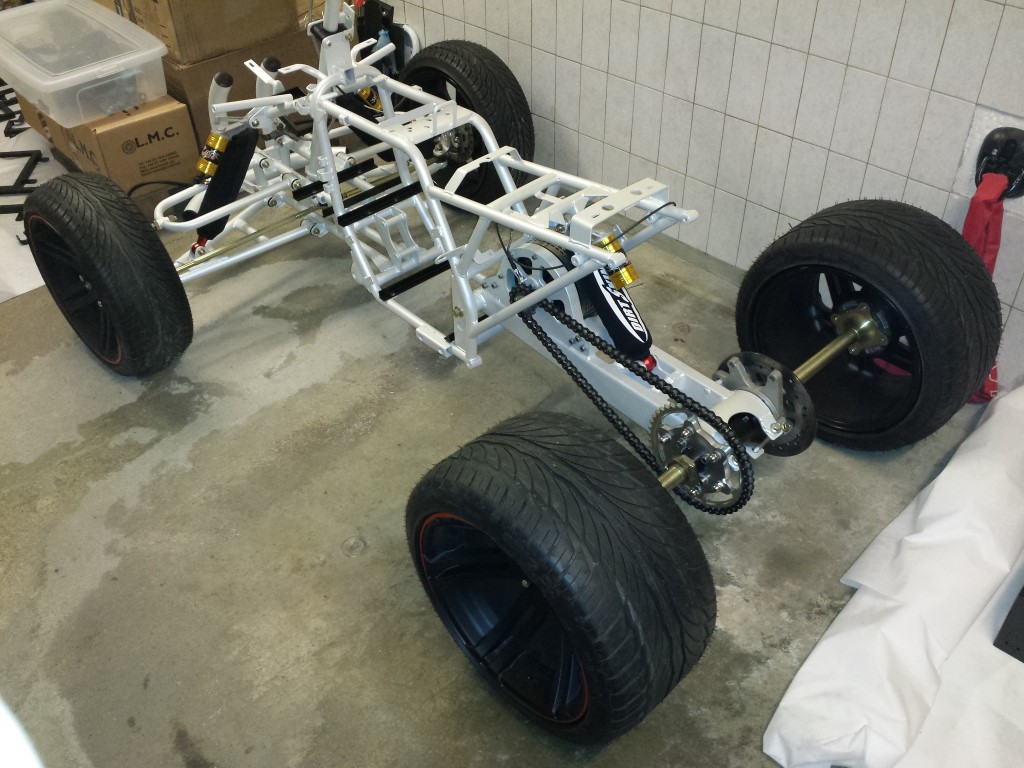
And then I could place the wheel hubs and the wheels themselves. Finally the quad bike is standing on all 4 of its wheels again.
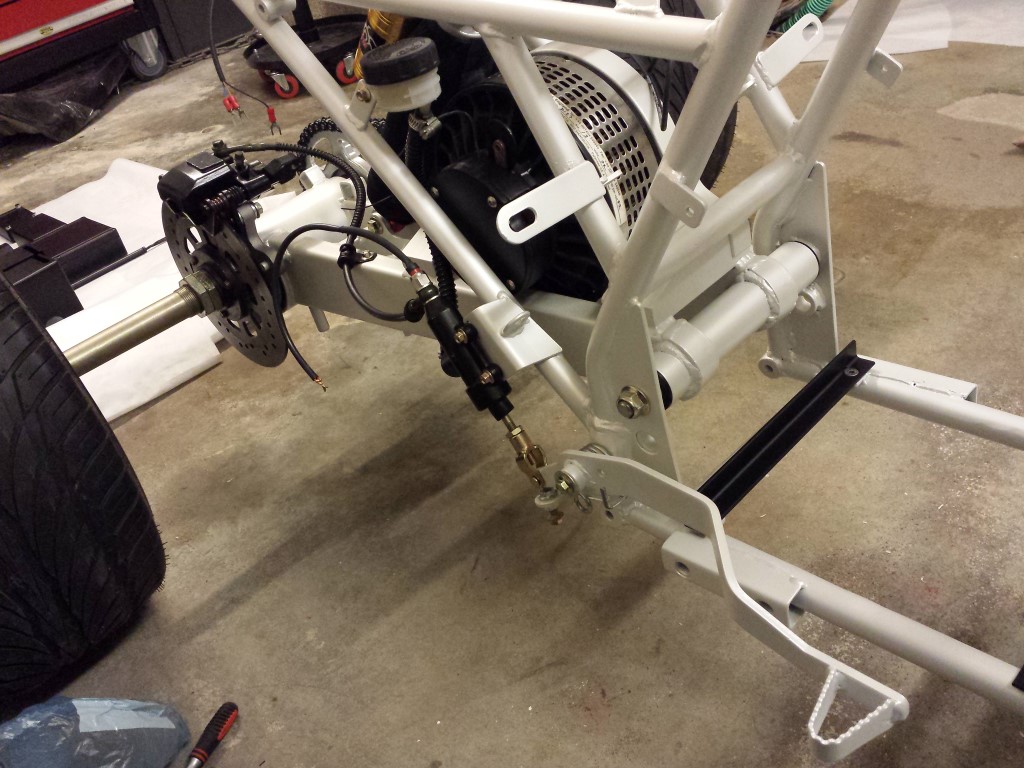
Also still placed the whole rear brake system.
And then I thought it was enough for today. Tomorrow afternoon and evening I'll continue again. What I did already notice is that the quad bike rolls much easier now than before. Think this has something to do with the new bearings. Always had to push it a lot harder when the old bearings were still in it. Or perhaps the brake pedal for the rear just wasn't properly adjusted, this is also quite better now I think.
Just another picture of how the quad bike looks like right now. Really starting to look like something again.