
 Nederlands
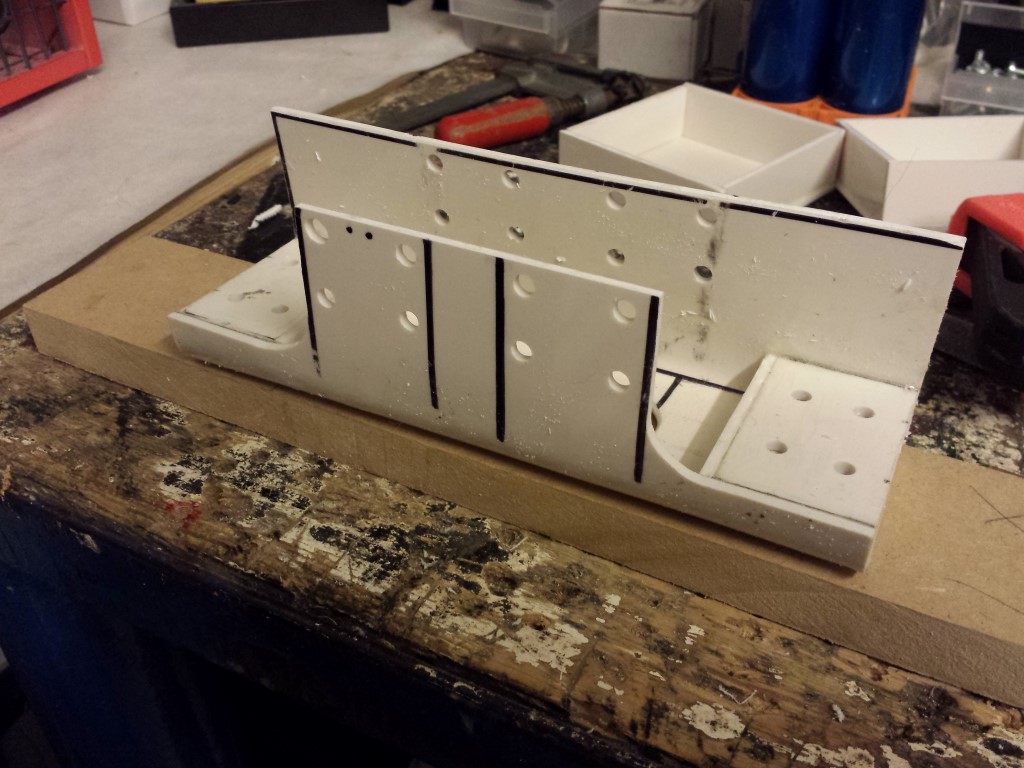
Blog
Posted on 2 November 2014 at 01:00 am (CET)
Category: Electric motor, Wiring (HV)
Posted on 2 November 2014 at 01:00 am (CET)
Category: Electric motor, Wiring (HV)
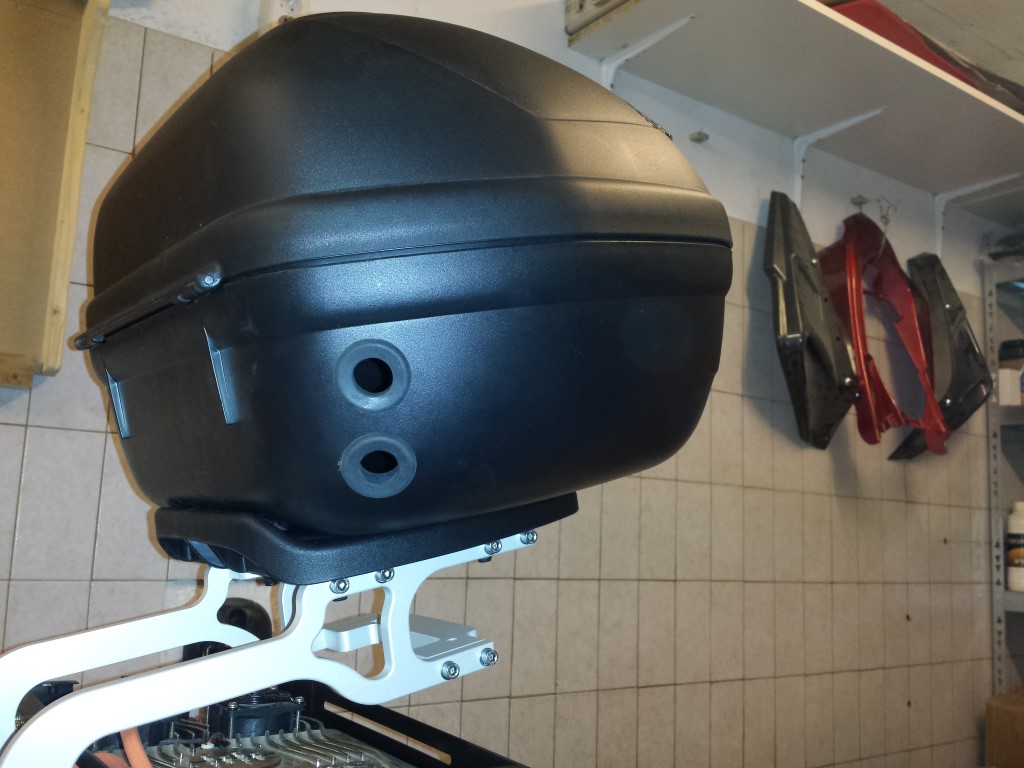
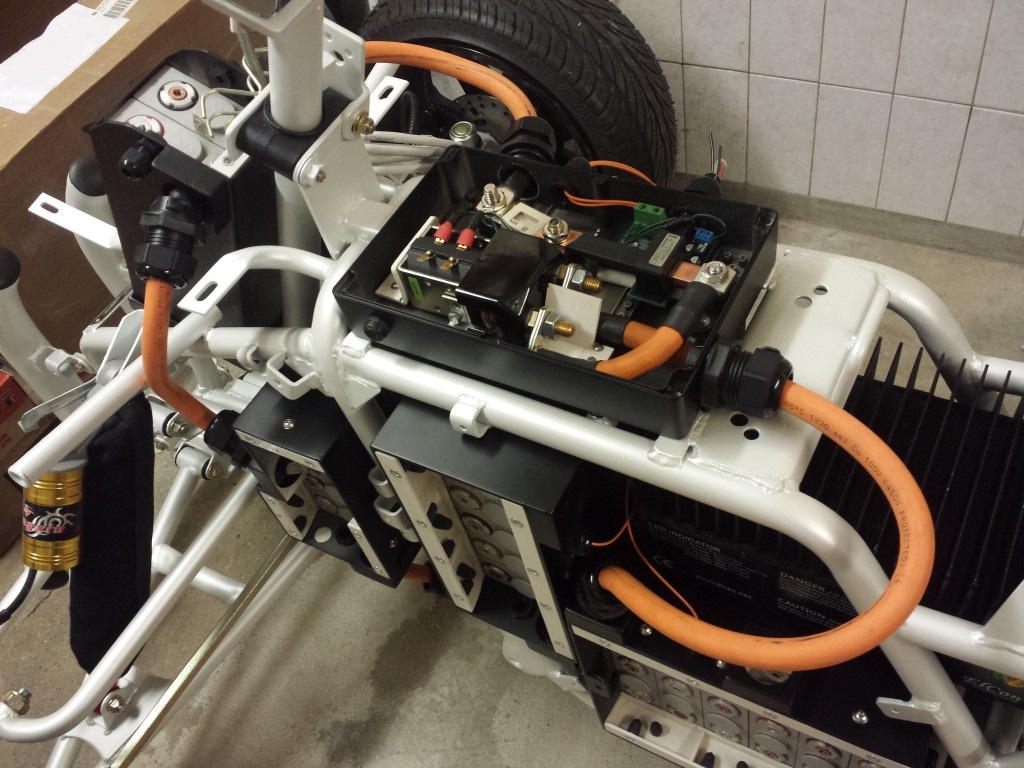
The past week I've done a lot of work again. First thing I wanted attached in the top case are the contactors for being able to drive in reverse. This all went well, I just hope that it's strong enough.
I made a whole construction out of plastic where the contactors fit in nicely.
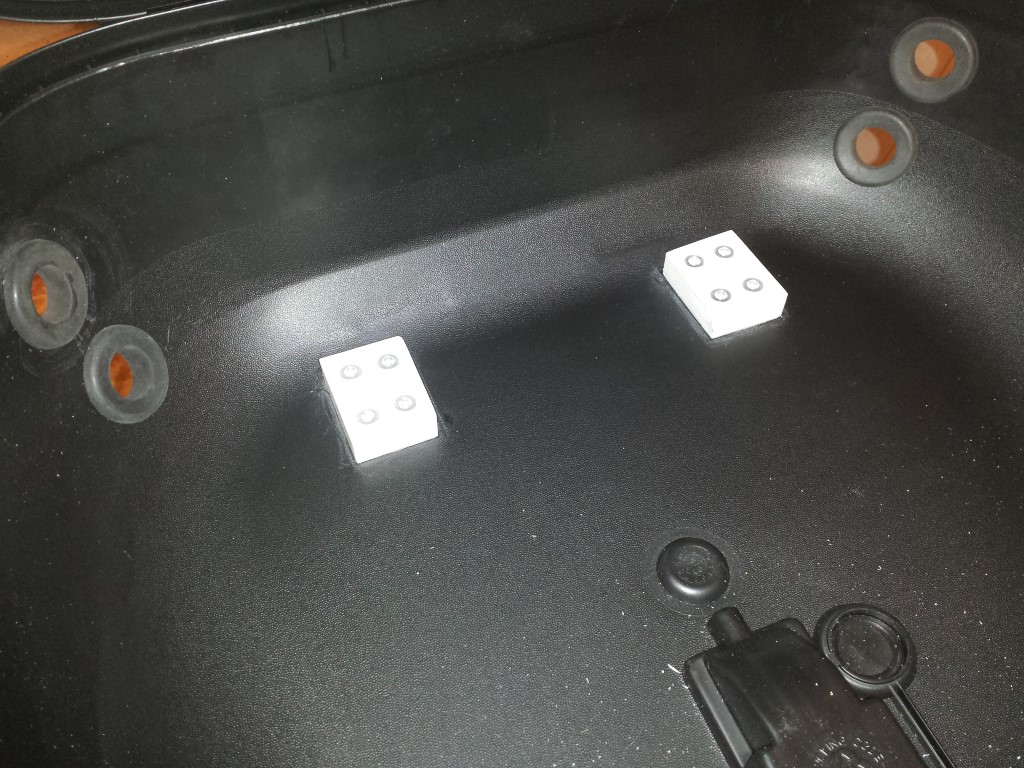
Also made mounting points that I glued into the top case with special glue. With this I have to wait and see if it's strong enough.
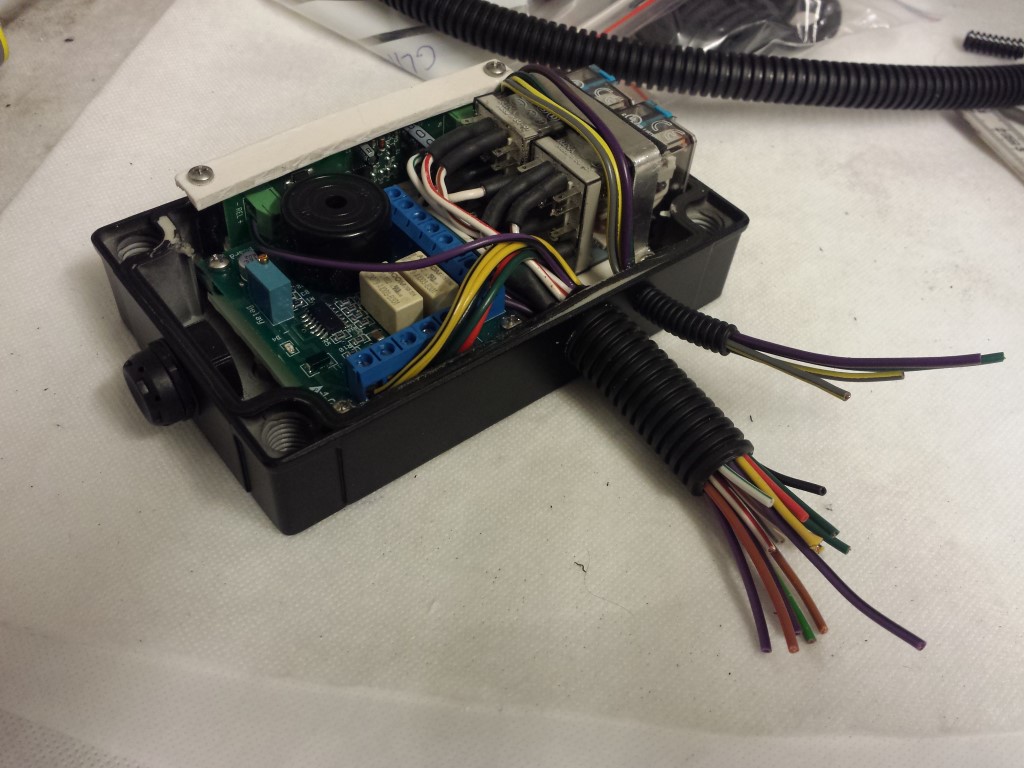
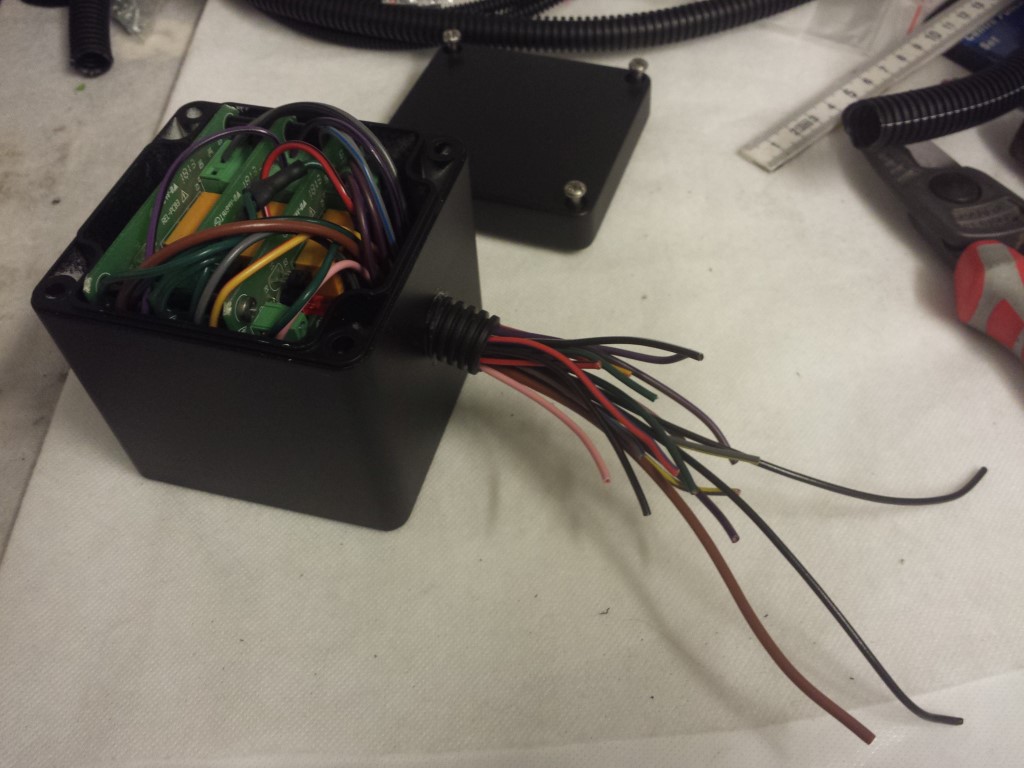
The contactors I can easily attach or remove this way. Meanwhile I've also connected the last few wires for the propulsion. The smaller black wires are just for earthing of the shielding in the orange wires, just still have to isolate these so they can't come in touch with the contactors.
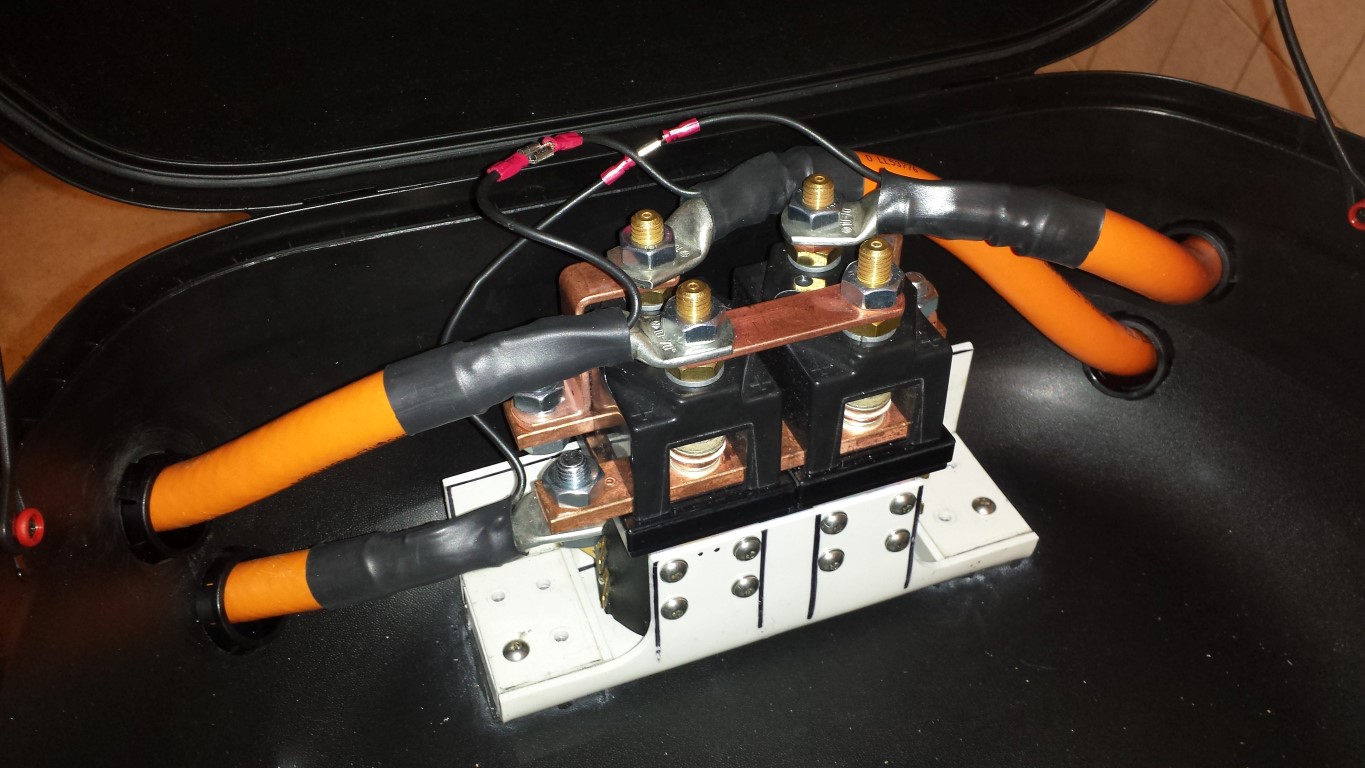
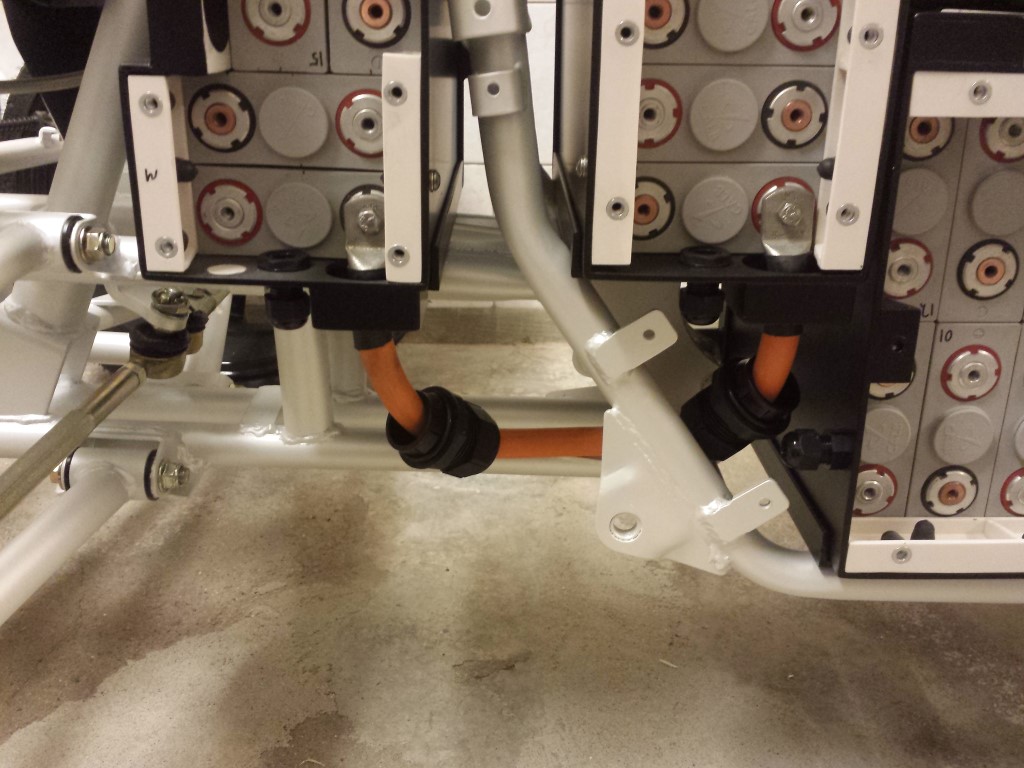
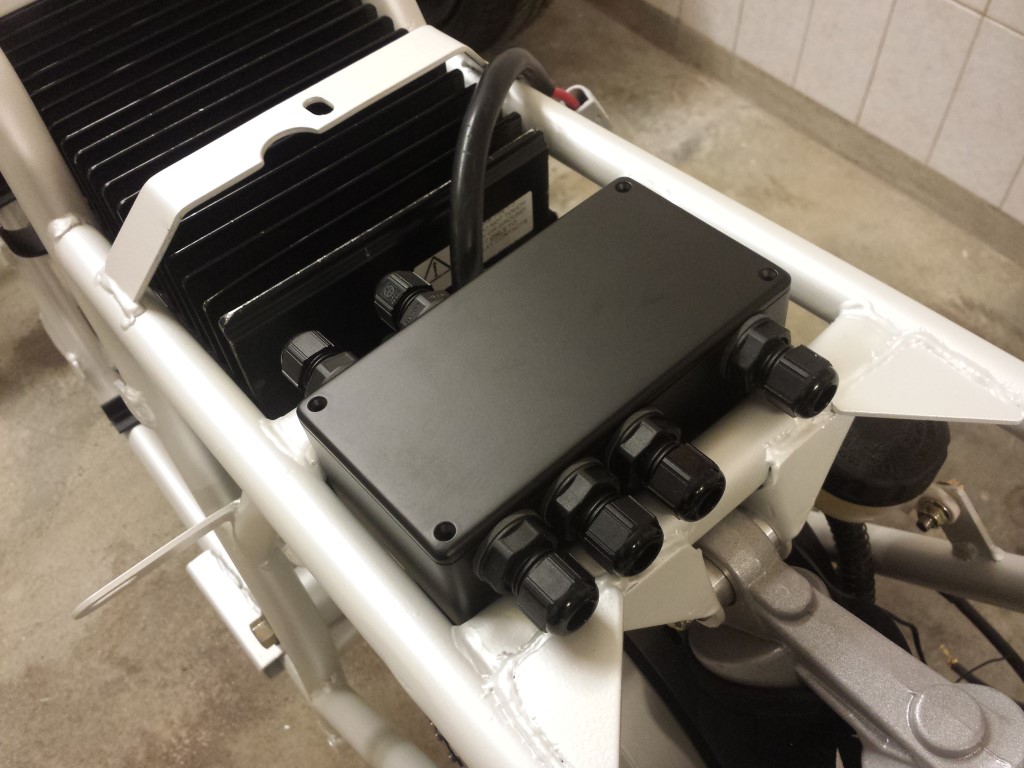
I was worried that it wouldn't look so good on the outside of the top case but it doesn't look too bad. As you can see I ended up using cable glands again instead of those rubbers. The wires stay in place much better like this and the top case is still waterproof.
I've also tried with the rear fender on it already and you don't notice the wires as much then. I just forgot to take a picture of this and the fender is also off again. So I'll show that later.
The plan now is to make some shielding in the top case so the contactors won't be visible anymore and untouchable. But that will take a while again to finish.
Posted on 24 October 2014 at 11:59 pm (CET)
Posted on 24 October 2014 at 11:59 pm (CET)
These past few days I've been busy again. Got a reply from the RDW saying it's no problem that a few components will be placed in the top case and that there will be high voltage wires coming out of it and sticking out a bit. So this is all allowed, just has to be done in a safe way of course.
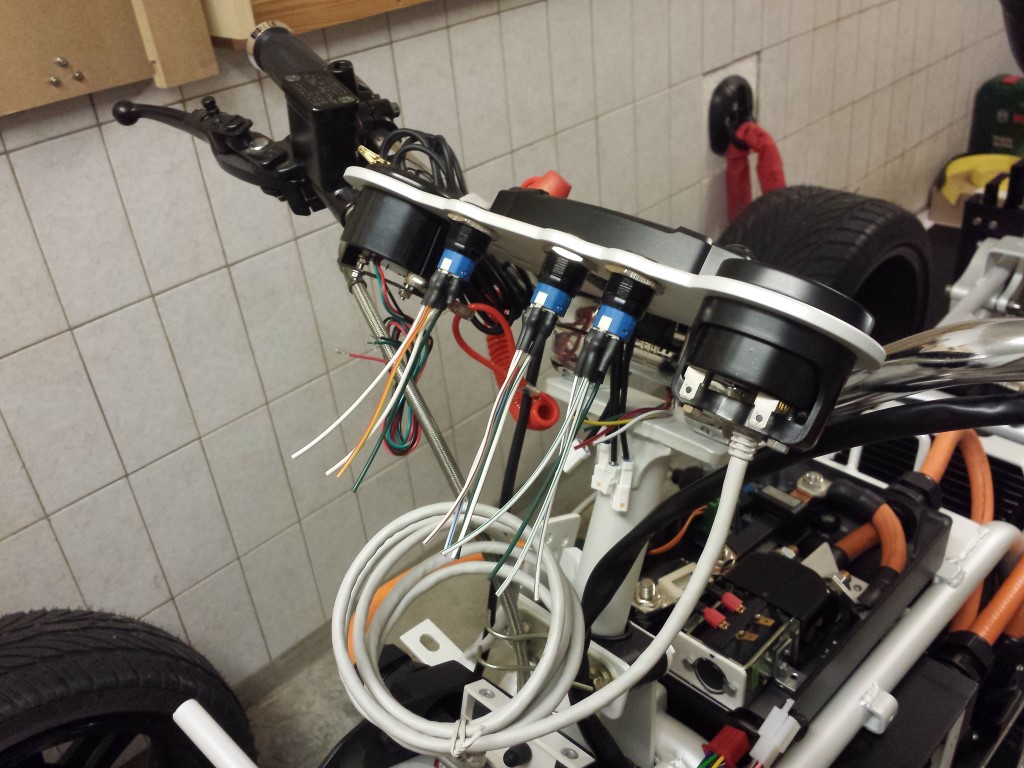
First I started making some pass through holes for the wires in the top case. I just don't know whether I'll keep using these rubbers or use cable glands again. With the rubbers the wires won't stick out as much.
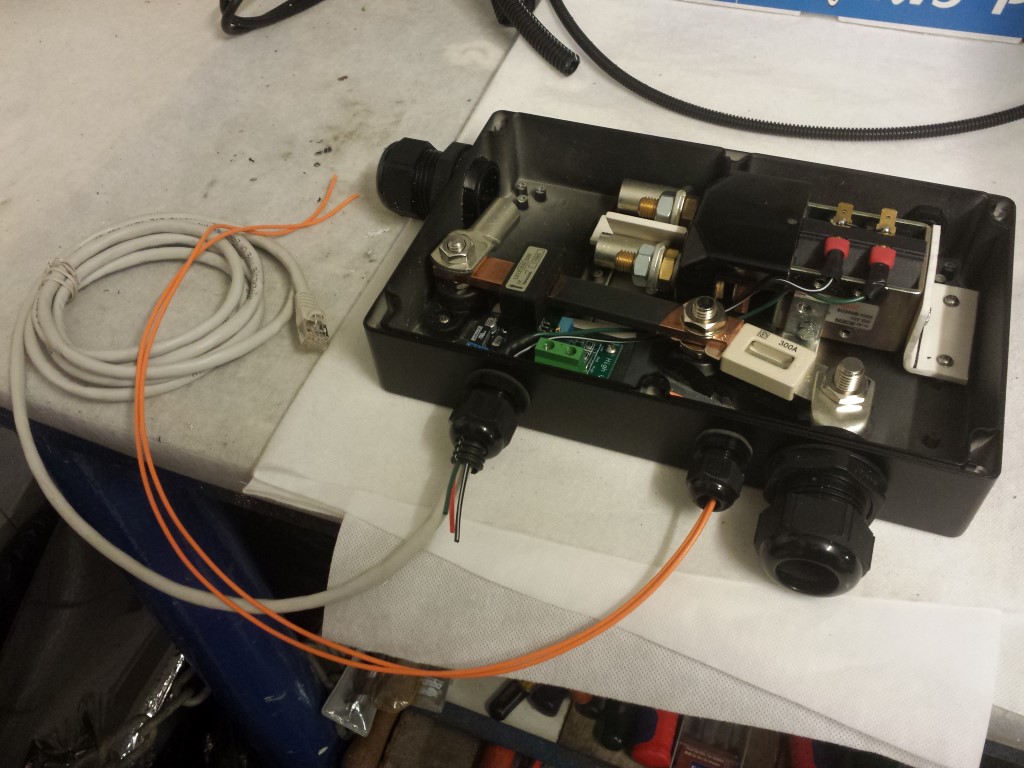
Also bought some new heatshrink so I could continue again making the wires for the charger. There are also connectors inbetween so I can disconnect the charger from the batteries just in case it's ever needed.
Here with the connectors connected. Because of the rubbers that are all around it stays completely waterproof.

Meanwhile I have also done some smaller things. The new handle switch is attached and soldered all of the wires for the led buttons.
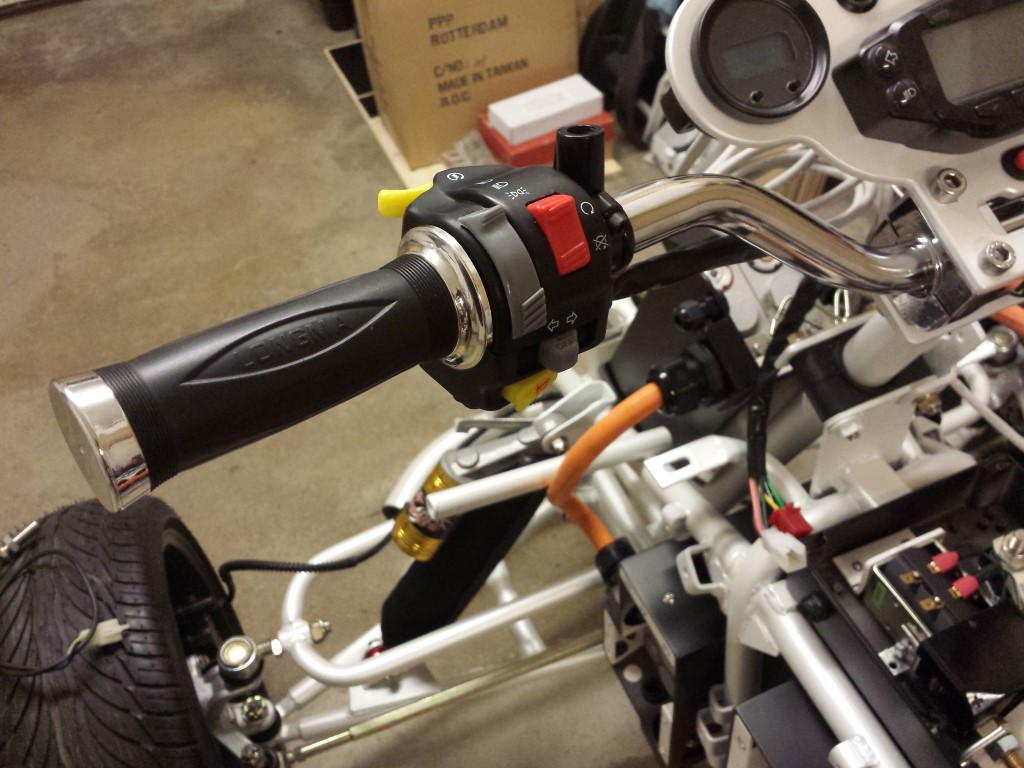
This weekend I'll start attaching all of the components in the top case.
Posted on 19 October 2014 at 12:26 am (CET)
Category: Controller, Wiring (HV)
Posted on 19 October 2014 at 12:26 am (CET)
Category: Controller, Wiring (HV)
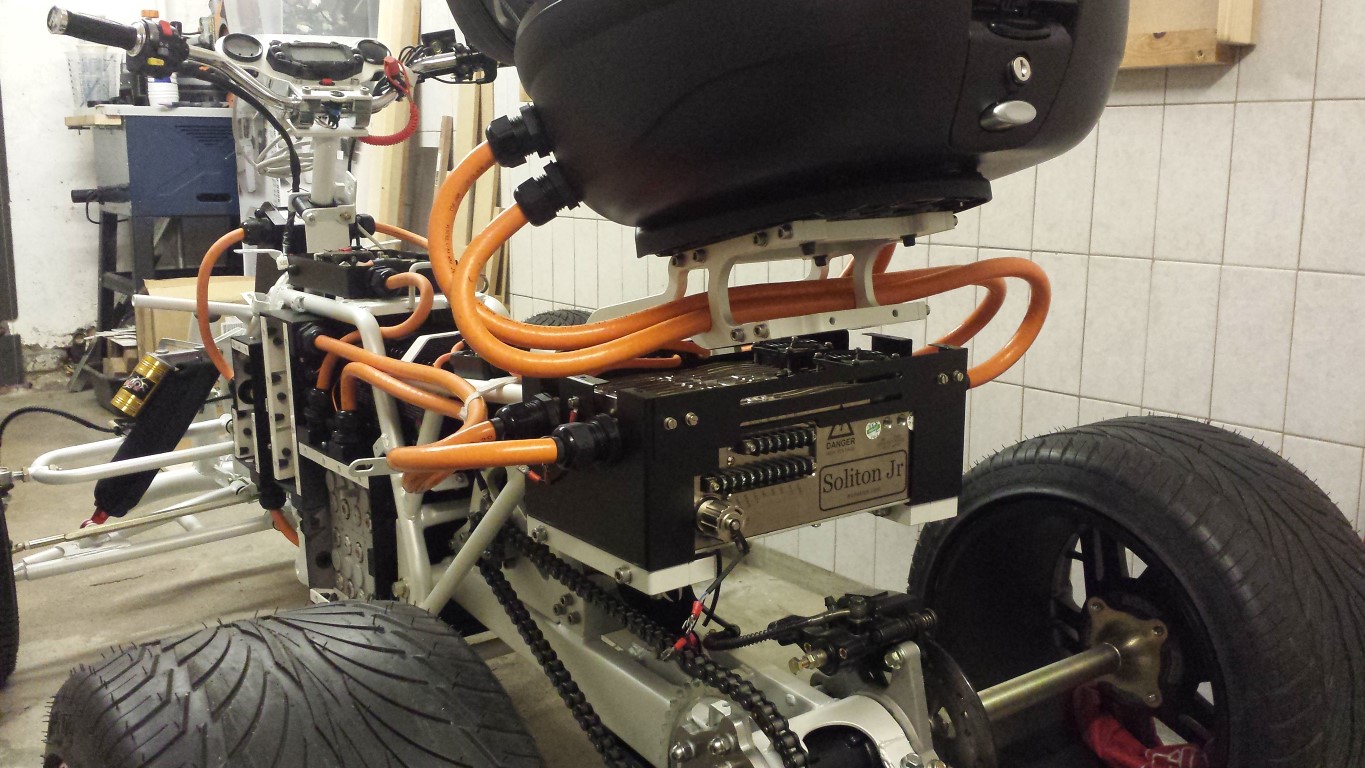
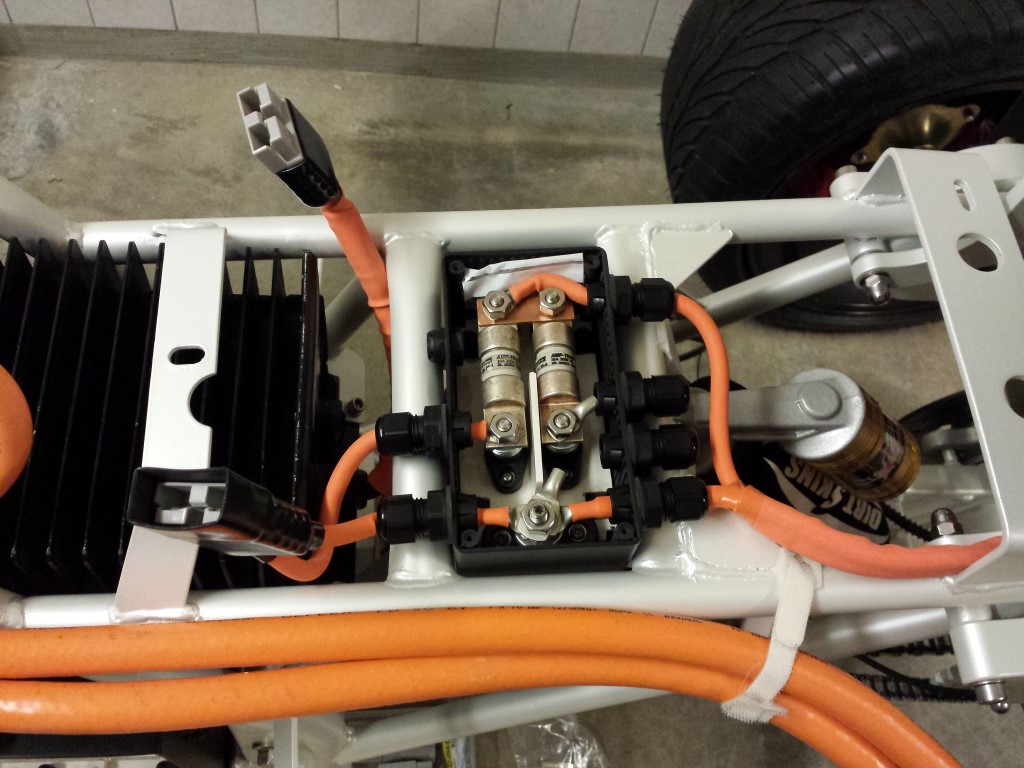
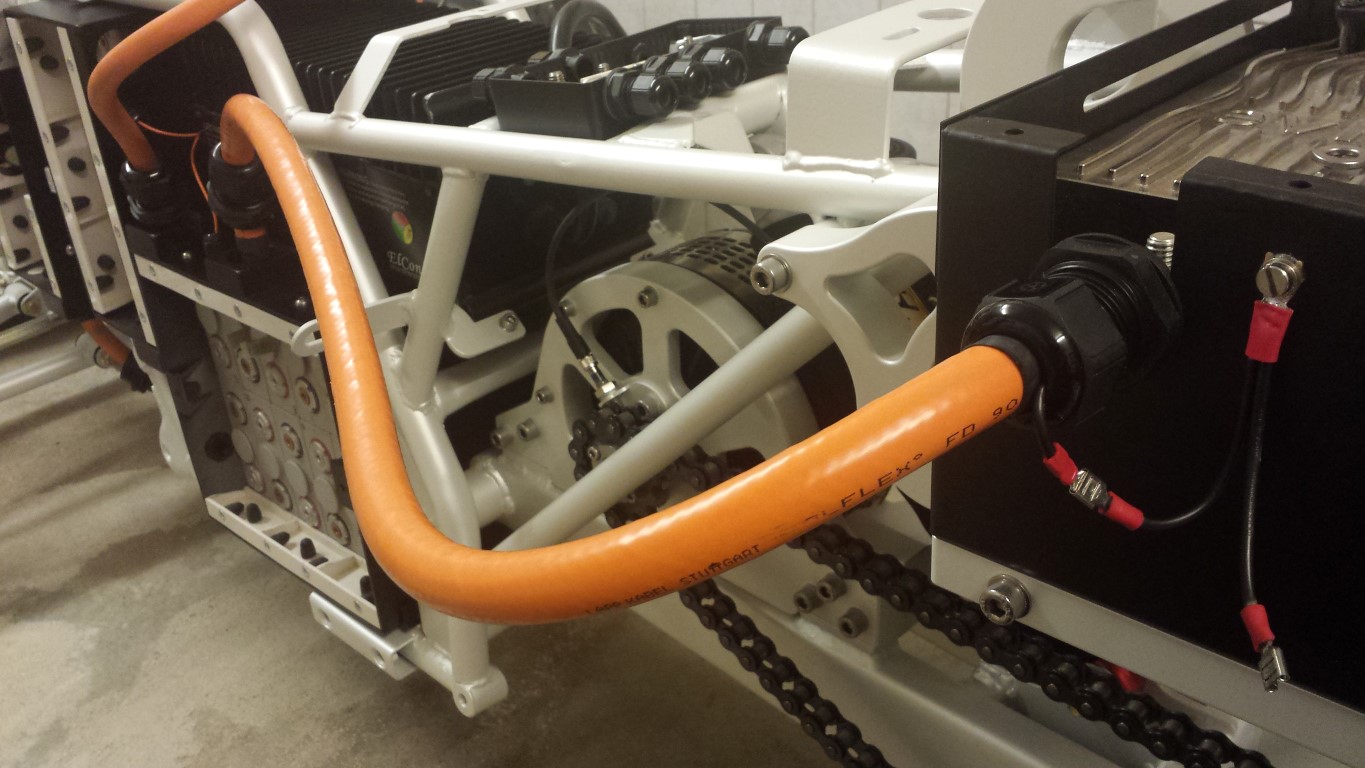
The wires between the whole battery pack and the controller are also done now. These were a bit harder to make because of the extra shielding in these wires.
First I did the same as with the other wires, stripped and crimped a cable lug onto it.
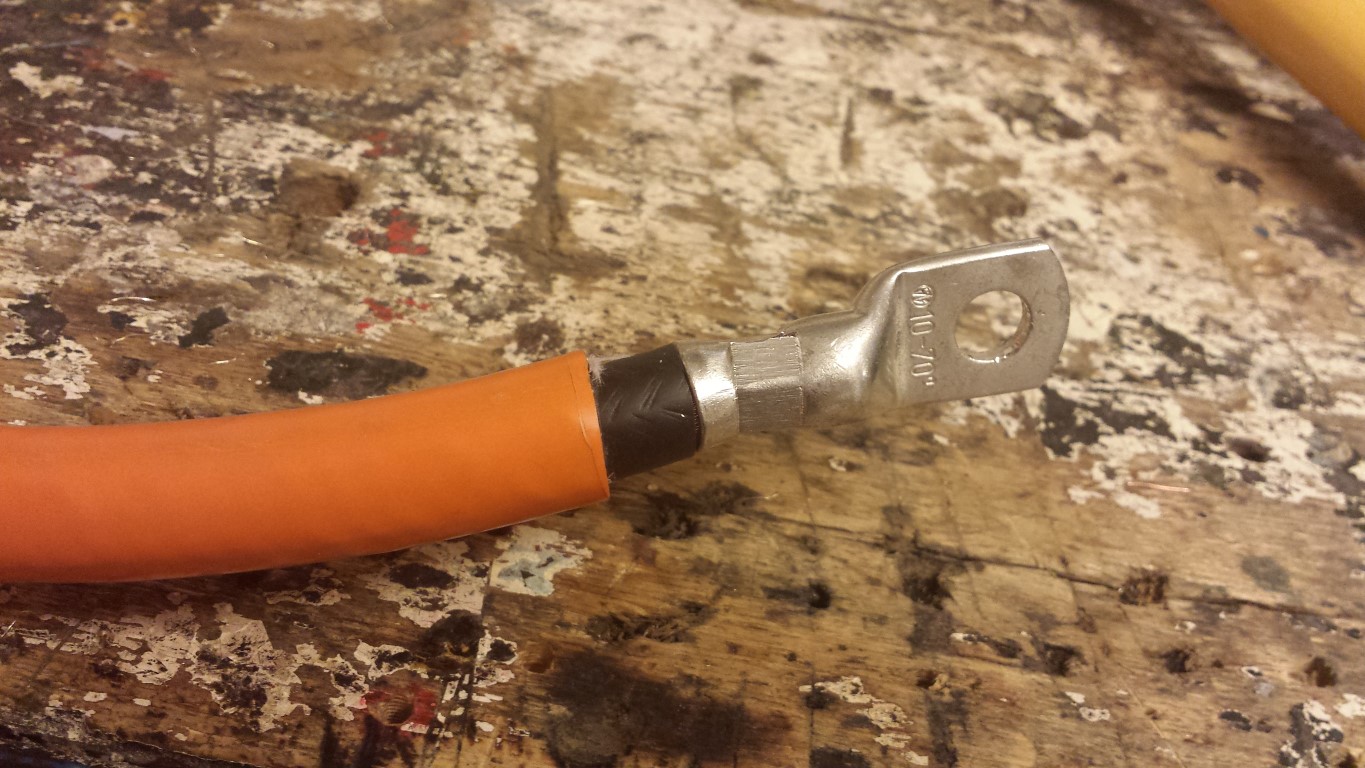
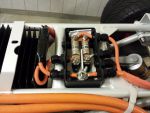
After that I stripped it to the shielding and soldered a small wire onto it. This has to be earthed to the controller's enclosure. The shielding should ofcourse not touch the cable lug so to be sure I used some extra heat shrink.
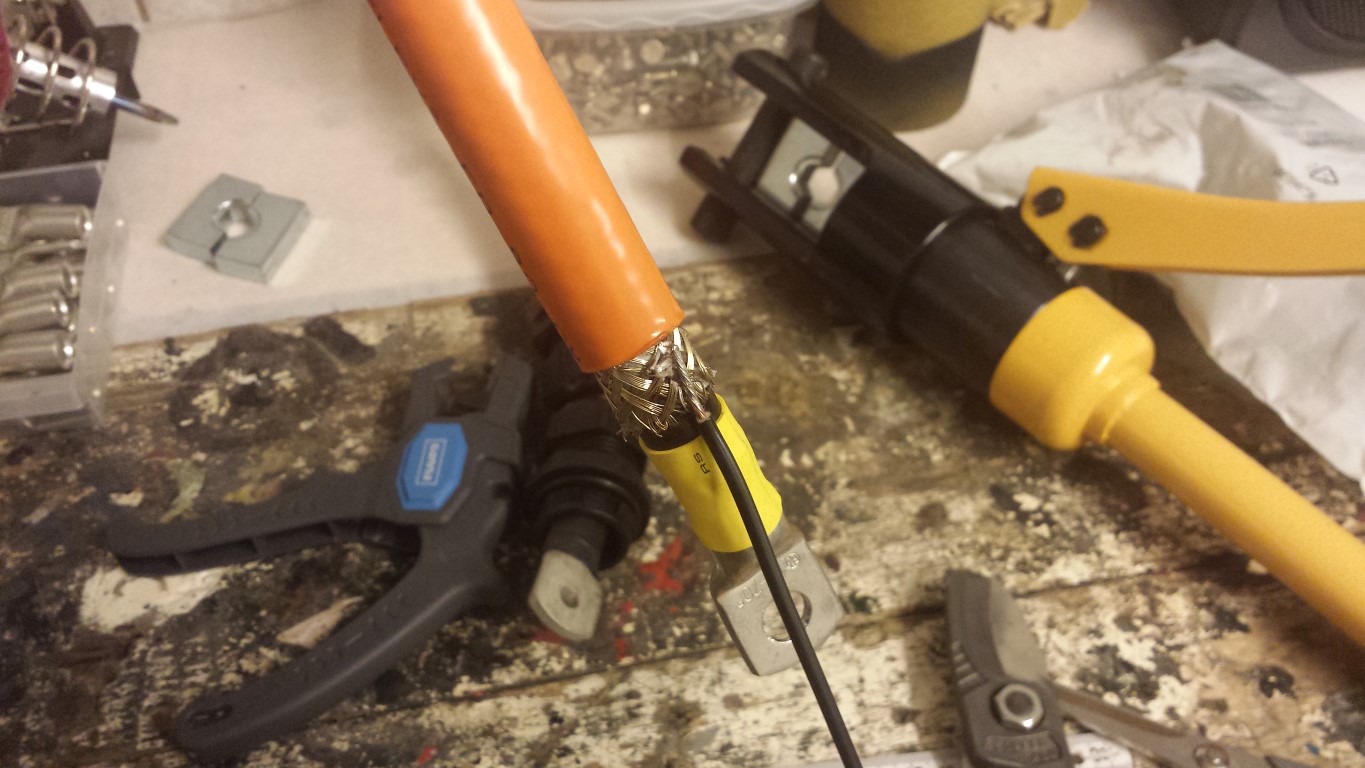
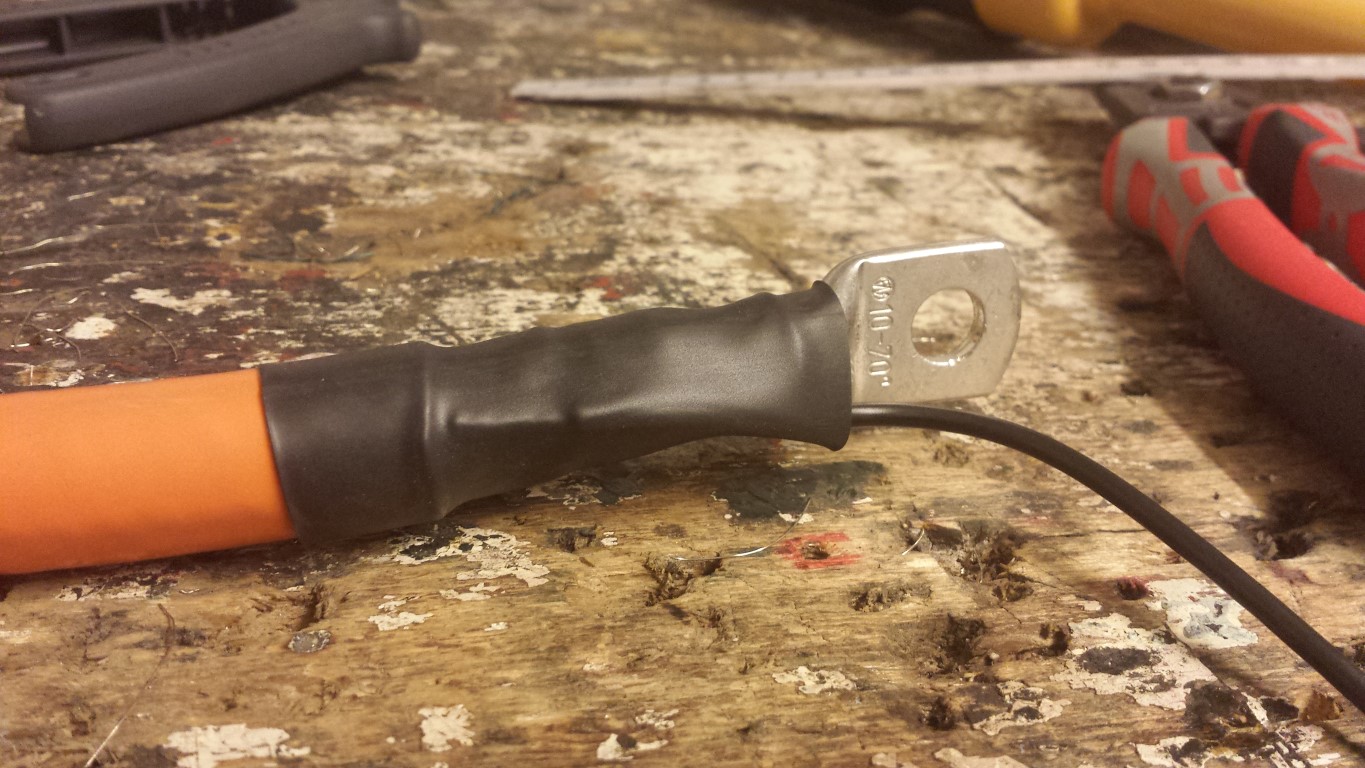
Some more heat shrink on it to seal it good again.
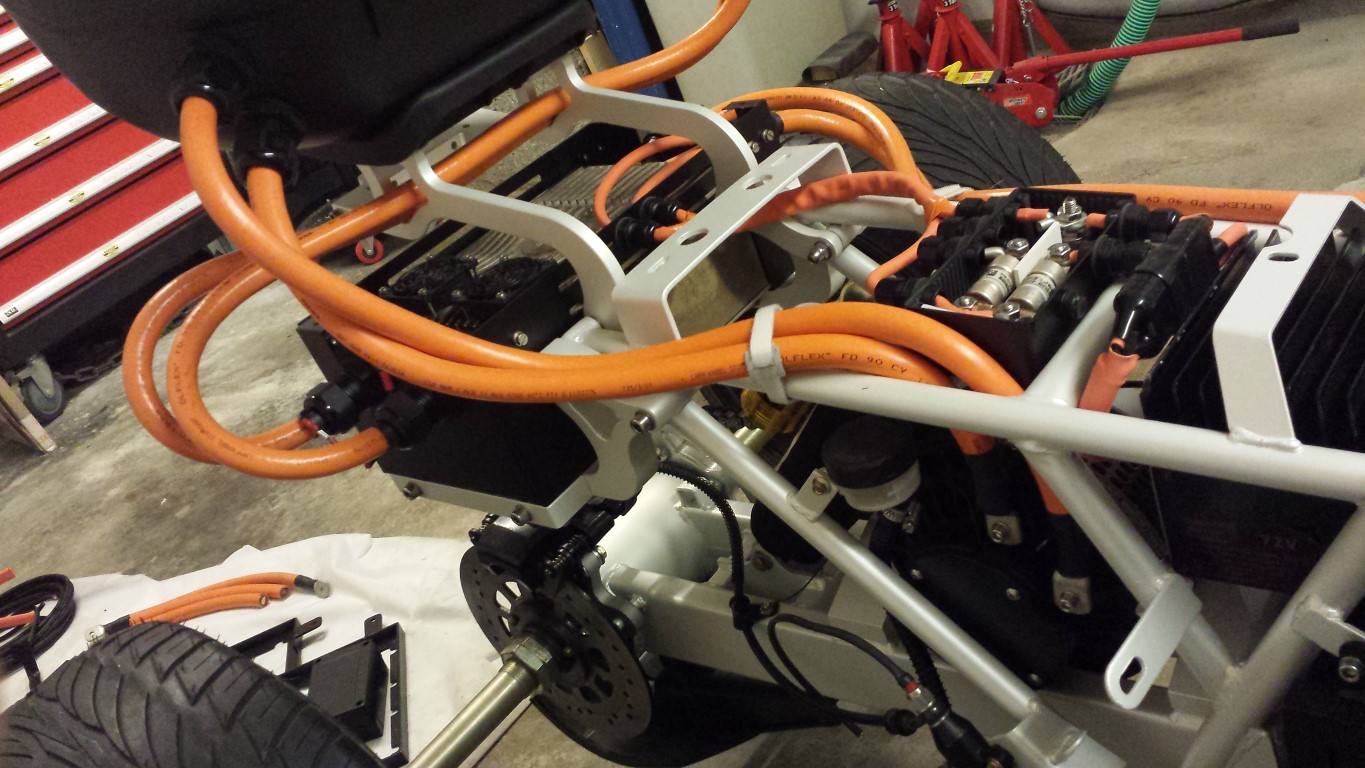
For the controller's enclosure I already made the wires for earthing quite a while ago. So now I could just connect the shielding of the wire to it. It's a lot of work but it's the only way to get it approved at the RDW (safety inspection).
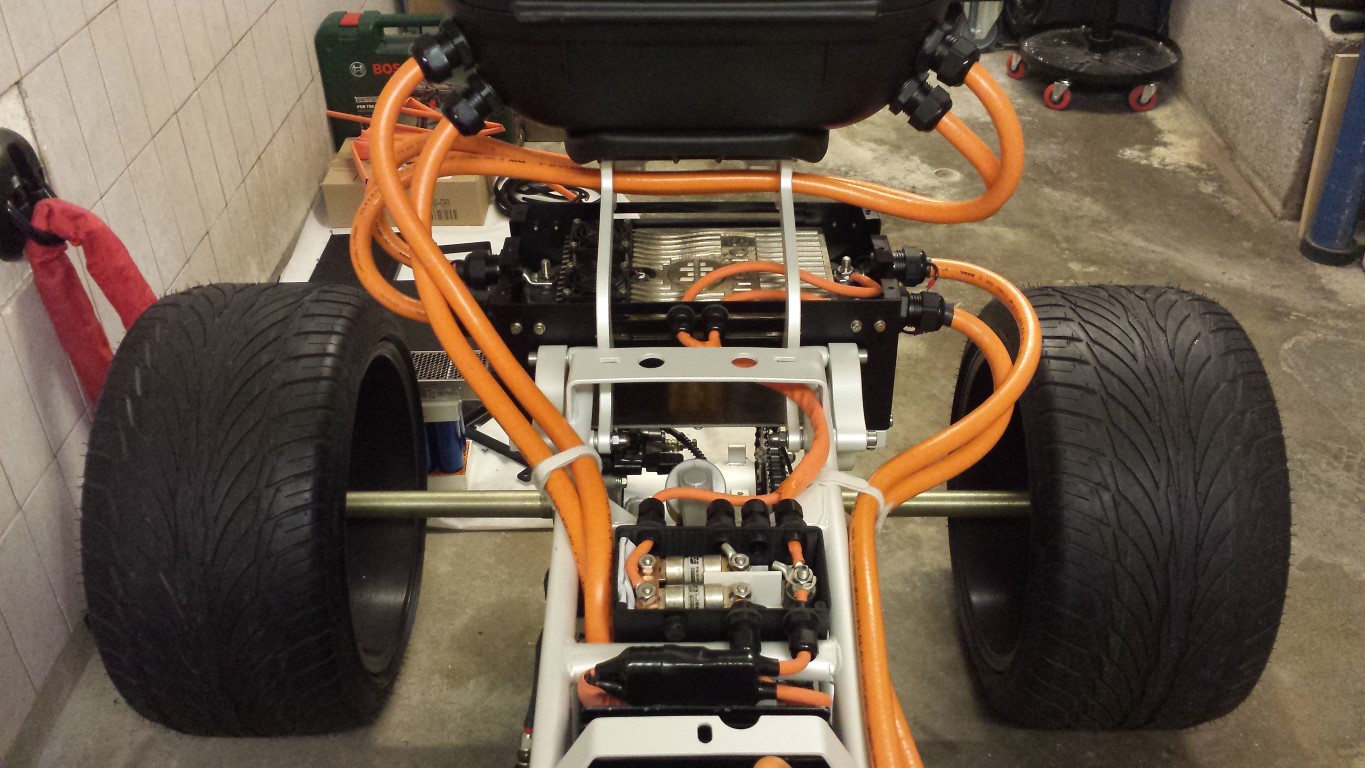
Did this all with the other wire as well. And after that I also attached the top case again.
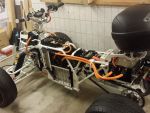
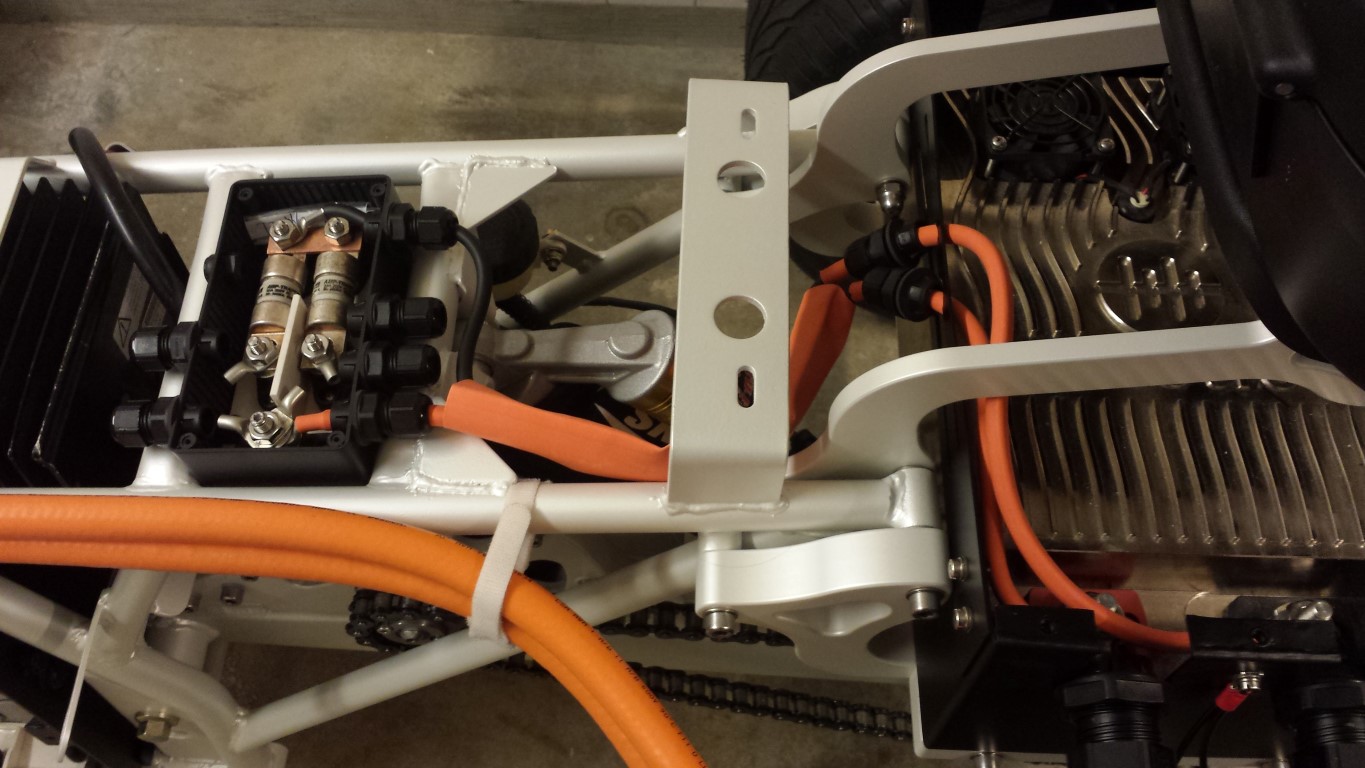
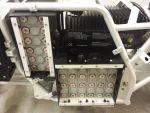
These 3 things I'll have to attach somewhere in the top case. These are the 2 contactors for being able to drive forward and reverse, the 12V battery and the DC-DC converter. Think I'll have to glue in some plastic mounting points. And I also have to make some holes in it for cable pass through.

Also made some wires already that go to the 2 fuses for the charger and DC-DC converter. I'm just short on orange heat shrink, can't really continue with this untill I have some more.
Tomorrow I'll continue again, it gets more fun every time now.

Posted on 16 October 2014 at 11:59 pm (CET)
Category: Wiring (HV)
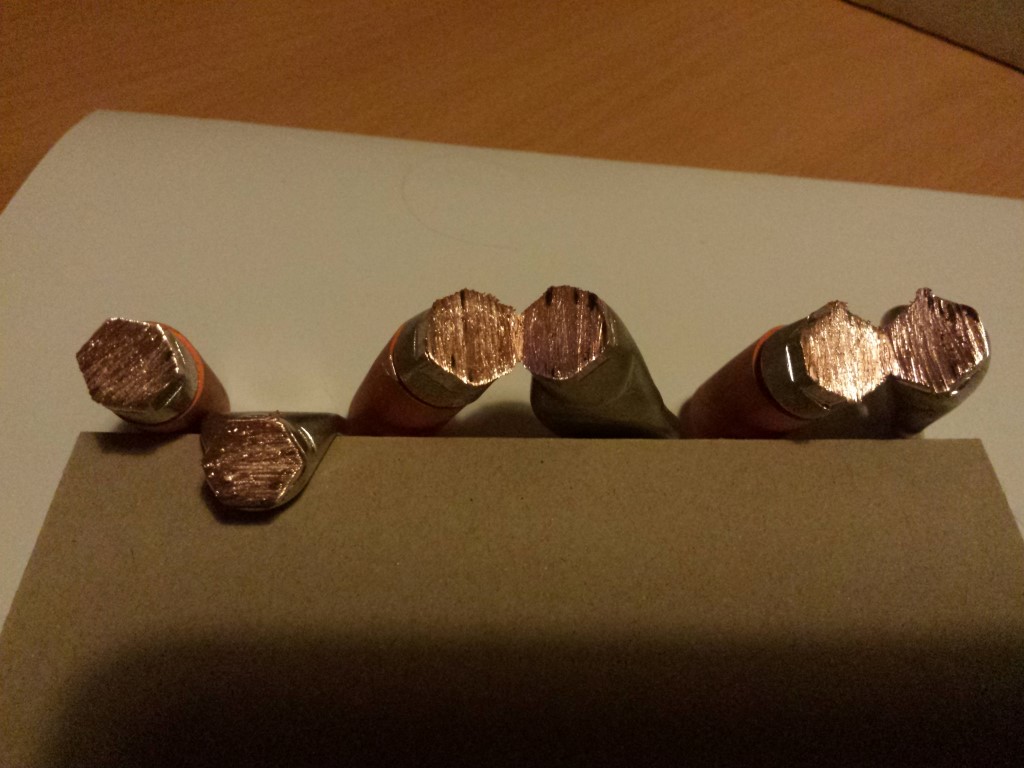
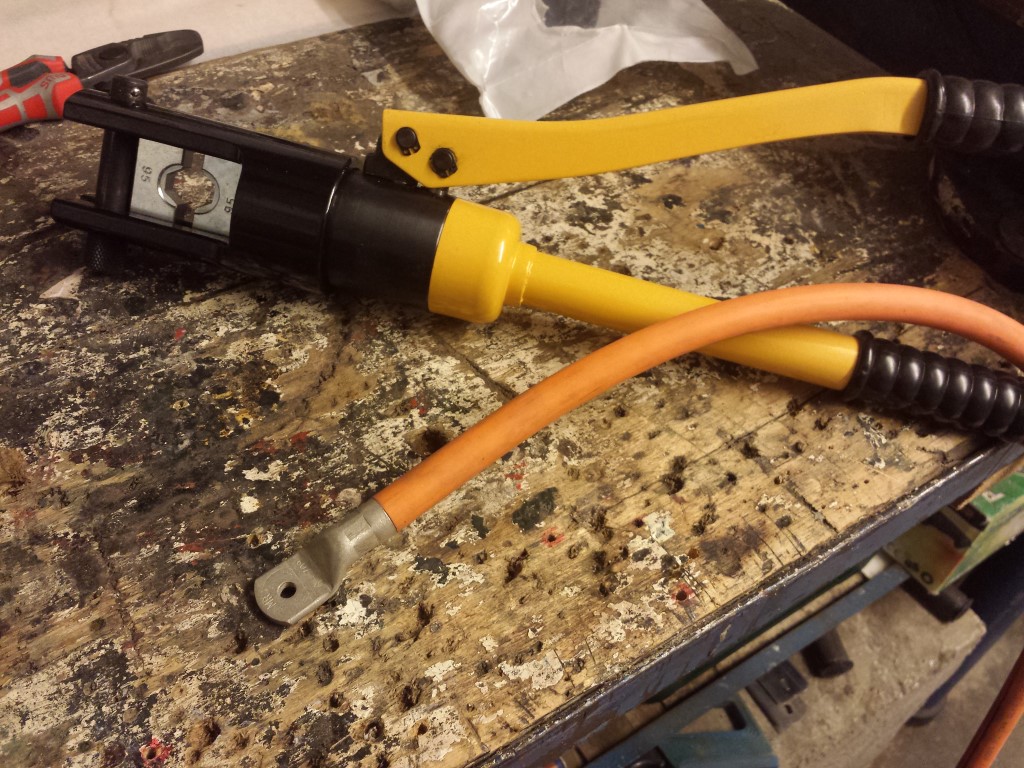
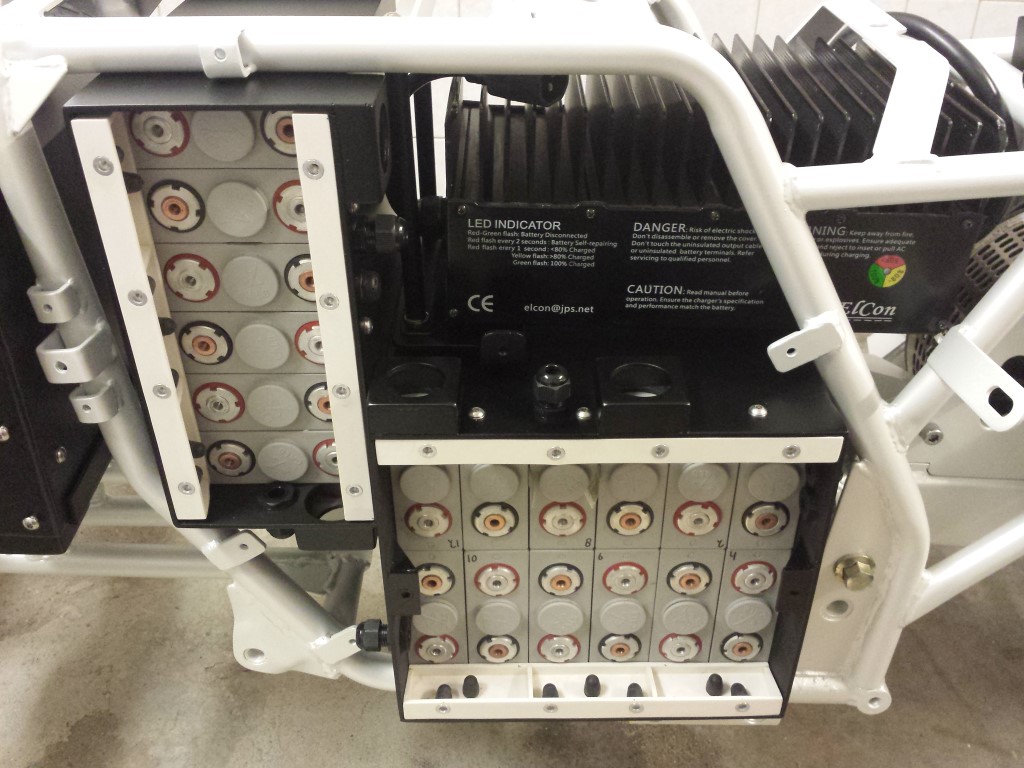
Yesterday and today I've been busy making the wires between the 4 battery packs. First I checked which size I needed to crimp the cable lugs. I just used a small piece of wire for testing. I also have 2 different kinds of cable lugs, one thicker than the other. I can't use the same size for both of them. You can see this here with the wire on the right, this is a thicker cable lug and crimped it with the same size as the thinner cable lug. Because of this you get some extensions on the sides. If a wire like this gets used it can melt or even cause a fire because of the heat build up. The left and middle one are crimped with 2 different sizes and are perfect. So that is how they all should be.
Now I could start with the real wires. First I stripped the wires and crimped the cable lug onto it.
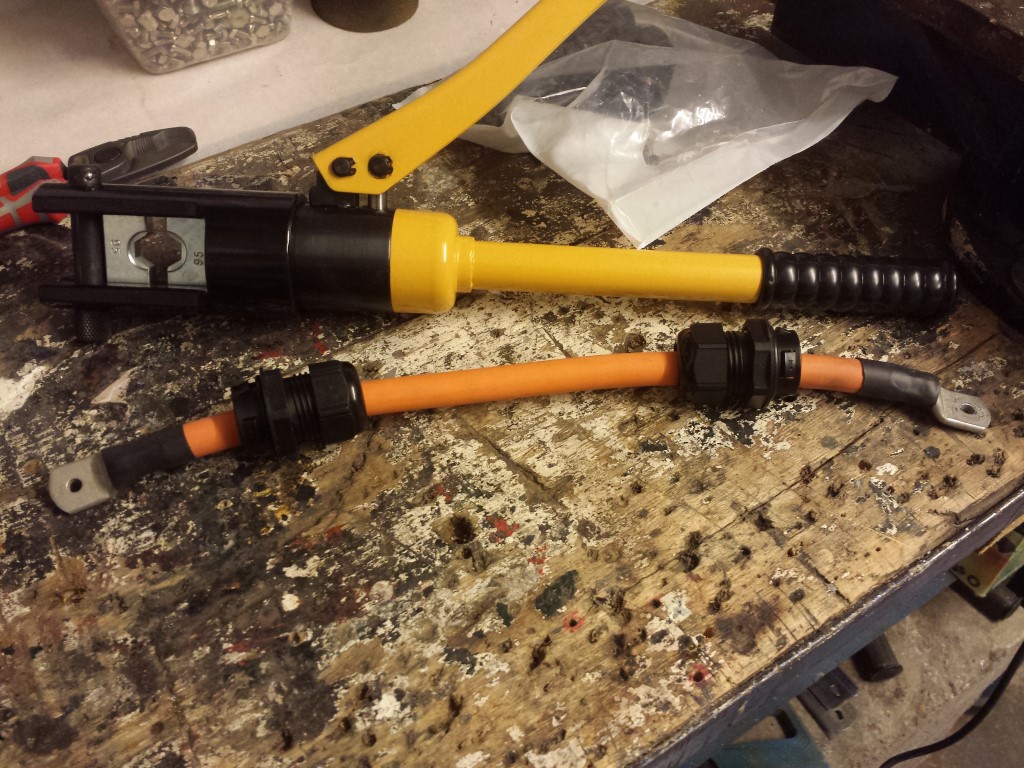
Then I made the wire to size and did the same on the other side. I just placed the cable glands on it first because they don't fit over the cable lugs.
That's how I did all of the wires for the battery packs and they're all done now.
Tomorrow I'll continue with the wires between the whole battery pack and the controller. These are a bit more difficult since there's also a seperate shielding in these wires making them more stiff. Also have to do some other things with these but I'll probably show this tomorrow.
Posted on 13 October 2014 at 11:33 pm (CET)
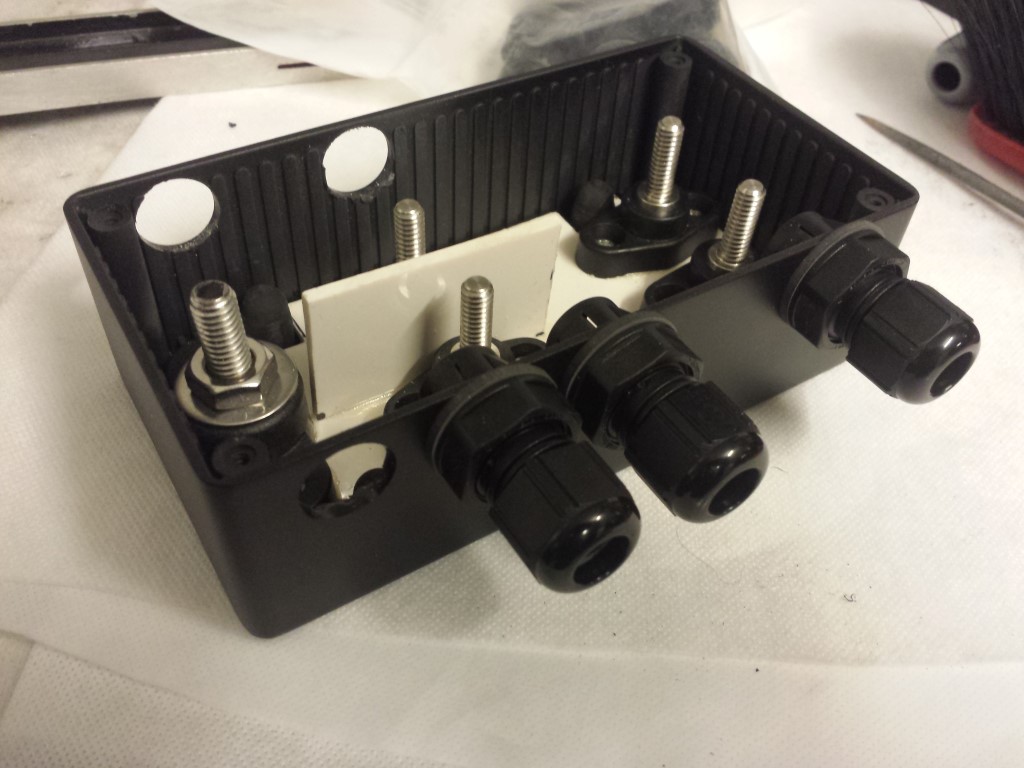
A big update again after a few days of work. I've made cable pass throughs for all of the boxes.
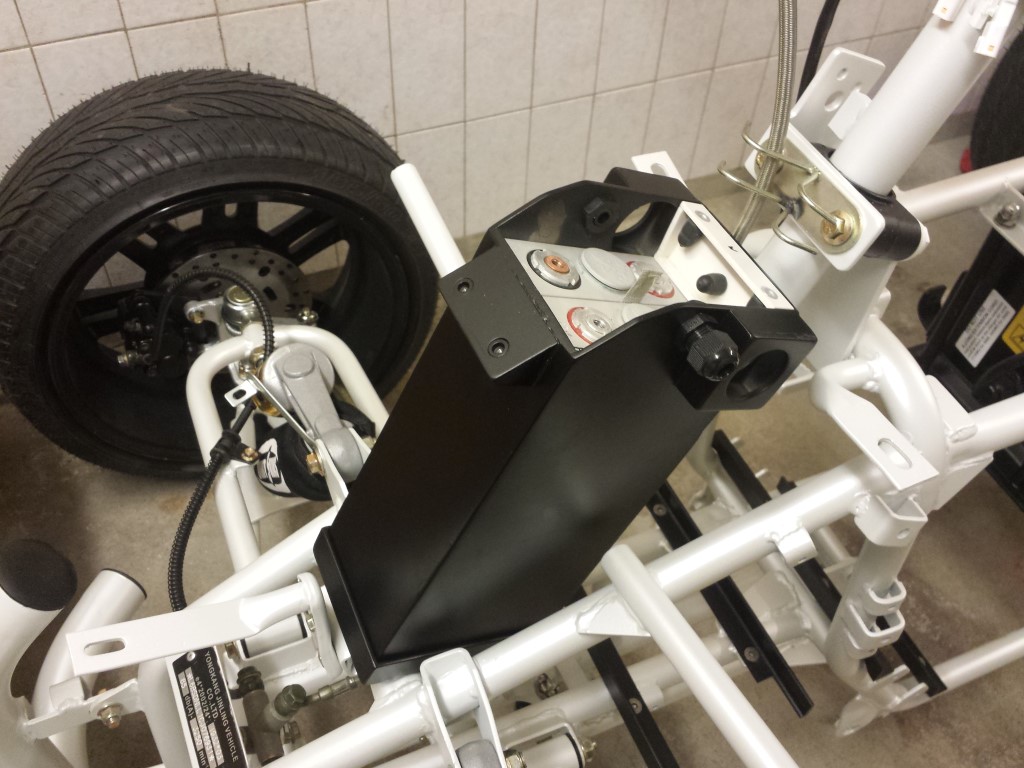
First I completely finished the one for the fuses of the charger and dc-dc converter. Drilled quite a few holes and placed cable glands in them.
This one I could also place on the frame already. Can only connect the cables once everything's on there anyway.
For the next box I didn't use a cable gland, not enough space for it unfortunately. So I just glued a small hose into there. Works pretty good as well.
For the square box I could have placed a cable gland but the space on the inside was very tight then. So I also just glued a small hose into there.
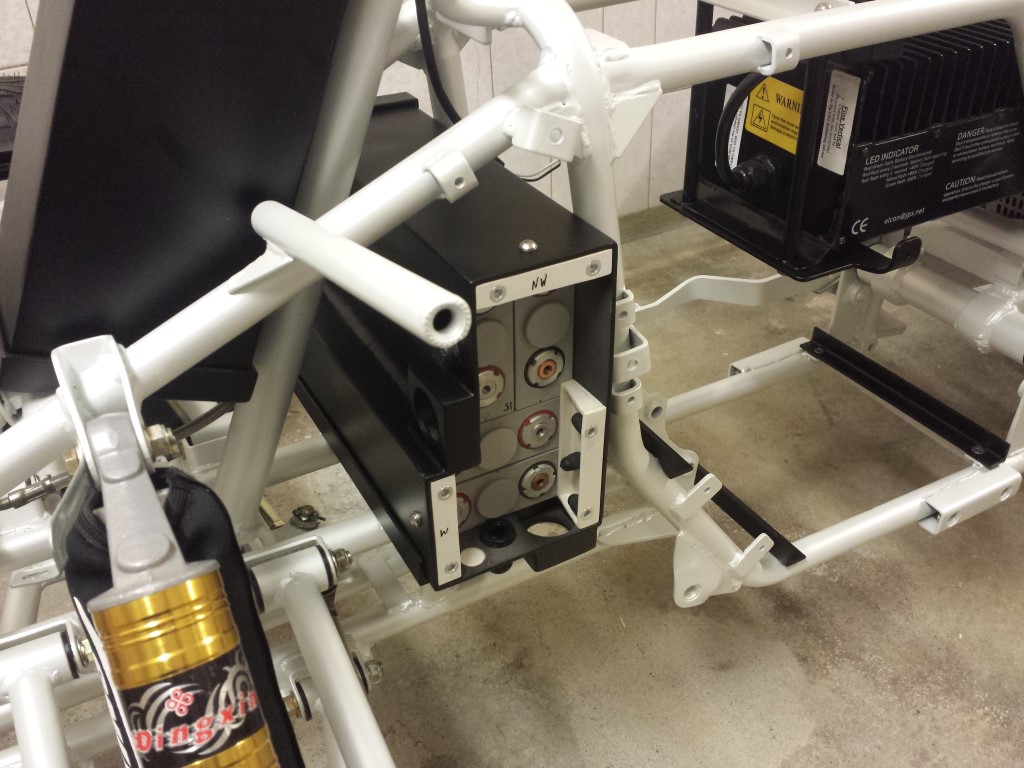
Then the bigger box. Here I was able to use cable glands everywhere.
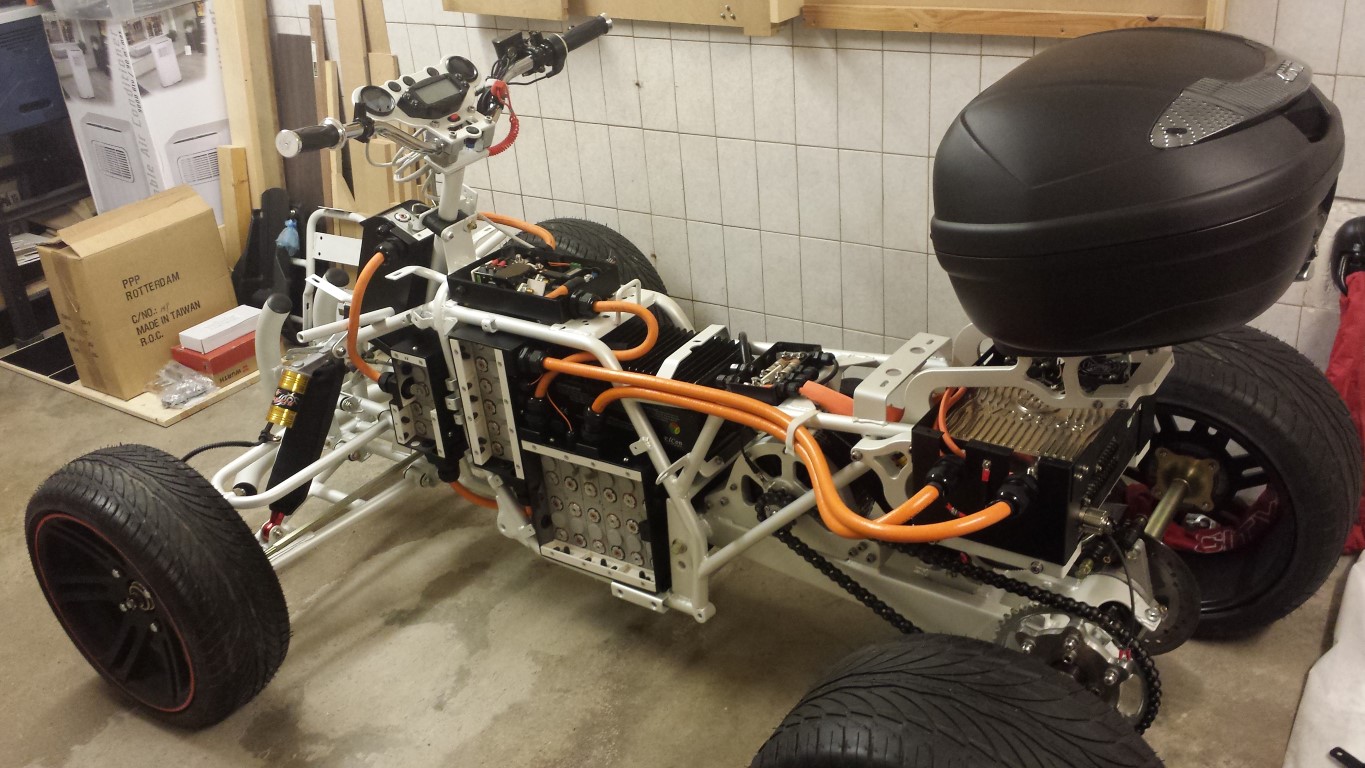
But the most important is that all of the battery boxes are all done now and finally back in the frame. I just wonder if all of the frames of corner profiles will still fit well since the paint layer is pretty thick but I'll find out soon enough.
Also placed all of the lids on them to see what it'd look like. I'd say it looks pretty nice.
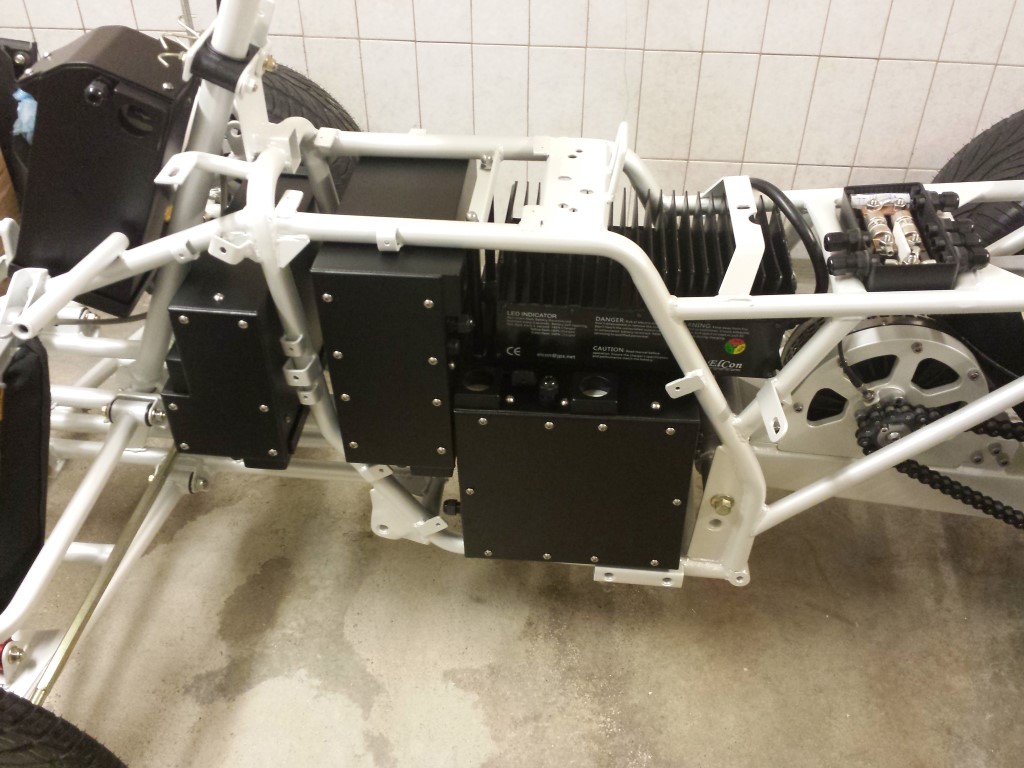
Now I just still have to place those other boxes, then I can start connecting everything. And the top case I still have to get ready as well, probably won't be easy either. But it's really starting to get a move on again.