
 Nederlands
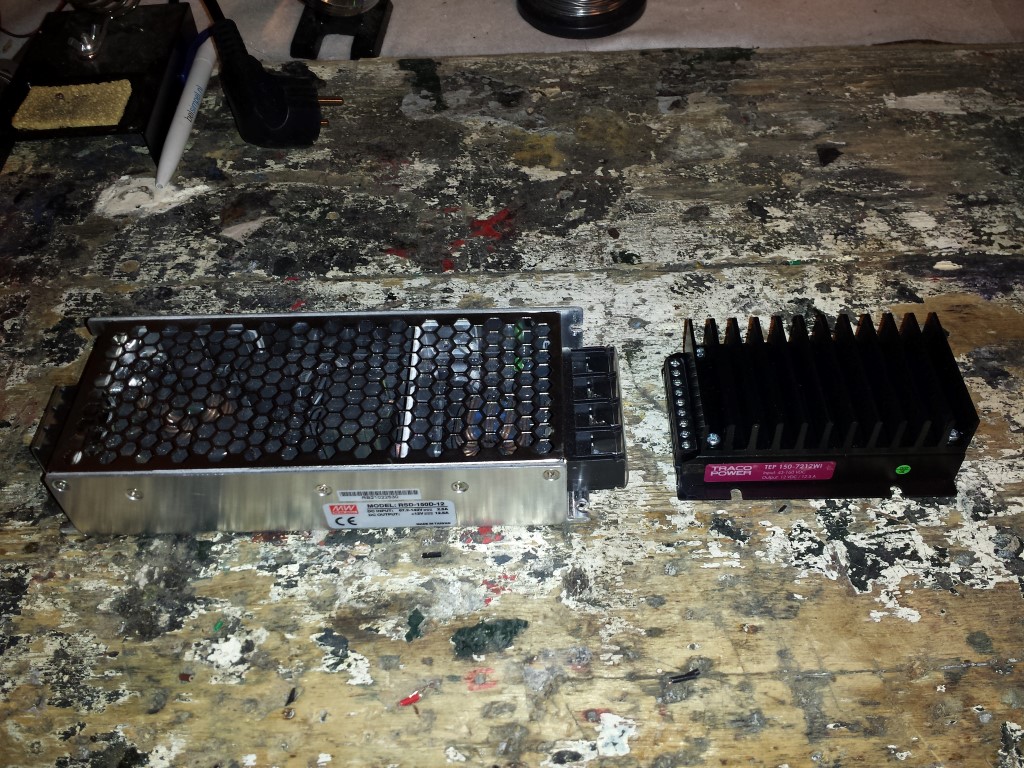
Blog / Wiring (HV)

Posted on 19 February 2015 at 12:03 am (CET)
Posted on 19 February 2015 at 12:03 am (CET)
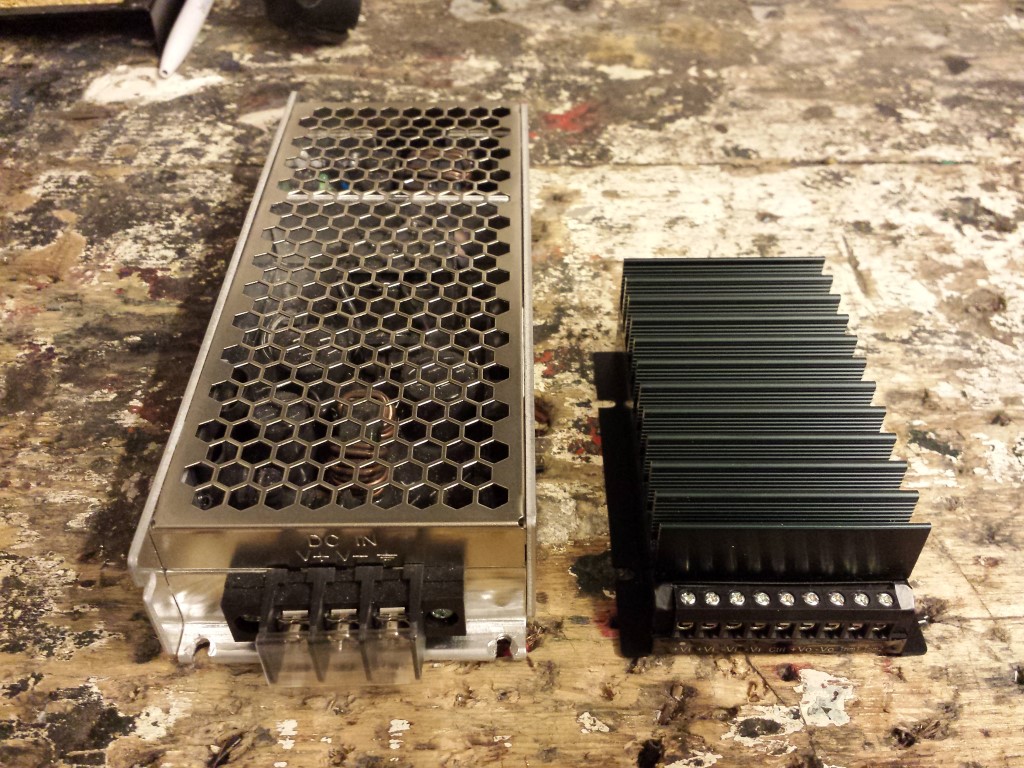
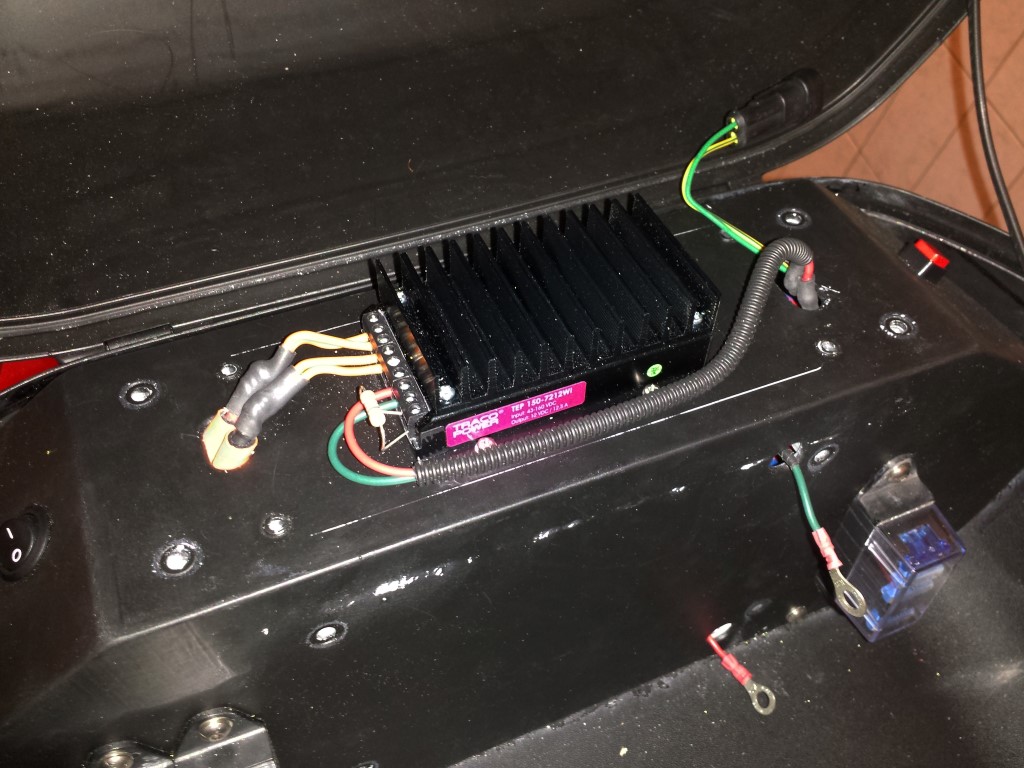
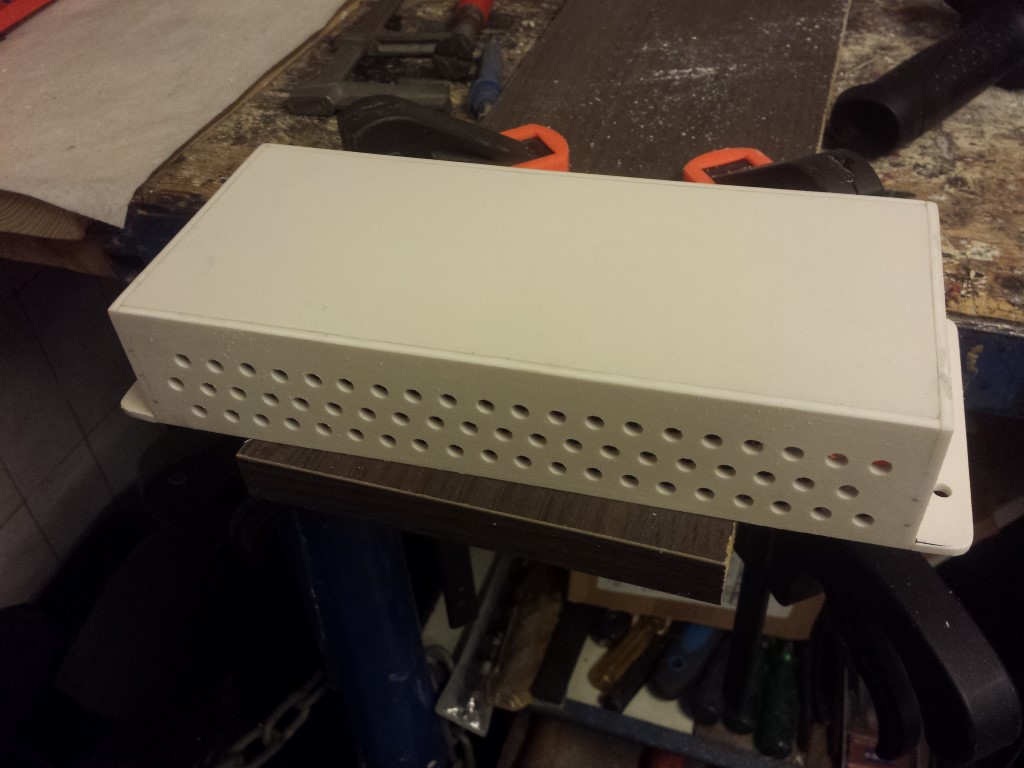
Seeing as a few things have broken during the test ride I've already had to do some repairs. The most important is the DC-DC converter. Ofcourse it was just out of warranty, already bought it a bit longer than 2 years ago so getting it replaced wasn't possible anymore. But I already wasn't satisfied with it since the output voltage was too low (11,9 V). So I bought a different one now, a Traco Power TEP 150. Same power, bigger input range, better isolated and an adjustable output voltage. Unfortunately it was a bit more expensive but for this price I don't think there's a better one. One more difference, it's a lot smaller.
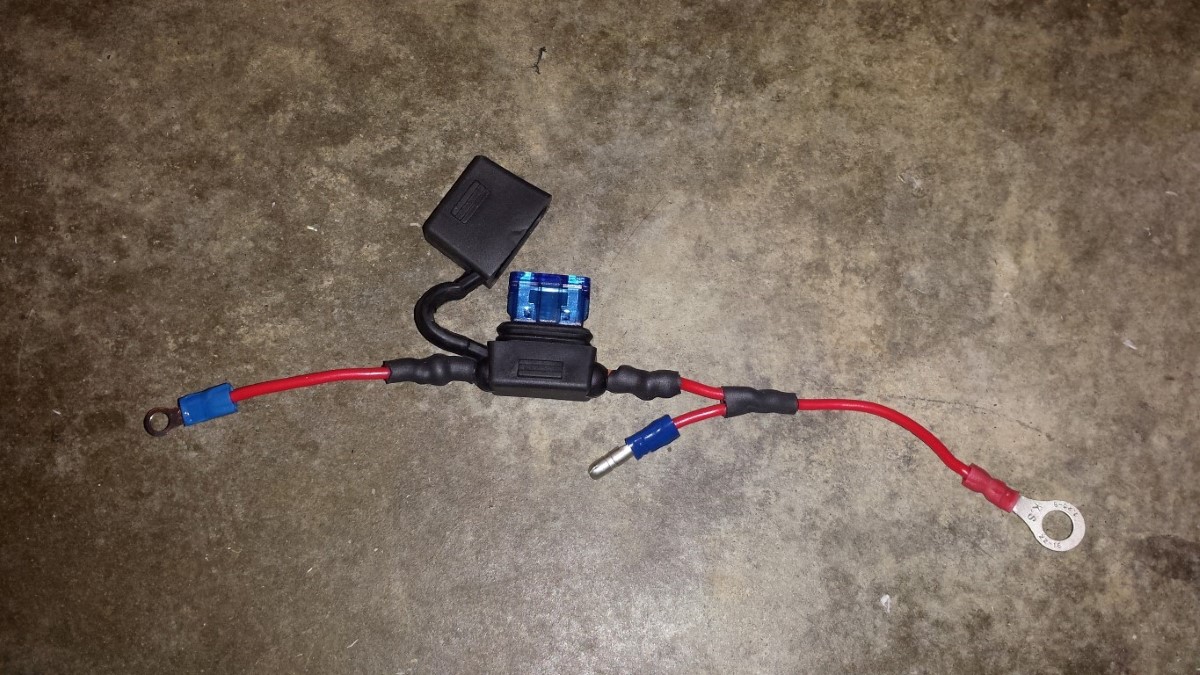
A fusebox also broke because of the heavy 12 V battery I placed in the top case during the test ride.
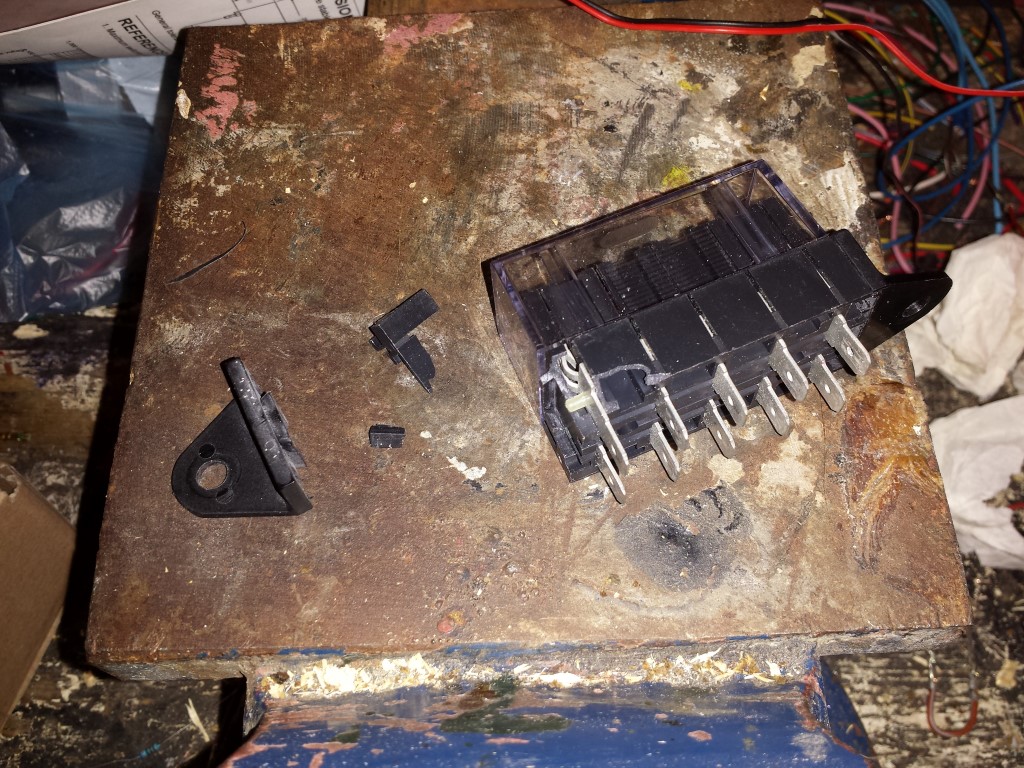
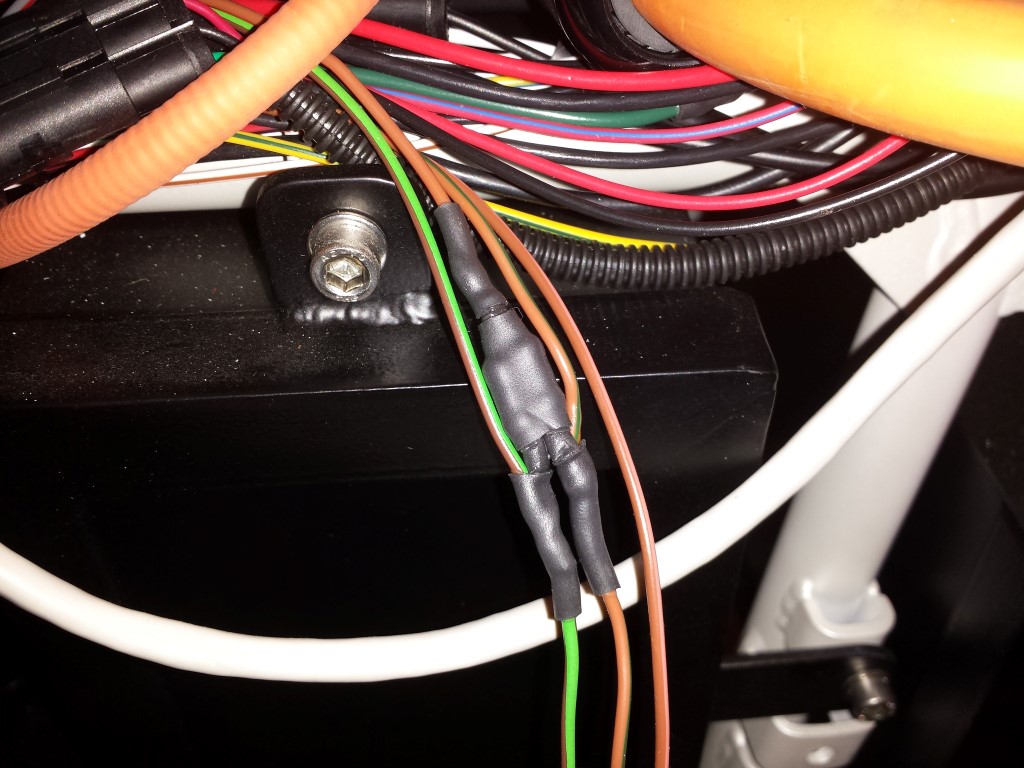
Replaced it and lengthened the wires for the new DC-DC converter.
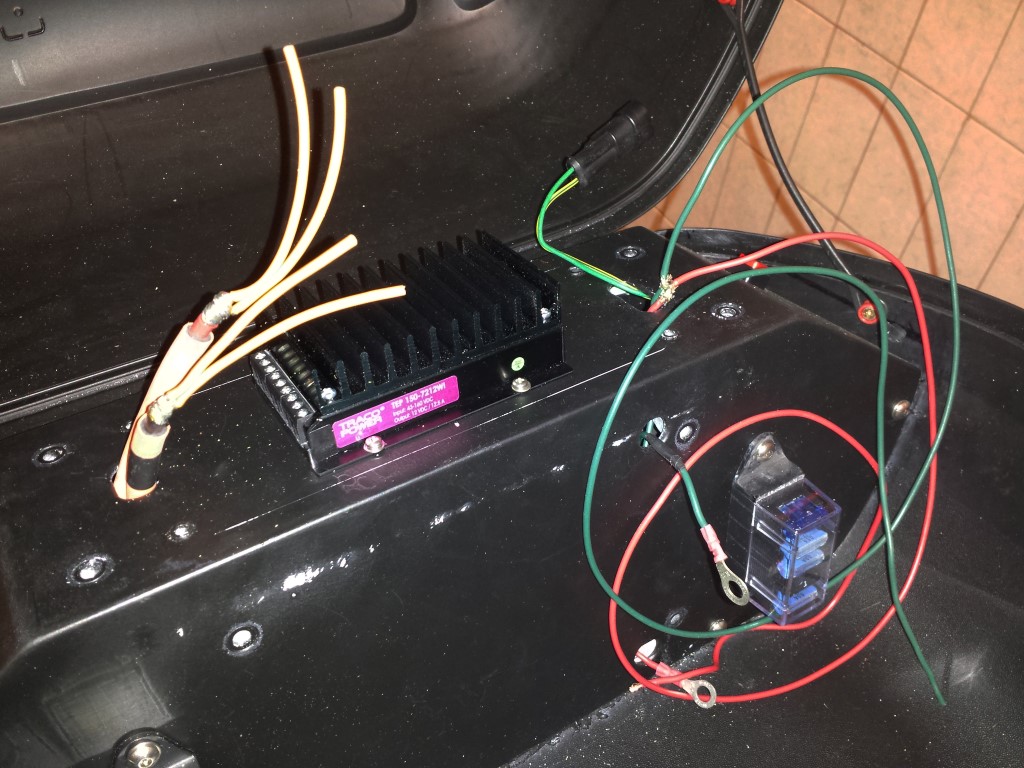
And here it's all connected. It also has the option to turn it on and off with a 12 V signal but for now I'll leave it always on.
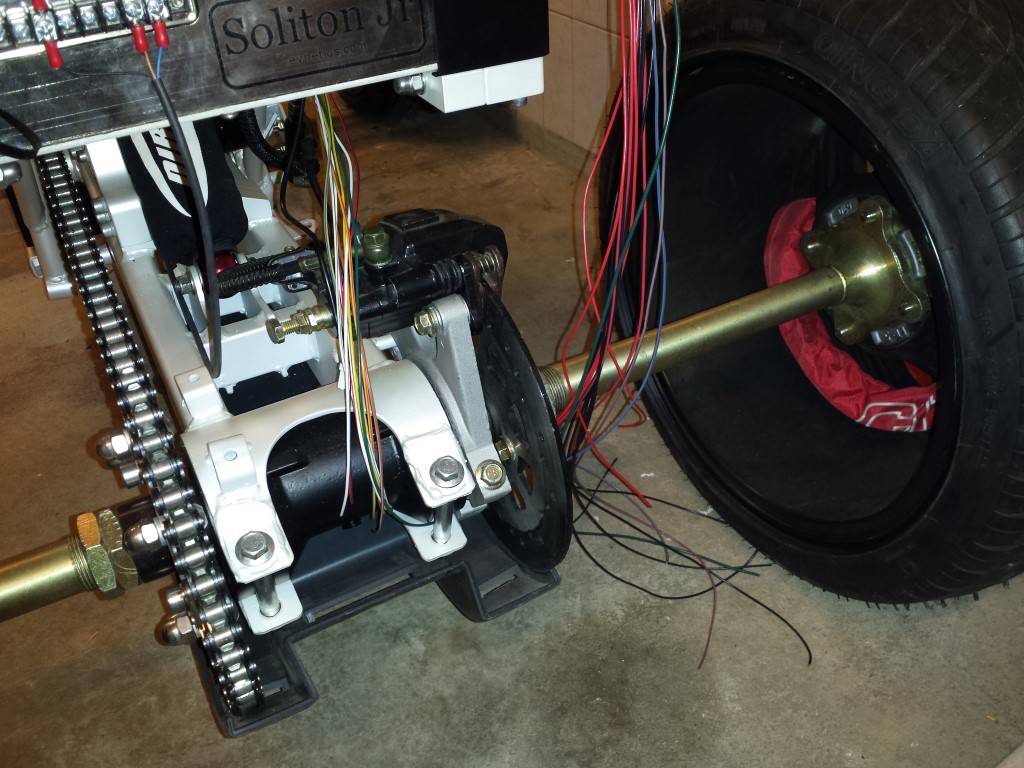
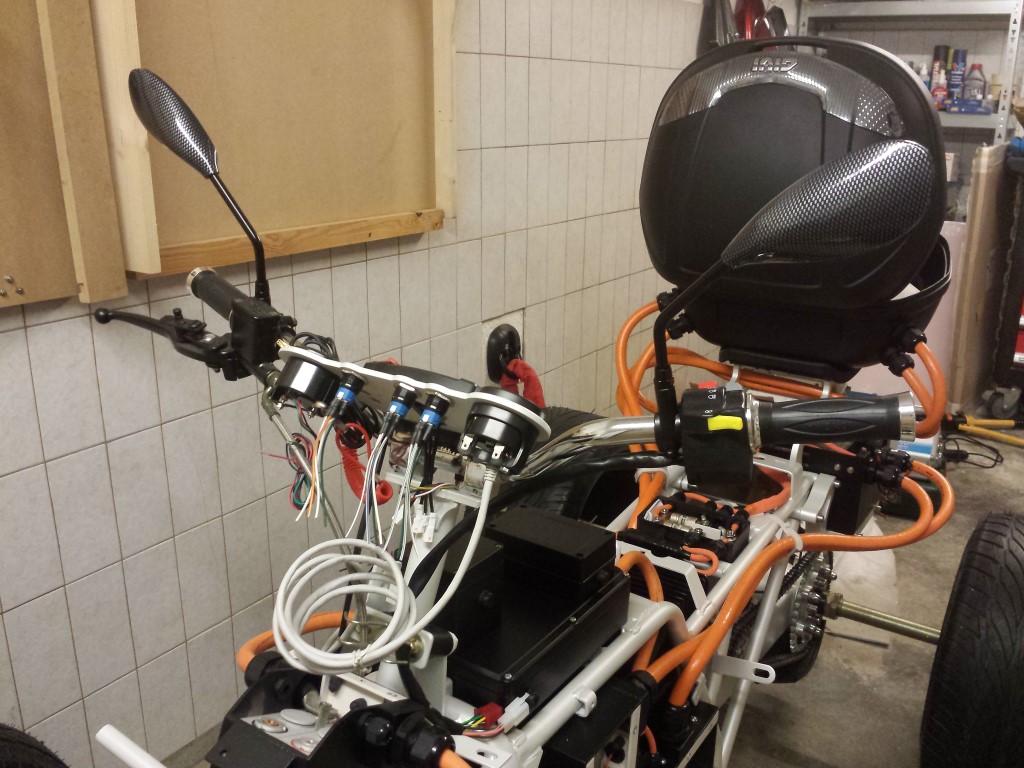
Then something I forgot about. Before the test ride I still wrapped the whole wire harness with wire hoses. Quite a lot of work with so many wires coming together.
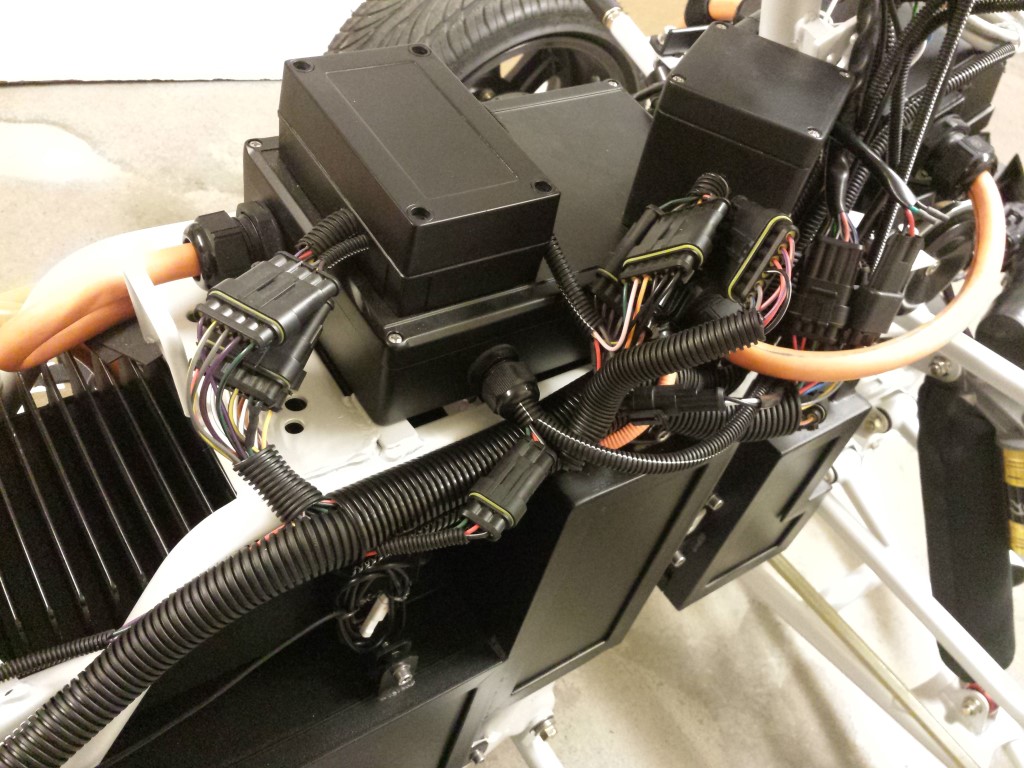
After that I put tape all around it.
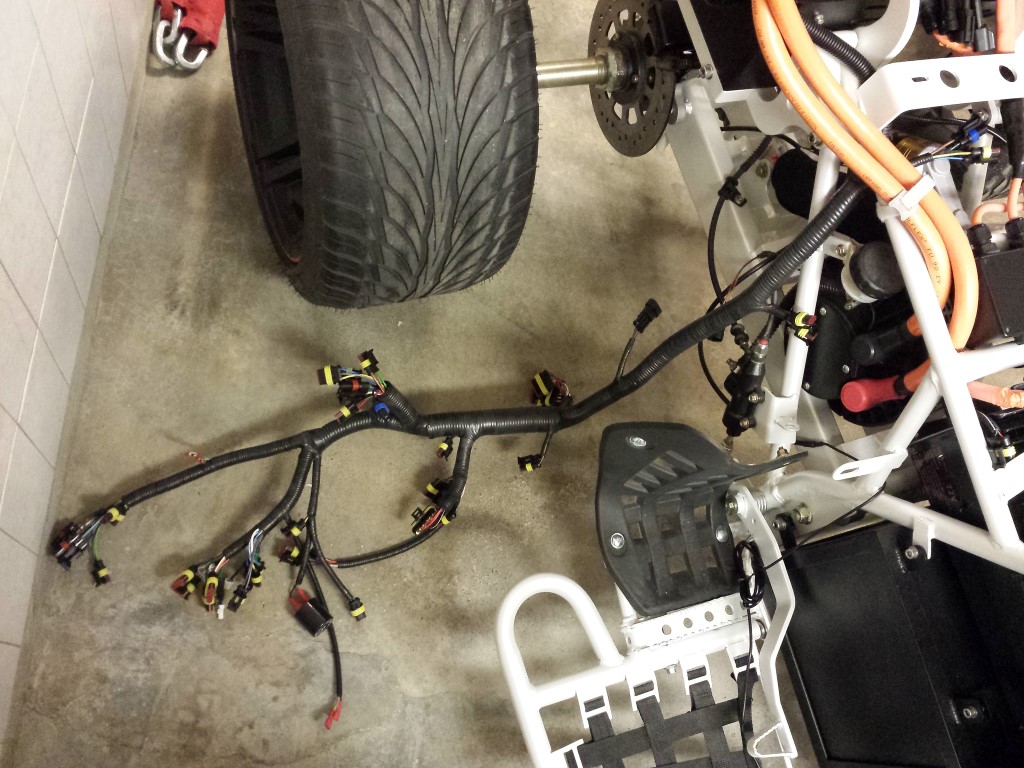
And placed it back again. Think it looks pretty nice like this.
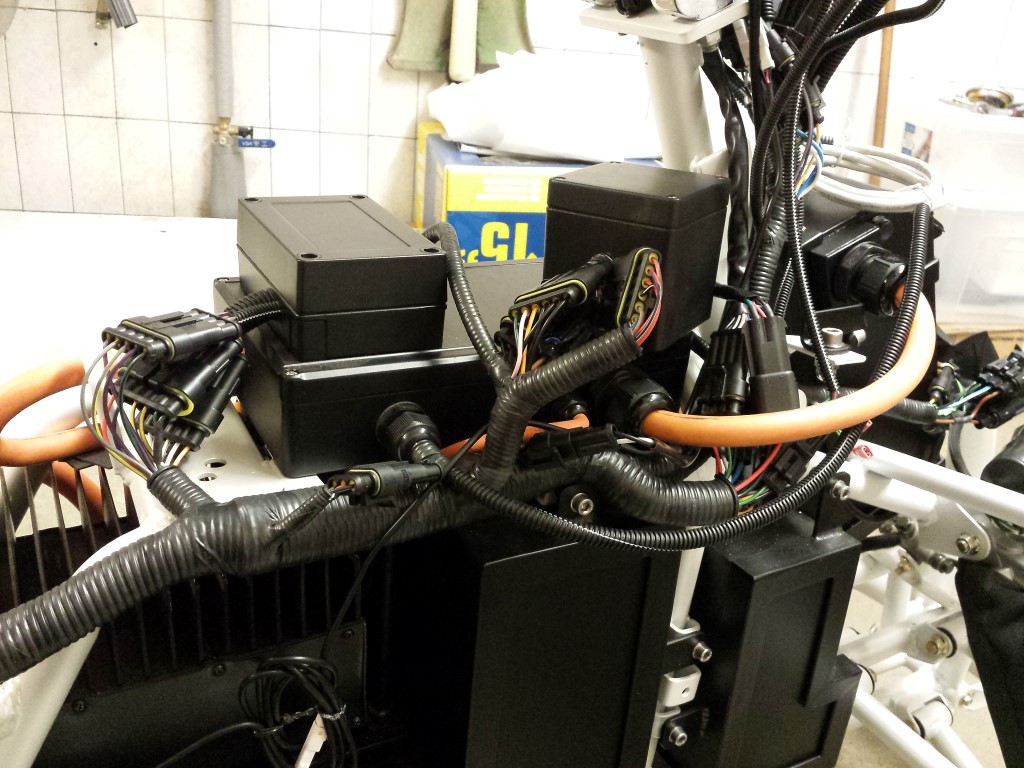
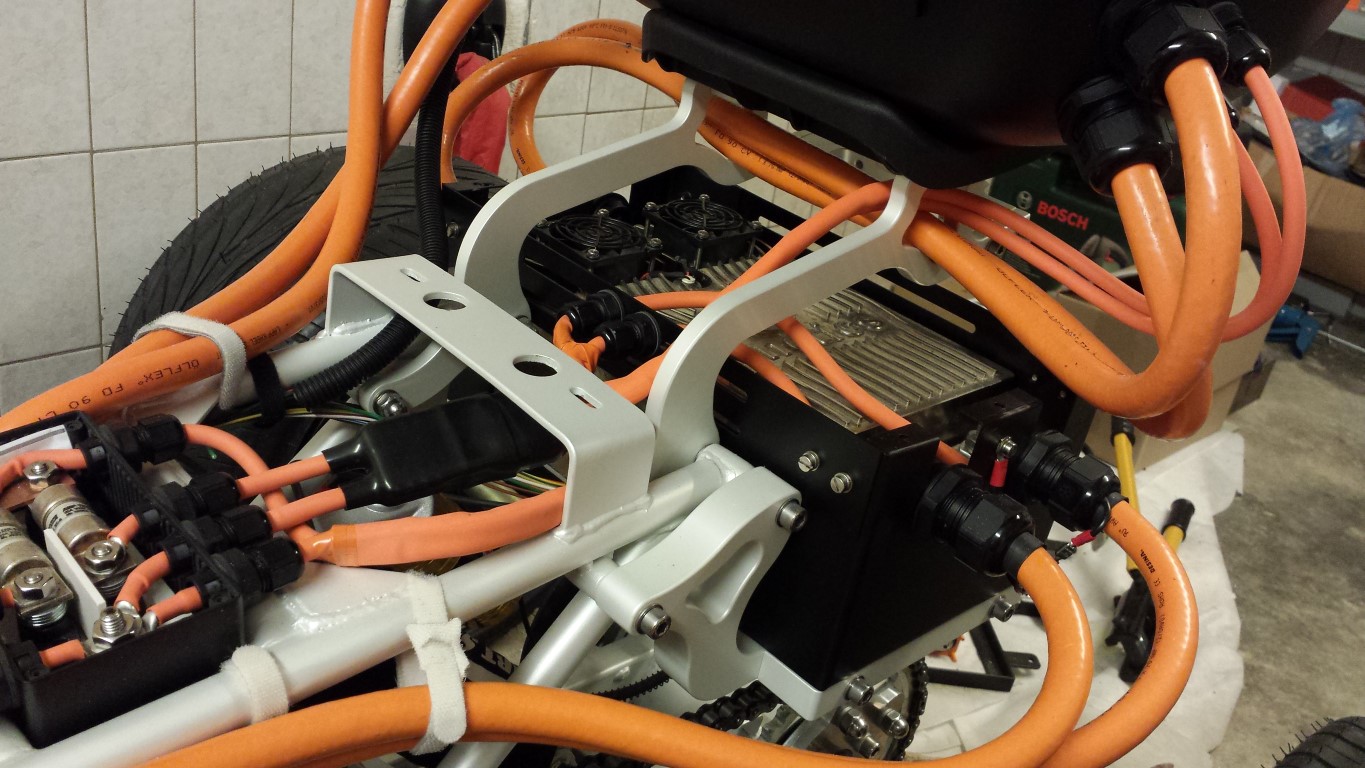
Currently working on putting wire hoses on all of the orange wires as well. It's for added safety and probably necessary again for the road approval test at the RDW.
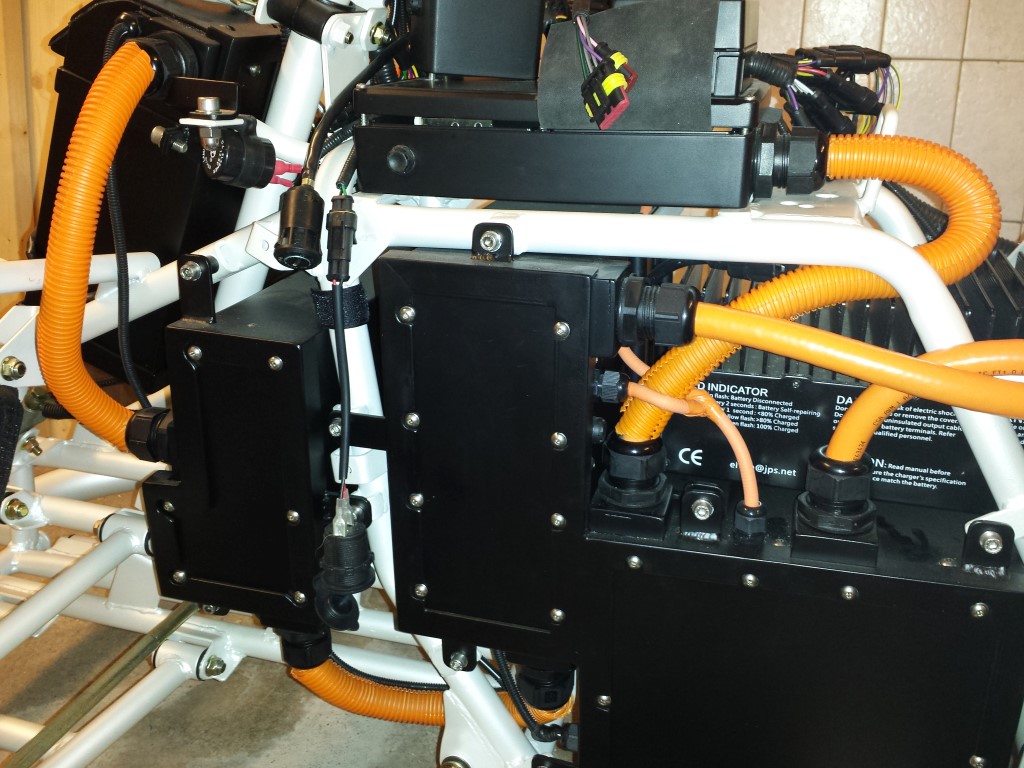
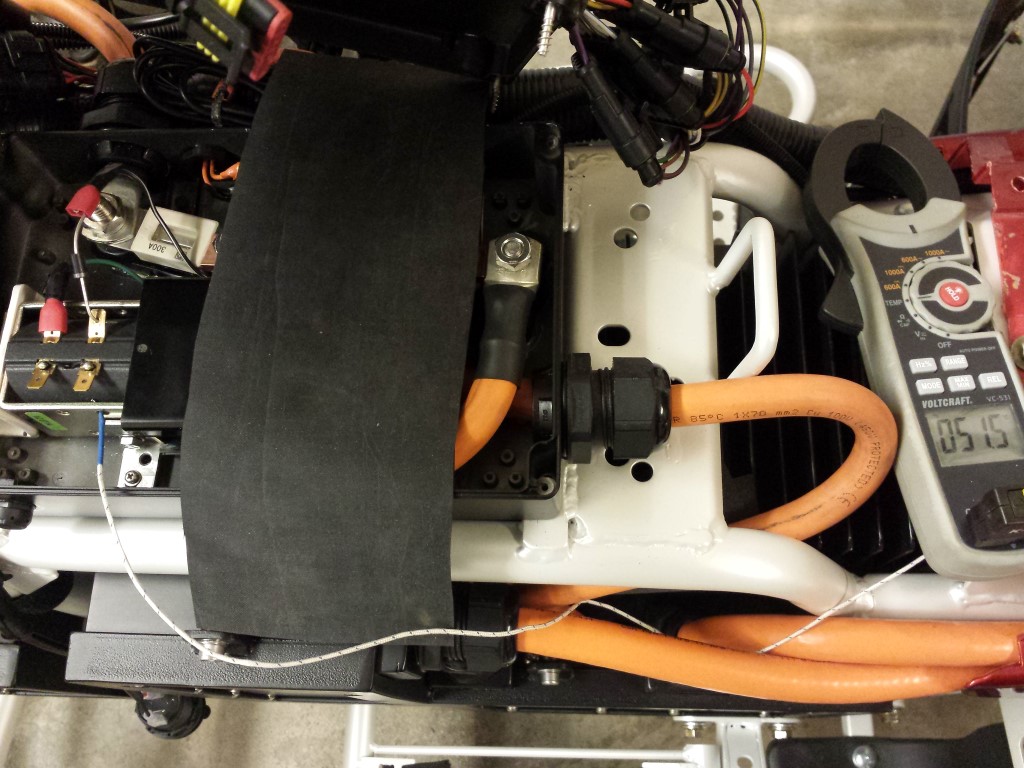
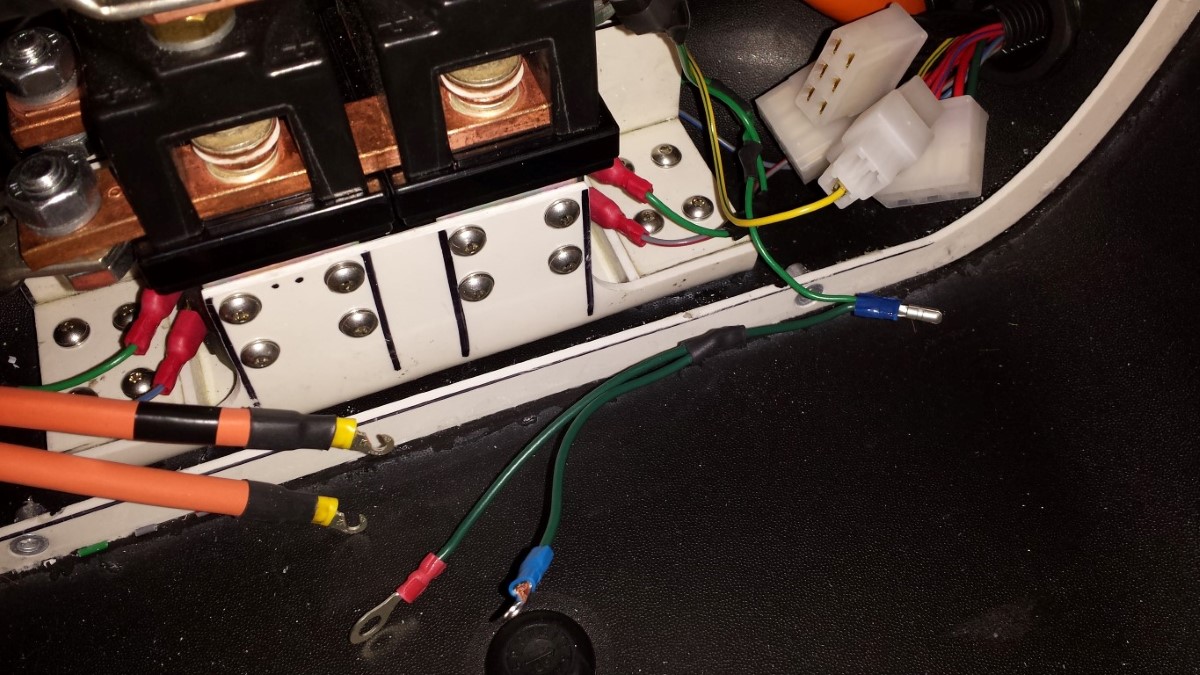
The only 2 problems I still have right now are a contactor that's getting quite warm and not getting the temperature sensor in the motor to work with my Trailtech display. For this sensor I still have to contact Trailtech to see if there's a way to calibrate.
As for the contactor I've already contacted the supplier and for now they say that this is normal. Just still have to give them the complete part number so they can confirm it. But most likely it's working just fine, I just still think it's getting too warm myself. Still have to find a solution for this so it gets less warm. It now goes up to about 51,5 degrees celcius with an opened enclosure. With the enclosure closed it'll probably go up to about 70-80 degrees celcius. For the contactor itself this might not be a problem but for the other components that I've placed in the same enclosure it might.
That's about it again. Hopefully I can solve these last few things quickly so I can already make the second test ride at real full power very soon.
Posted on 12 January 2015 at 06:35 pm (CET)
Posted on 12 January 2015 at 06:35 pm (CET)
It's time for another new update.
The past few days I've been busy connecting all of the battery cells to eachother. It all went well, for extra safety I already isolated all of the tools with some tape. For the rest you just have to stay very focused.
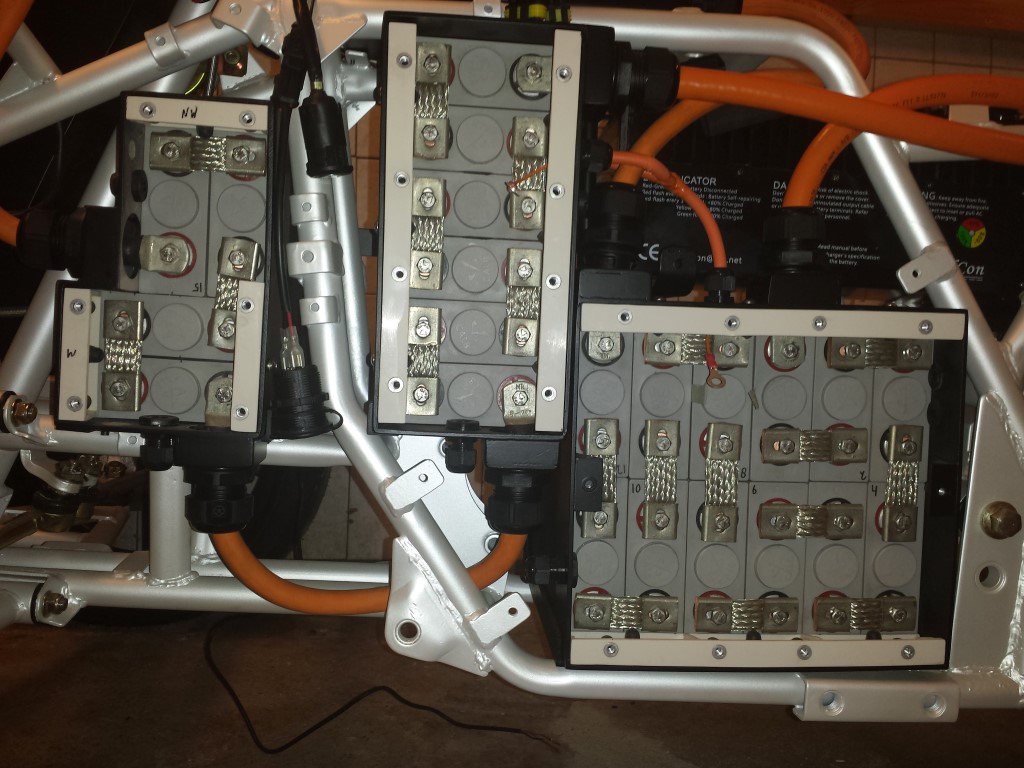
But that's not all yet, I also started on the BMS (Battery Management System).
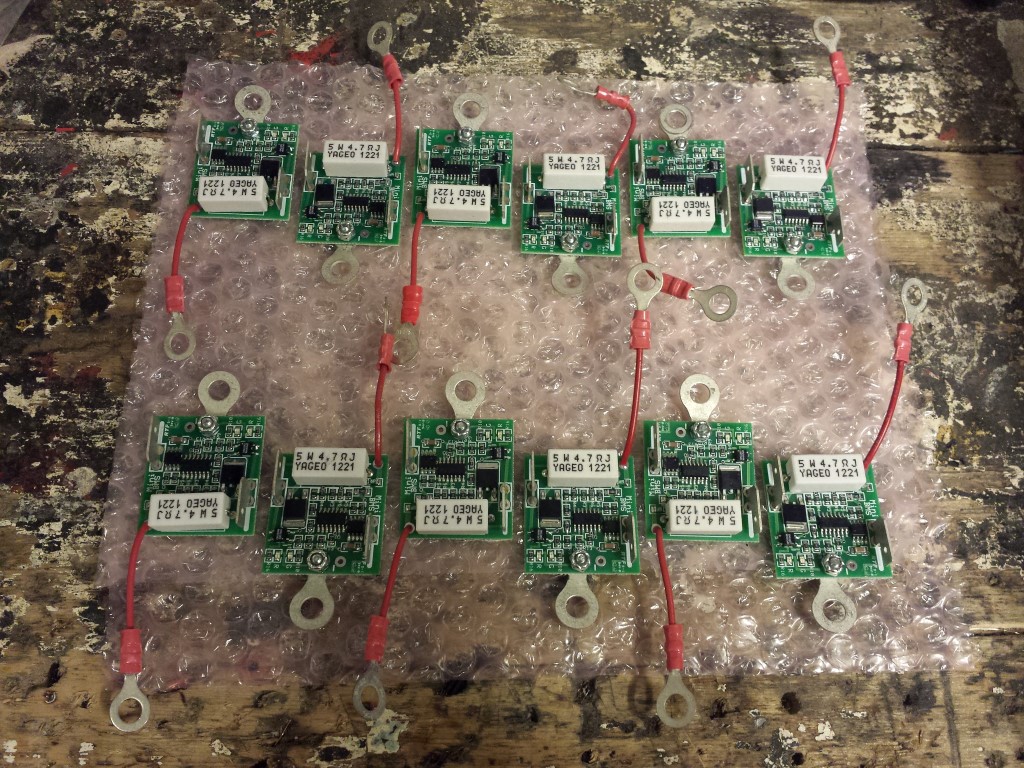
First I made all of the wires exactly to size.
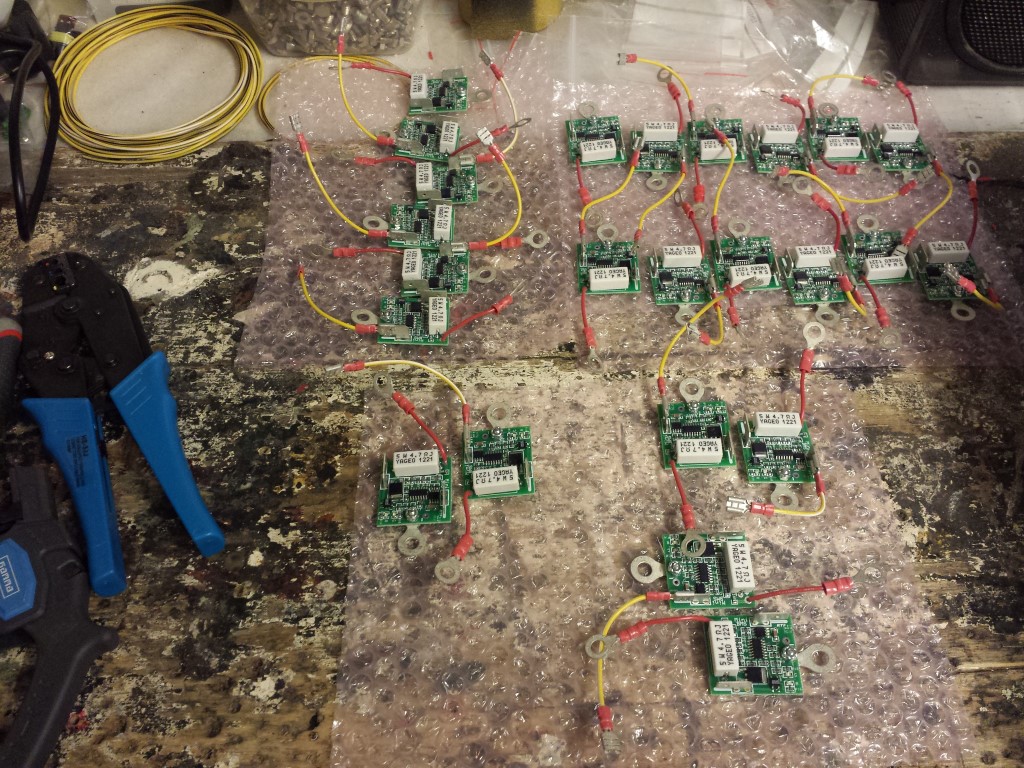
Then I connected them all to the battery cells and to eachother. Thought it'd be a lot of work but it wasn't all that bad. It was the first time something actually took less time than I expected, usually it always takes longer. They're also connected inbetween the battery boxes, this was actually the hardest since at one part I had to push 4 wires through that wire loom. The size I used actually is for only 3 wires. But it all went fine anyway.
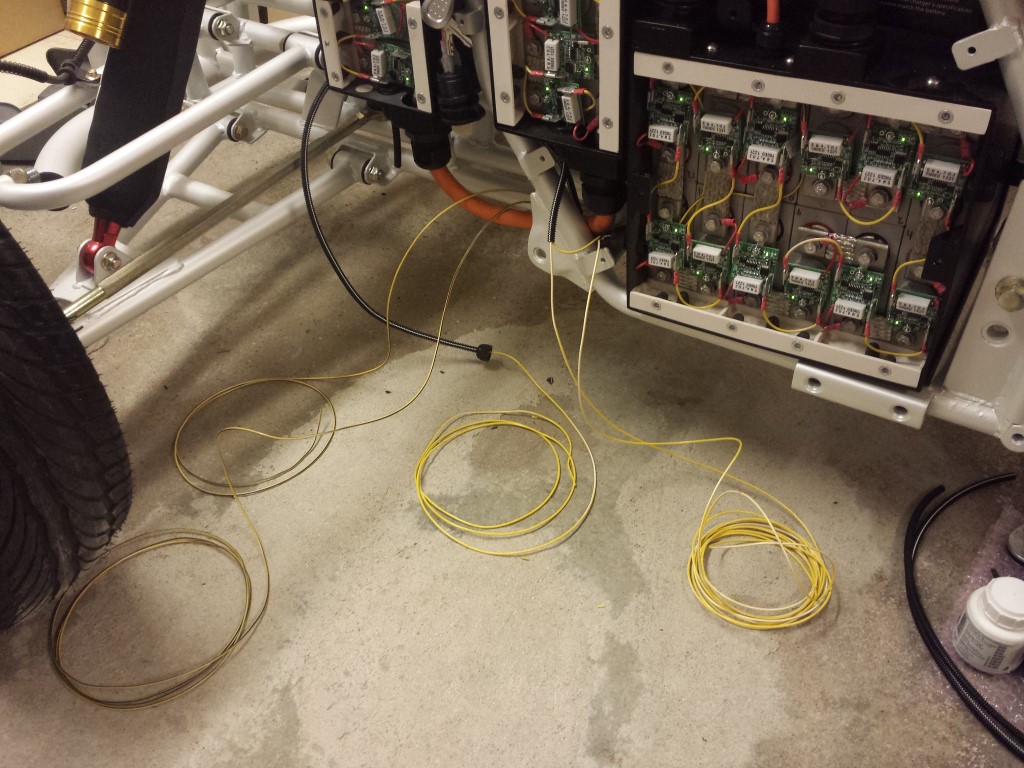
Looks pretty nice too. The green LED's show that they're connected properly and that the battery cell is at the right level.

In the dark it also looks nice with all of those LED's. Just too bad that you won't see any of it anymore once the battery boxes are closed.

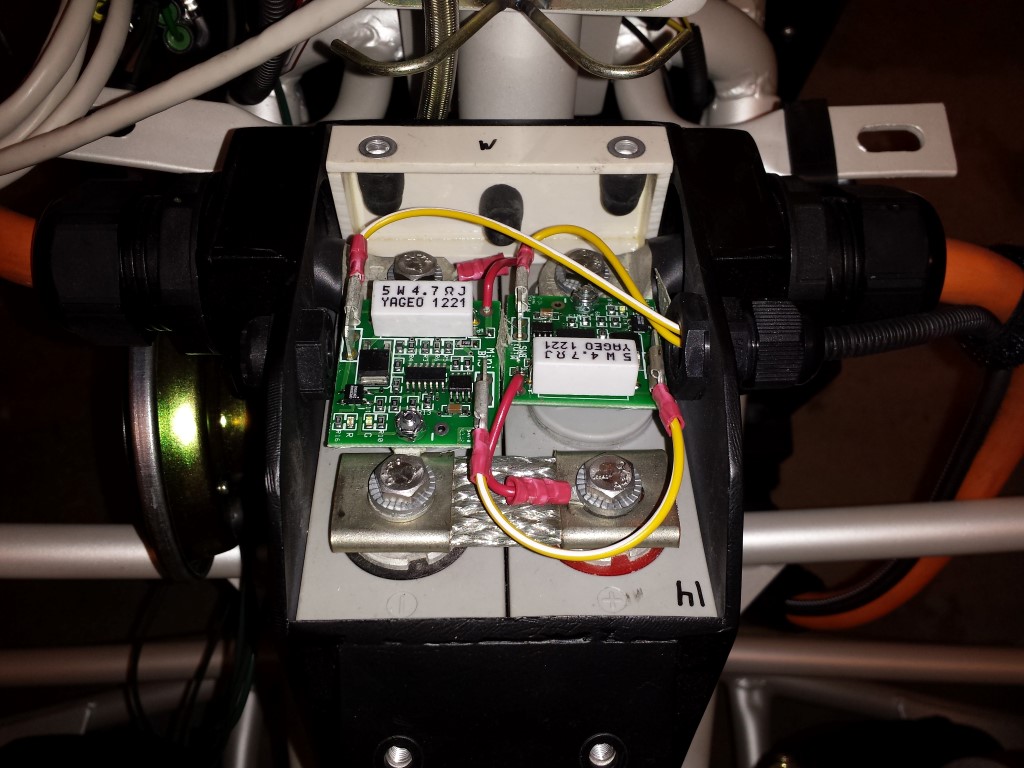
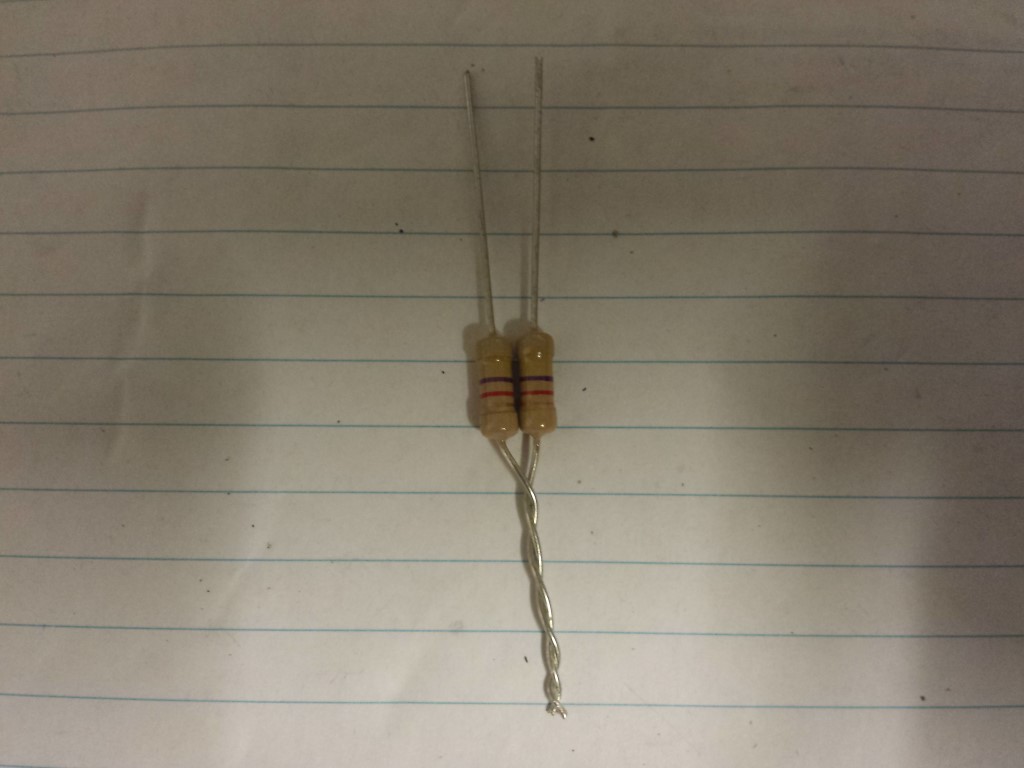
I also connected the throttle now. I used 2 resistors for this and one extra wire, these are again for the BMS. These will make sure that there's not much power available anymore once the battery cells drop below a certain level. This way you won't immediately destroy the battery cells while still being able to get off the road safely.
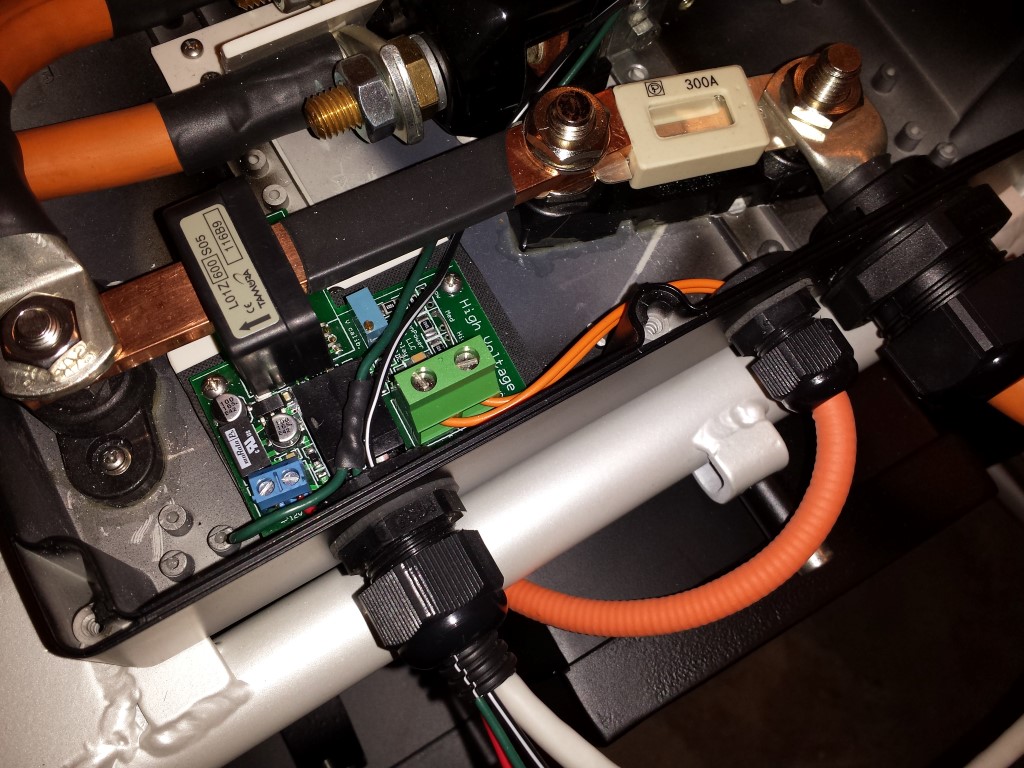
Also placed all of the fuses to be able to test the 12V system. Meanwhile I've already broken one and replaced it, apparently the contactors needed a little more power.
And I can already say that the 12V system is working perfectly. I just had to make a small modification with a relais, for the rest everything seems to be fine. I just have a weird problem where the controller sometimes doesn't give any power the motor after I let it run in reverse and then forward again. Could be that there's just not enough voltage since everything was connected to a 12V battery. Just have to connect the wires to the controller again and then I can try with almost 80V, see if it works better then.
Posted on 5 January 2015 at 01:43 am (CET)
Category: Wiring (12V), Wiring (HV)
Posted on 5 January 2015 at 01:43 am (CET)
Category: Wiring (12V), Wiring (HV)
First off I'd like to wish all readers a happy new year. Hopefully 2015 will be a very good year for all of you.
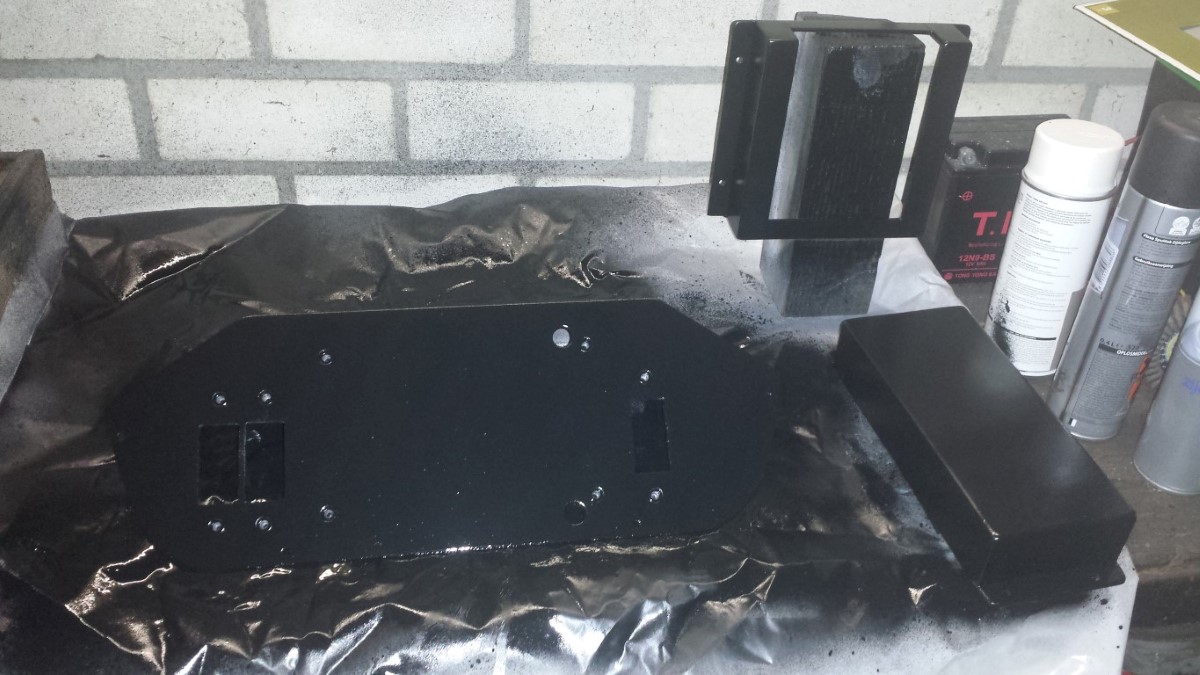
The first update this year and it already starts good. I was able to completely finish the top case this weekend.
The protective covers were all sprayed black. I did this myself and it actually still turned out pretty nice.
I still want to be able to detach the plates so I bought some connectors again for all of the wires. The top case itself is already waterproof so I don't need waterproof connectors for this. First I put all of the contacts on the wires.
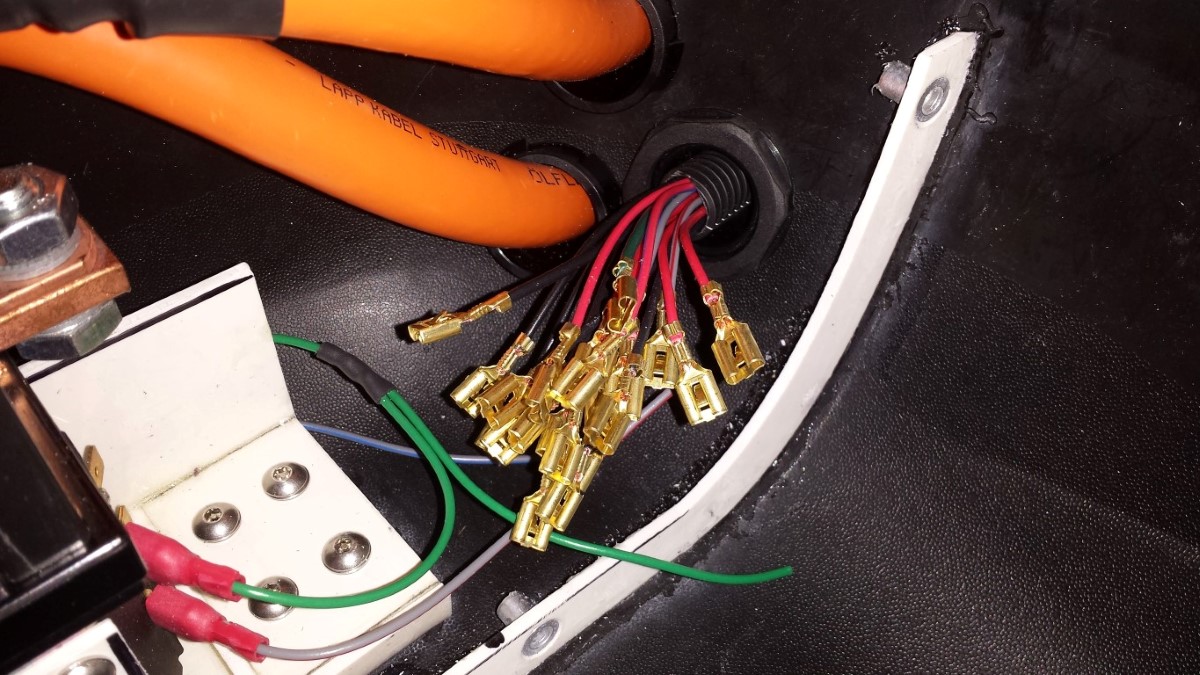
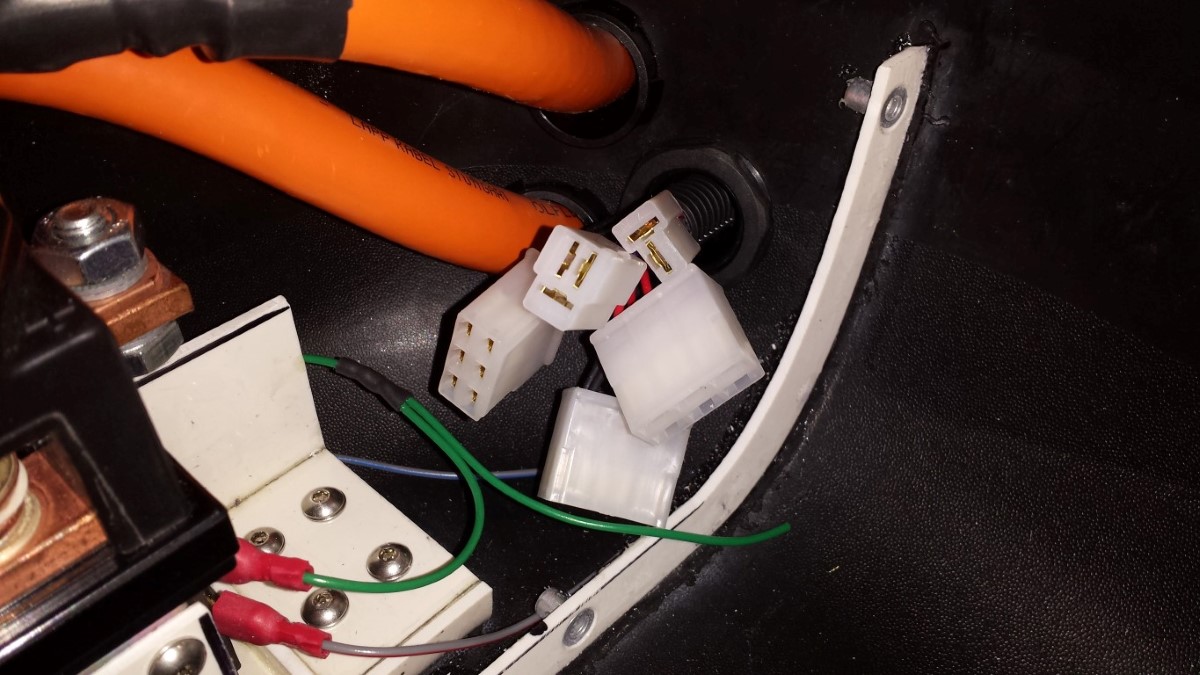
With the connectors on.
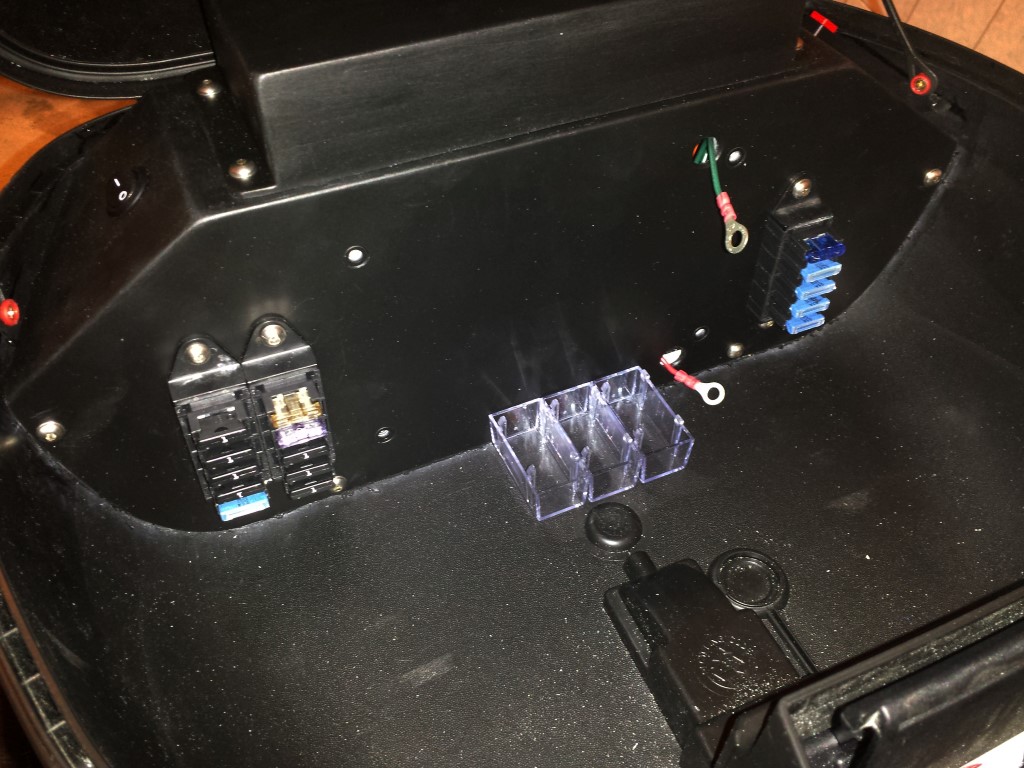
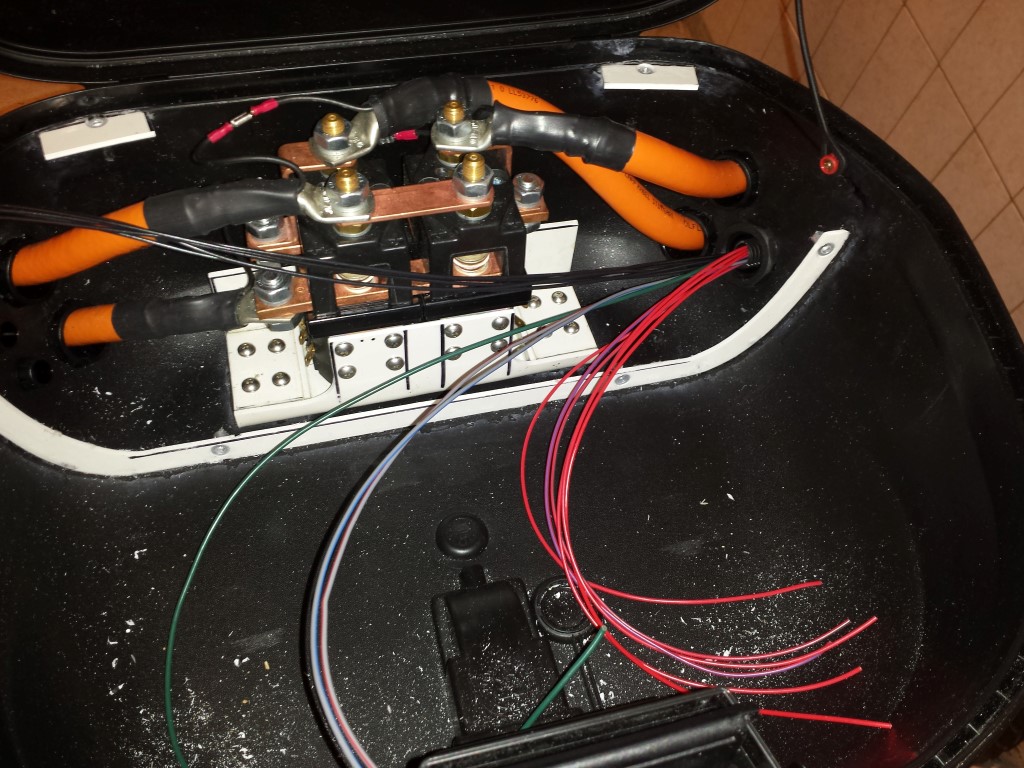
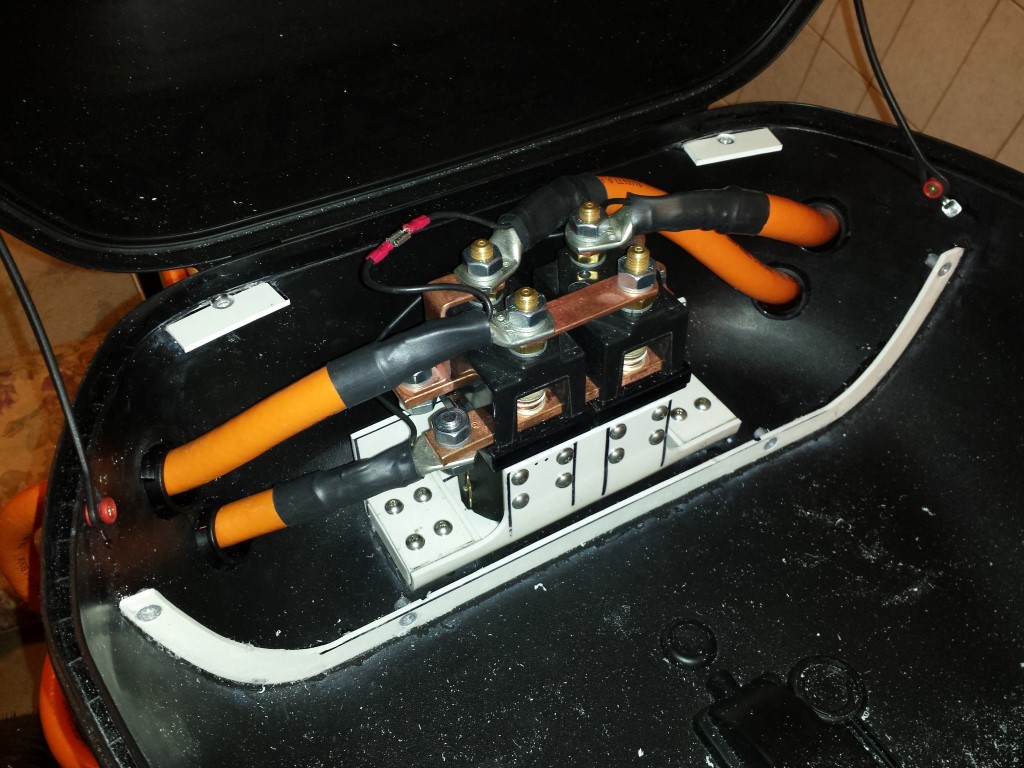
Since I made a complete new wire harness I wanted to add some extra safety. I bought a few fuse boxes which all seperate circuits are fused with. Was a lot of work to connect this all but it'll be very nice when it's in use.
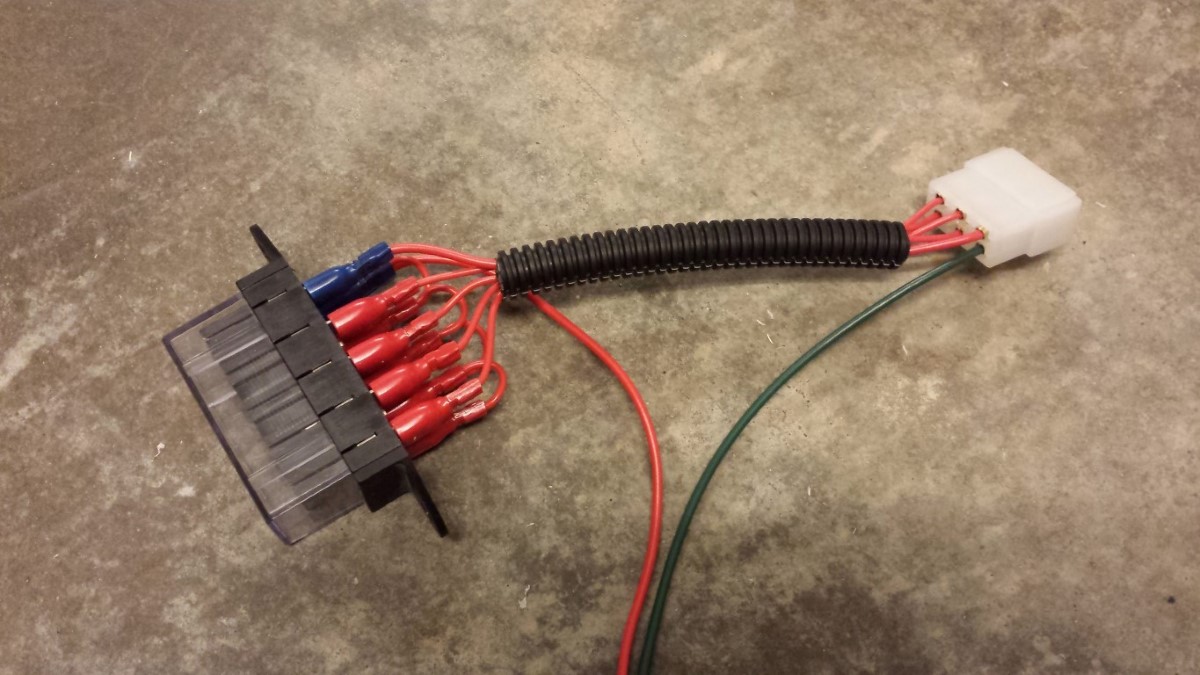
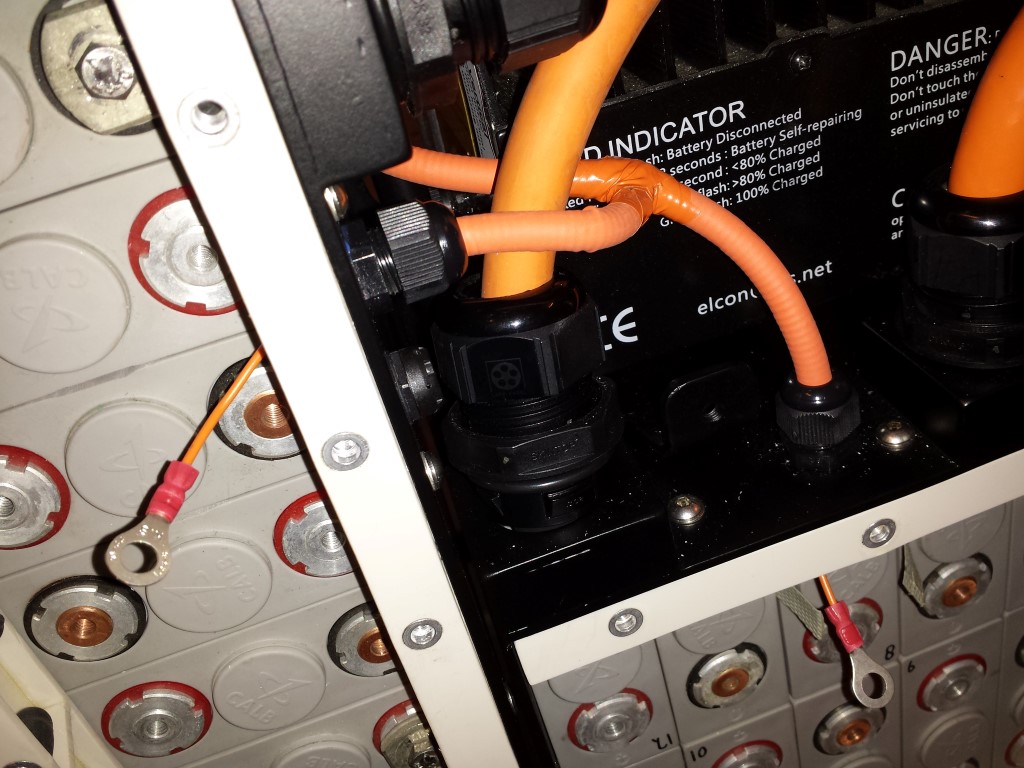
The wires between the DC-DC converter, 12V battery and wire harness were also very fun to make exactly to size. The + wire of the DC-DC converter also has a seperate fuse.
Attached everything to the protective cover. Now you know what all the holes I made in it are actually for.
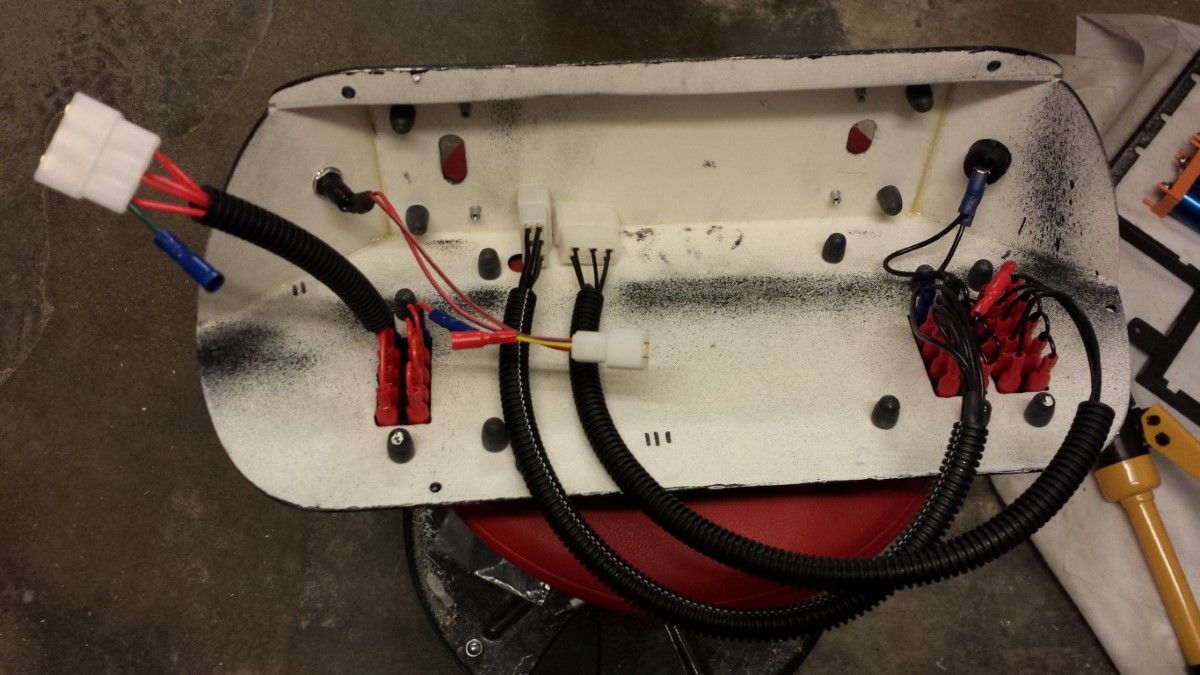
Was quite some work to get everything connected before I could attach the plate but finally it looks very nice now.
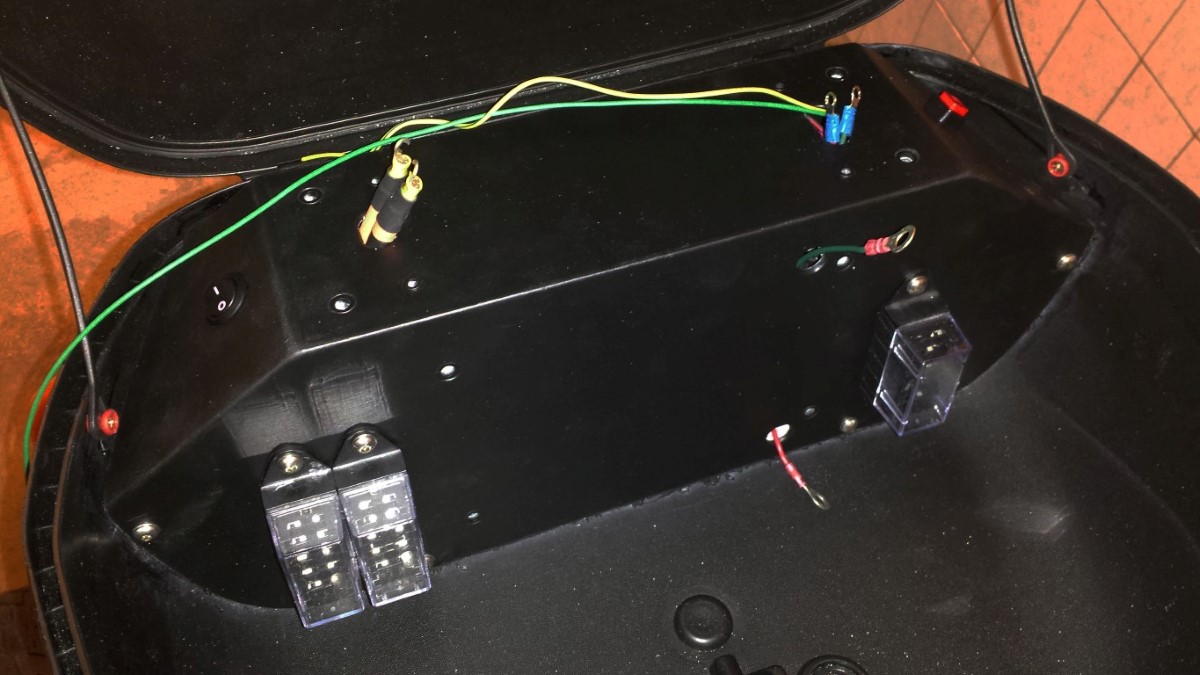
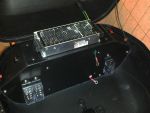
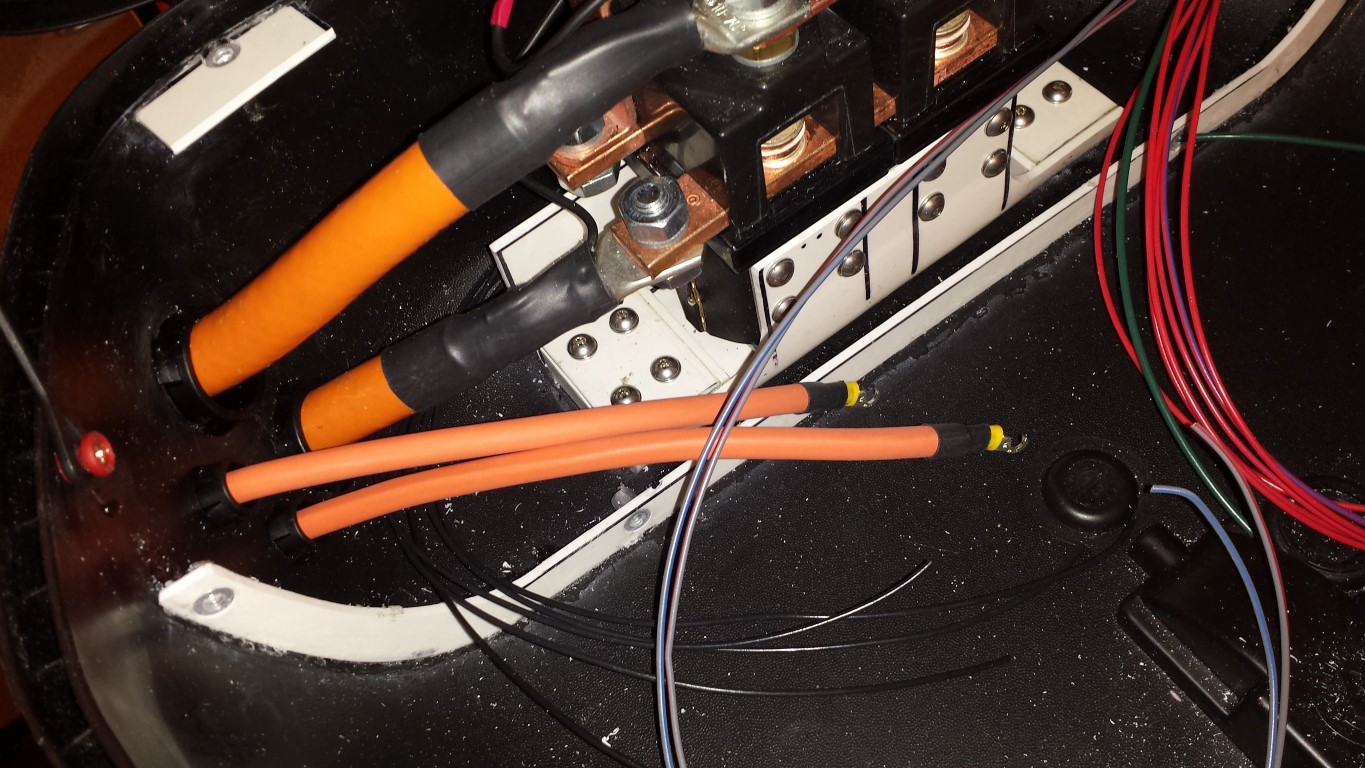
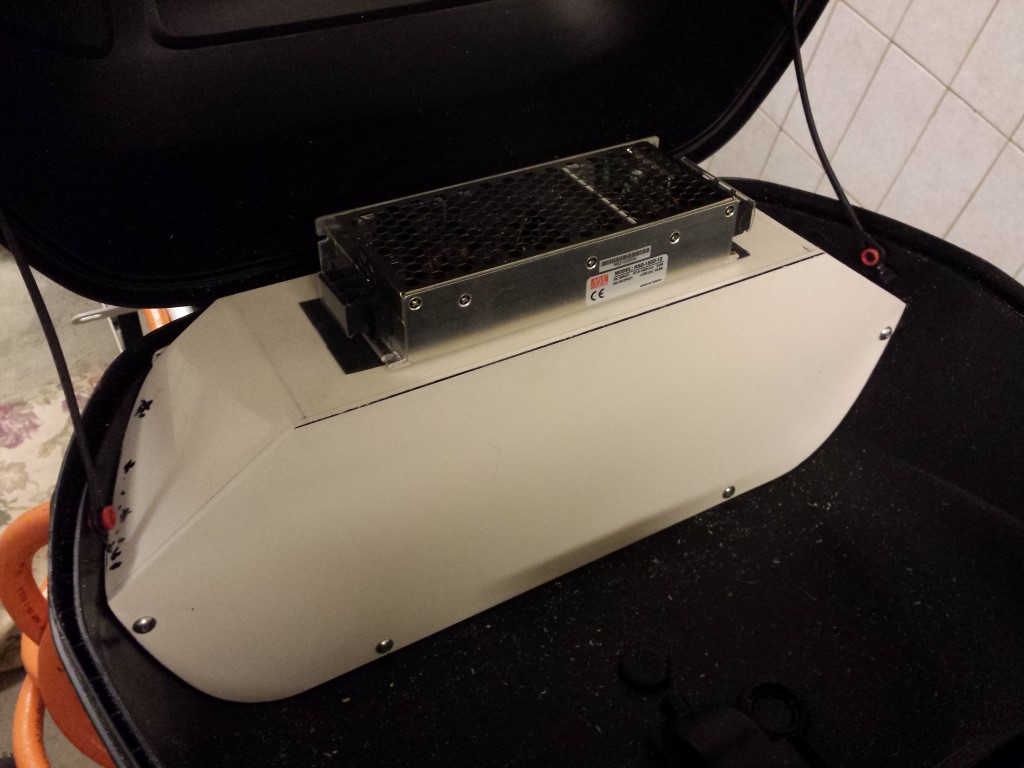
DC-DC converter attached and connected.
And another protective cover on there.
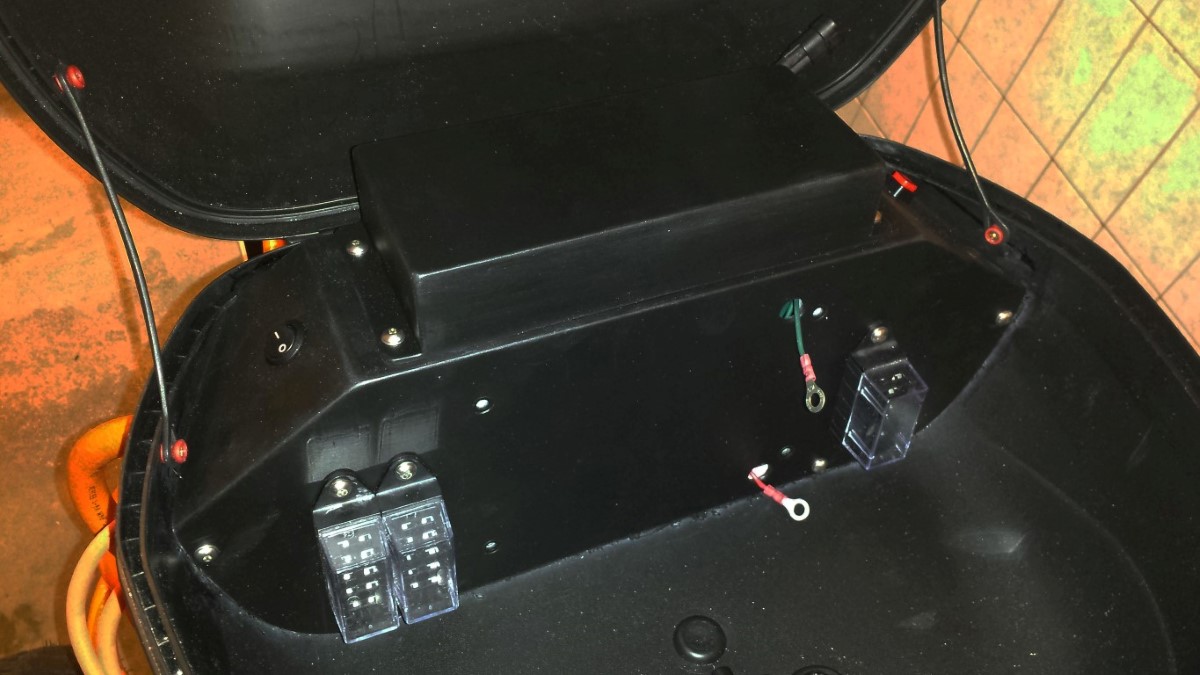
The 12V battery I won't connect for now. I did this for a short moment but then I saw that the DC-DC converter actually draws a little power. So I can only connect it once I have the whole battery pack connected so the DC-DC converter can keep the 12V battery charged. That's what I'll be busy with the coming days. Will be a bit more exciting since I won't be working with 12V anymore but 72V.
Posted on 30 December 2014 at 11:52 pm (CET)
Category: Wiring (12V), Wiring (HV)
Posted on 30 December 2014 at 11:52 pm (CET)
Category: Wiring (12V), Wiring (HV)
Just a quick update before the end of the year. I continued with the wiring again. The wire harness itself is pretty much done. Just still had to connect everything at the rear to the controller and in the top case.
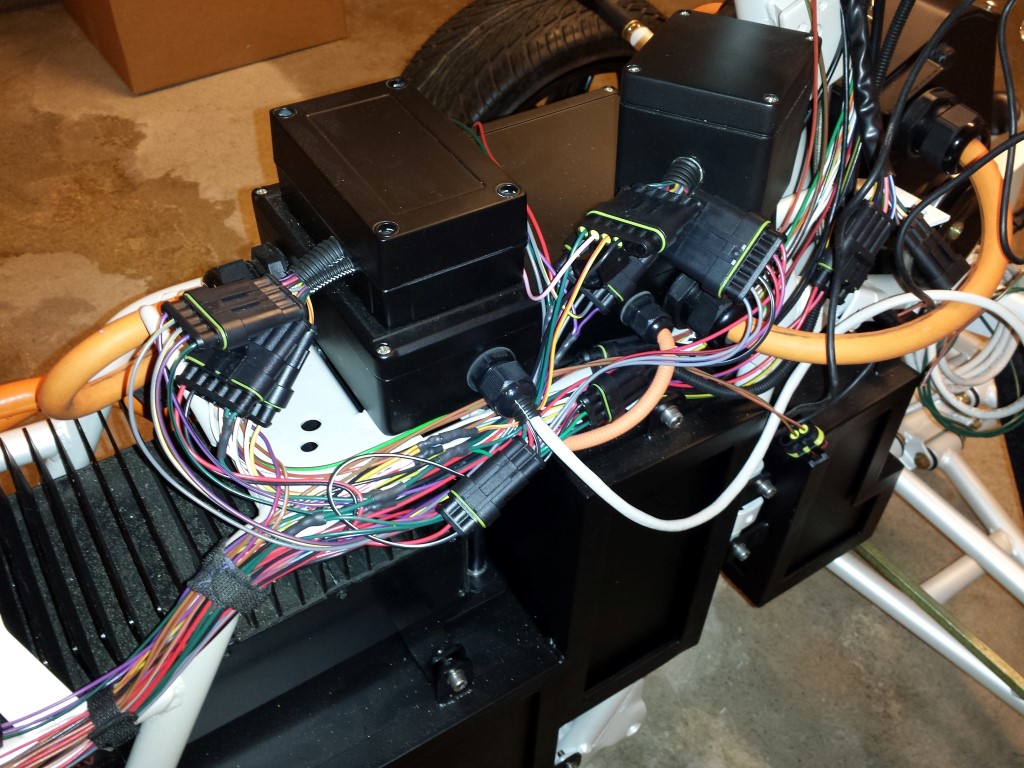
On the controller I've done it already, everything's connected there now.

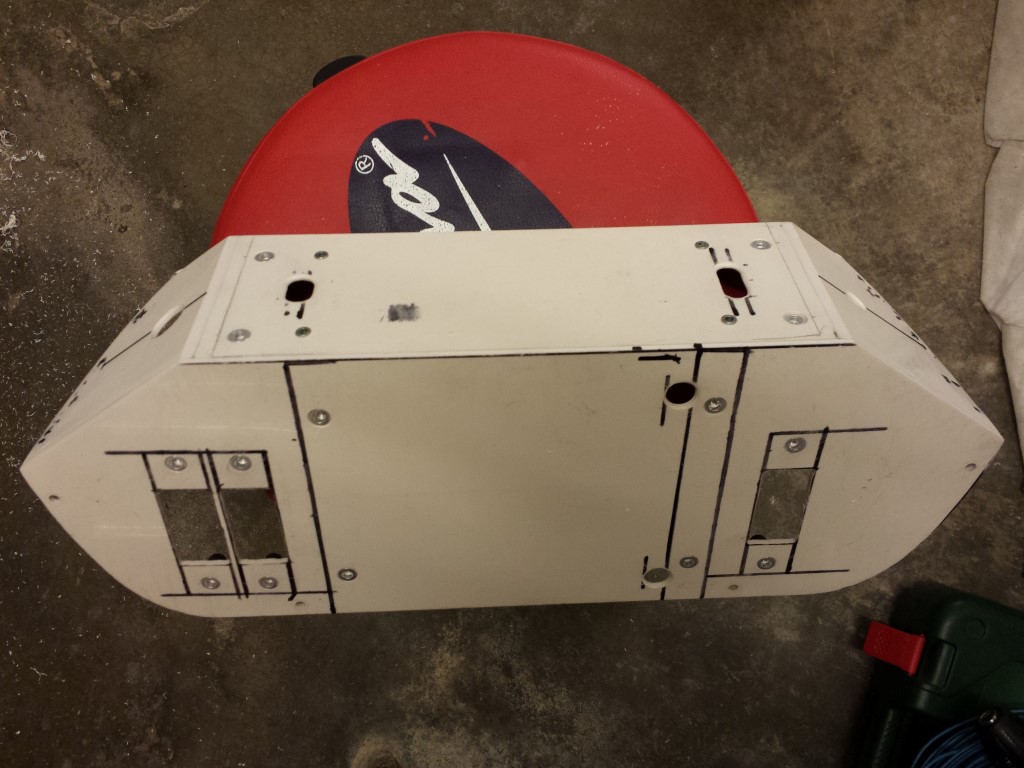
In the top case I removed the protective plate again and made some modifications. The round holes are for cable pass through and some switches. What the bigger holes in the front side are for I'll show you in a few days once the plates are sprayed and everything's on there.
The wires to the top case are also all in there already, just still have to connect them all.

And the thicker high voltage wires for the DC-DC converter are also ready to be connected.
Next year there'll be more updates again. January will be very fun, that's what I can tell already.
Posted on 17 November 2014 at 12:07 am (CET)
Category: General, Wiring (HV)
Posted on 17 November 2014 at 12:07 am (CET)
Category: General, Wiring (HV)
Finally an update again. These past 2 weeks I've definately not just been sitting on my hands. Lets start with the small things.
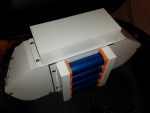
I've placed the wires for the sensor to the batteries. These are very important wires, because of them I can always see the voltage of the whole battery pack and the capacity is also calculated like this. So that's definately nice to know while driving.
For the looks I bought some new mirrors, these match very well with the carbon mudguards. Looks much better than the standard chrome mirrors. Just have to wait and see how the view is. The only problem is that these don't have an E-marking, so I'll still have to use the chrome mirrors for the road approval test at the RDW.
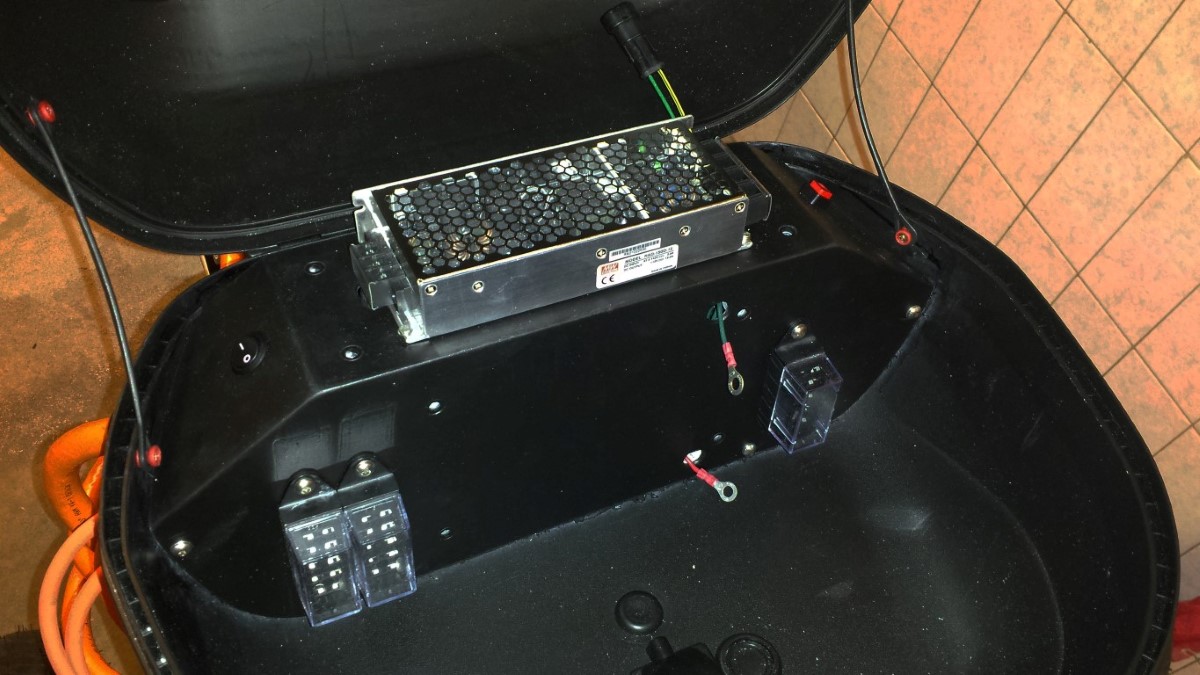
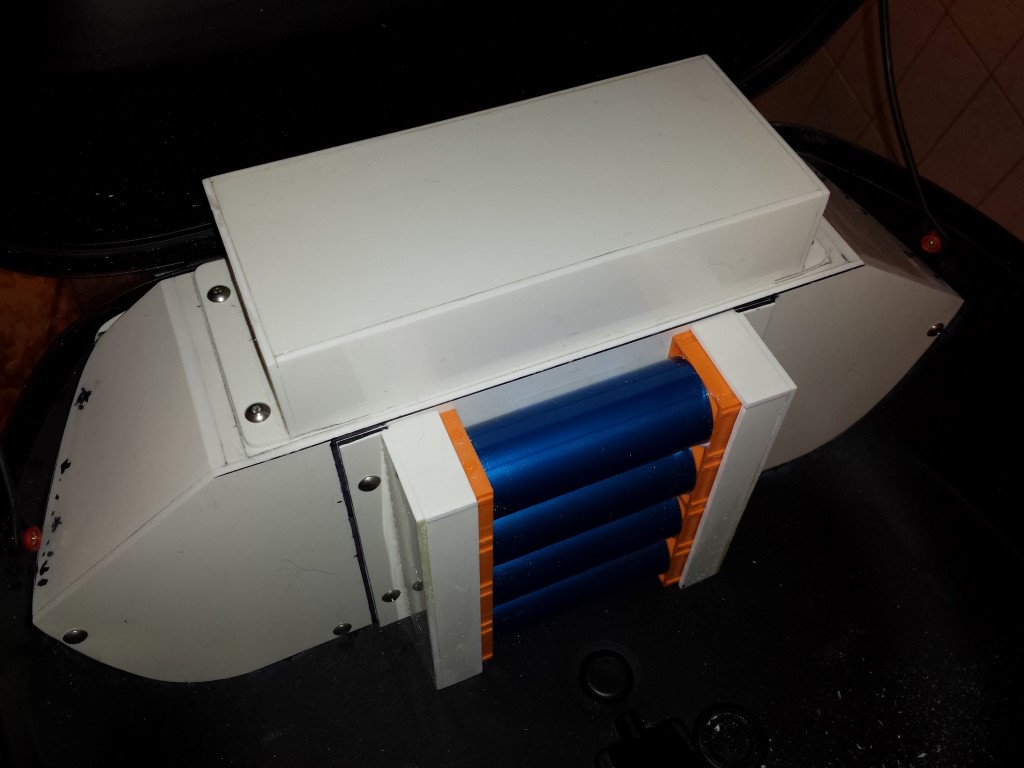
But the most important is that the top case is pretty much done now. I've made a protective cover out of plastic that fits over the contactors and is closed off all around it. This way it's impossible to still touch anything with live voltage. Mounting points for this are glued in again. The DC-DC converter to convert 72V to 12V still fits very nicely on top of this as well.
But since this is open on the top and has live voltage on certain parts I also had to make a seperate protective cover for this. On the rear I drilled quite some holes so the heat can go out.
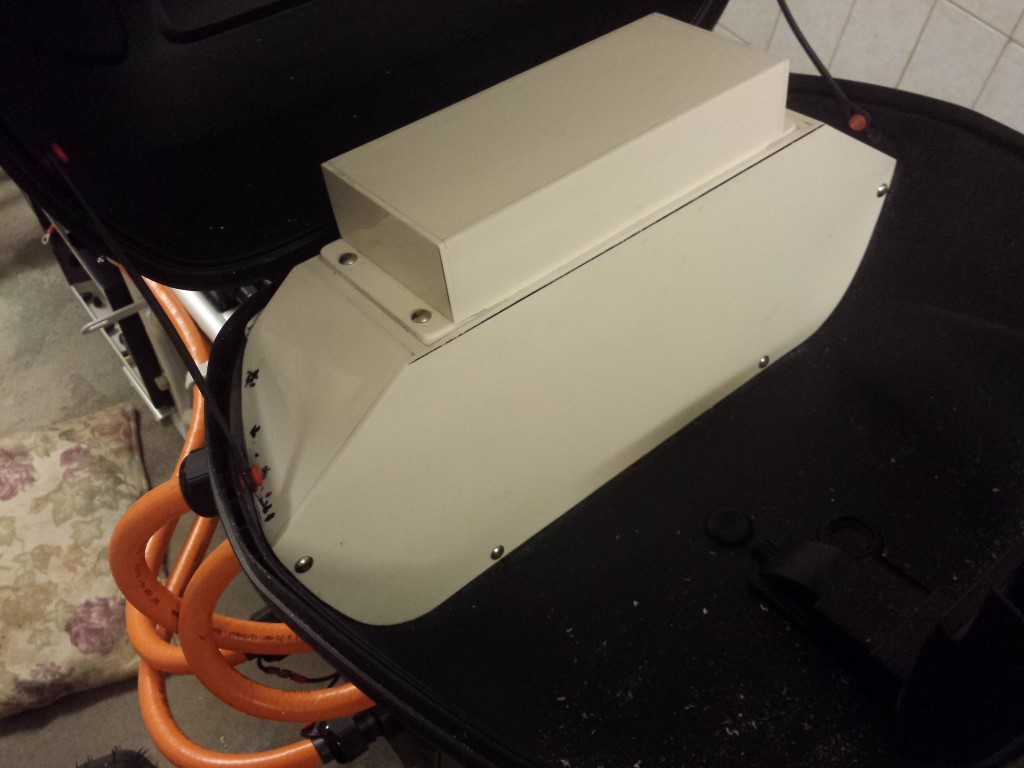
Then I was still left with the 12V battery. The plan was to place this as a square block as far as possible to the right but because of all the round shapes in the top case this was just too difficult. So I ended up placing it as an oblong shape in the middle. The sides are covered up again. I left the rest open, I think it looks pretty nice.
This will all still be sprayed black and then I can continue with the wiring again.